


This post contains affiliate links, which means I may earn a small commission on purchases made through the links provided, which enables me to provide more resources just like this; all at no extra cost to you. Thanks for your support!
Like how I start most of my projects, I convinced myself that refreshing the garage would be a weekend project to scratch my painting itch – it’s been almost 10 months since I picked up a paint roller to do more than small touch-ups throughout the house. It was refresh – paint only! But one realization led to another and while I did scratch my painting itch, the previous garage organization was NOT cutting it.
The “Before”
This picture is from a garage cleaning and gym space refresh from February. We initially added the gym to the dubbed “project” side of the gym. In theory, having a clear space to workout also meant a clear space to do projects. Right? Right?!
Kind of… with two spaces that constantly need their own space, the garage turned into a battle of project leftovers, tools, and pushing things over to get a lift in. At times there would be minimal room for squats, only with the strictest form and control. See the pileup of supplies in front of the work bench? Good idea in theory; not great execution for garage organization.
Going Dark & Moody
Even knowing these organization challenges, when I started the garage refresh I was ONLY focused on painting the walls. With less of the two-tone striped pattern… I knew it would *look* less chaotic – albeit not necessarily more organized – if the walls were a uniform color. And, with everything our garage holds and all of the work it sees, I knew it could use the help.
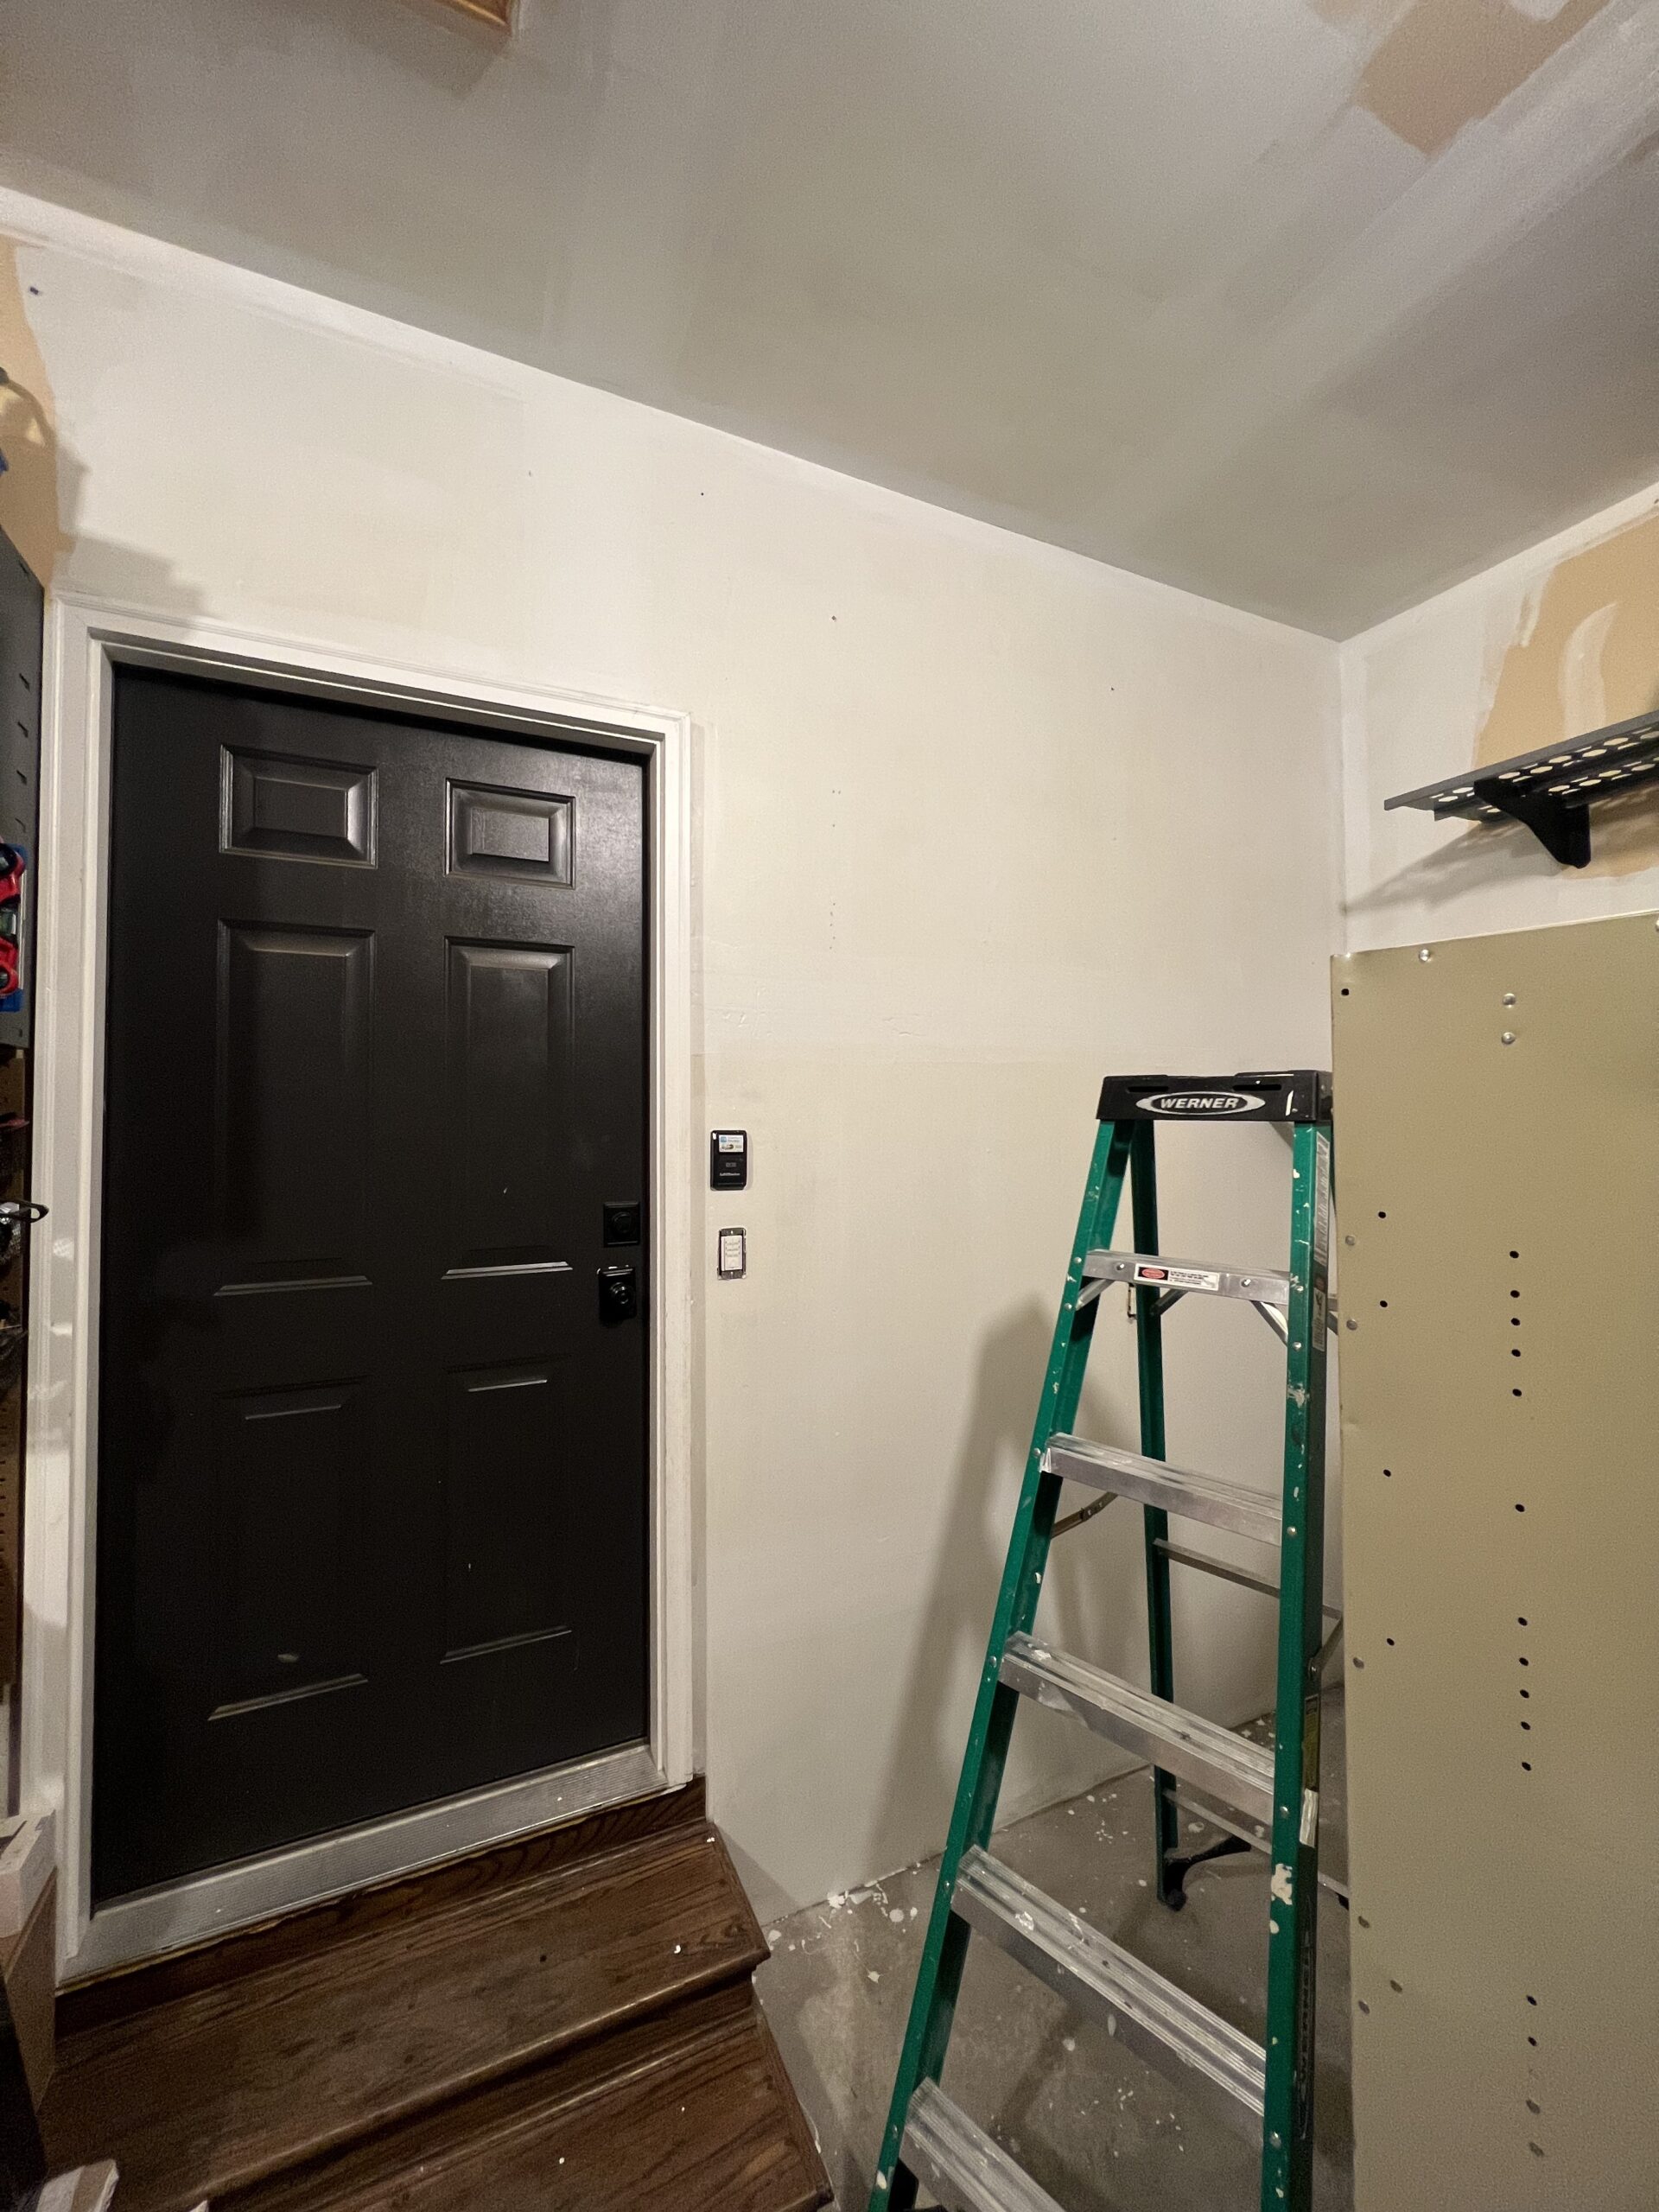
Since the walls were raw drywall, I started with a couple coats of this primer. IMMEDIATELY, I could tell this was going to be a “paint is magic” project. I wanted to paint the garage dark and after seeing the walls primed white, I knew it was the right call for the space I wanted to create. Worries of it being too dark? Nah. This space arguably has the largest “window” in the house.
Again, reorganization was not on my mind. I focused on priming and painting one area at a time to incur the minimal amount of shifting items. I would focus on putting everything back in its original place after I finished a wall and planned to do a final garage clean up (see ‘before’ picture of work bench. eek!) after everything was painted.
Garage Reorganization Realization
It was after I painted the dubbed “recreational” (think bikes, kayak, outdoor toys) side of the garage that I was reminded what I always know… I can’t just do something half way when I know it isn’t right. I was already taking the time to move things; I should move them “back” to ideal places. After I painted a quick coat of paint one evening, I shared my realization about needing to reorganize. We discussed pain points, what we thought would work better based on how organization chaos would frequently ensue, and set out to purge some things as well. Sometimes organizing requires removal, otherwise I just find myself madly figuring out how to fit a square into a round hole (read: too much stuff in a space that will never happily support it all). We would need to remove shelves and tools off the wall to paint anyway, so why not take it a step further and uninstall it (nuts, bolts, screws, and all!).
What’s garage organization without a reorganization?
The Organization Method to My Madness
It’s been over a week and surprisingly the garage is only getting MORE organized. Everything is easy to find, reach, and put back in a ‘home’. In general, here are the methodologies I used during this organization refresh:
Decluttering
We pared down the tools in sections and put everything away only if we used it/planned to use it again. We didn’t necessarily purge based on the last time we used something (I hadn’t painted in almost 10 months) but we used our judgement and project list as a starting point to decide if we would keep items.
Organizing by Zones
We organized the remaining items into zones. Based on projects and activities my family engages in, we ended up with these main zones:
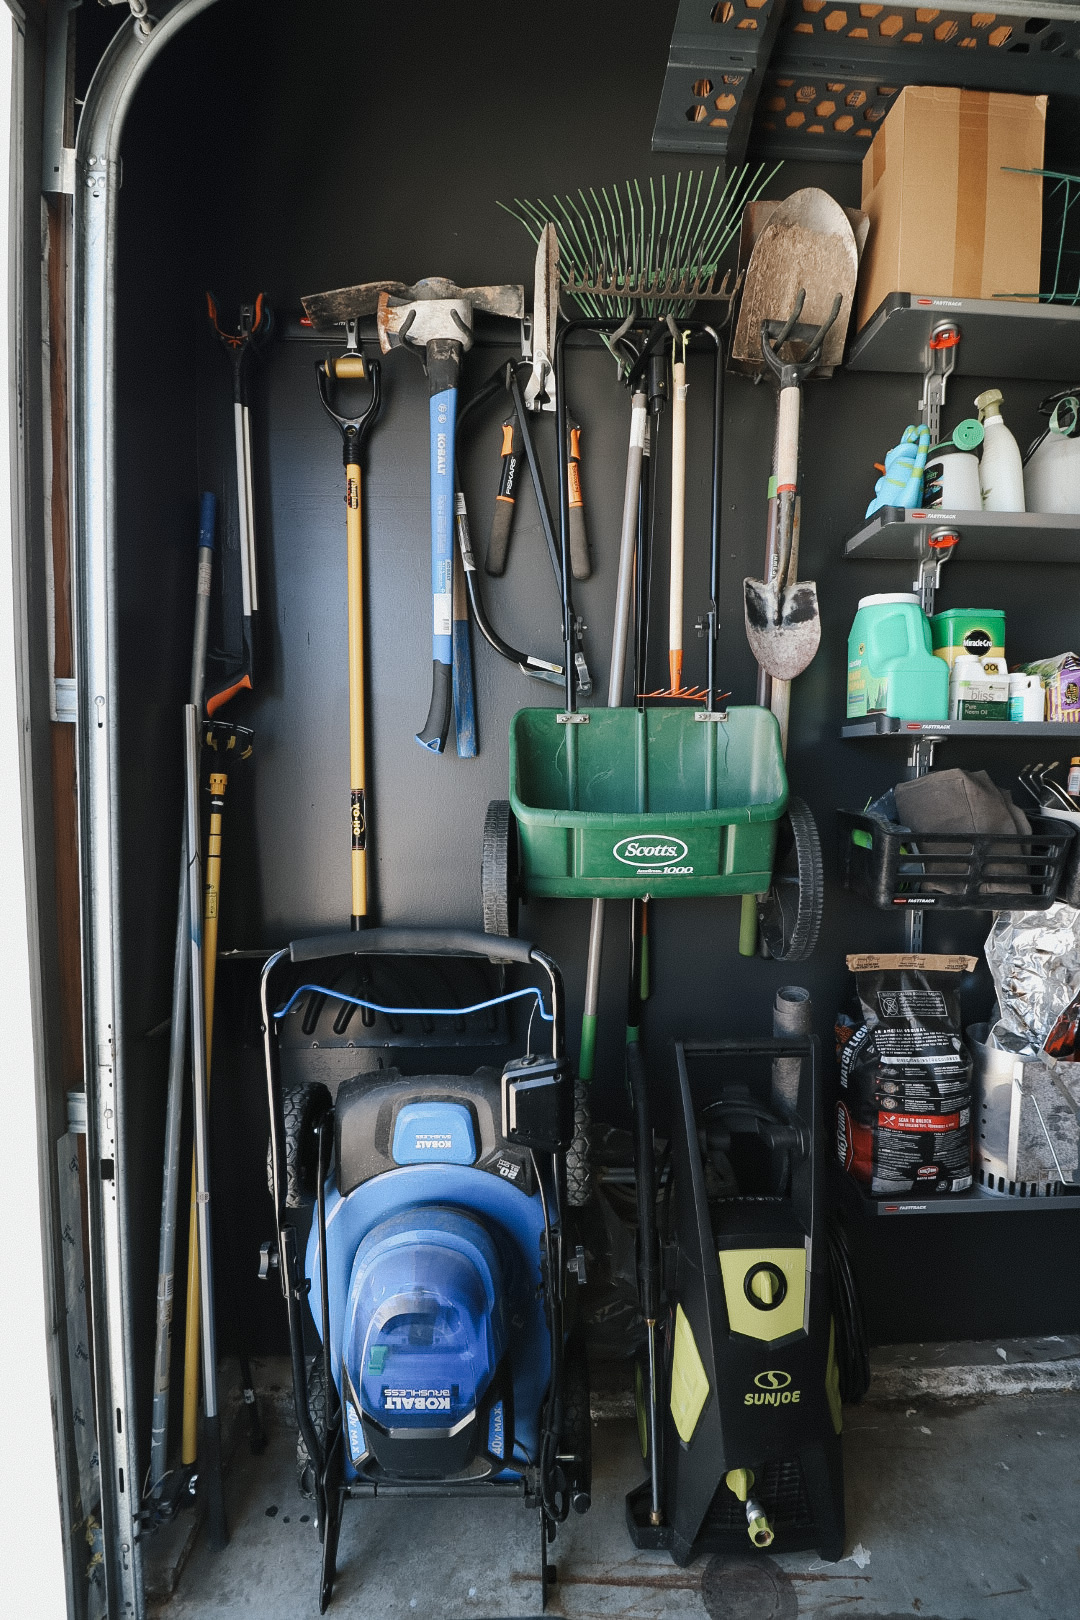
- outdoor yard tools
- gardening
- paint
- grilling/smoking
- work bench/work table
- lumber
- gym/sports
- holiday
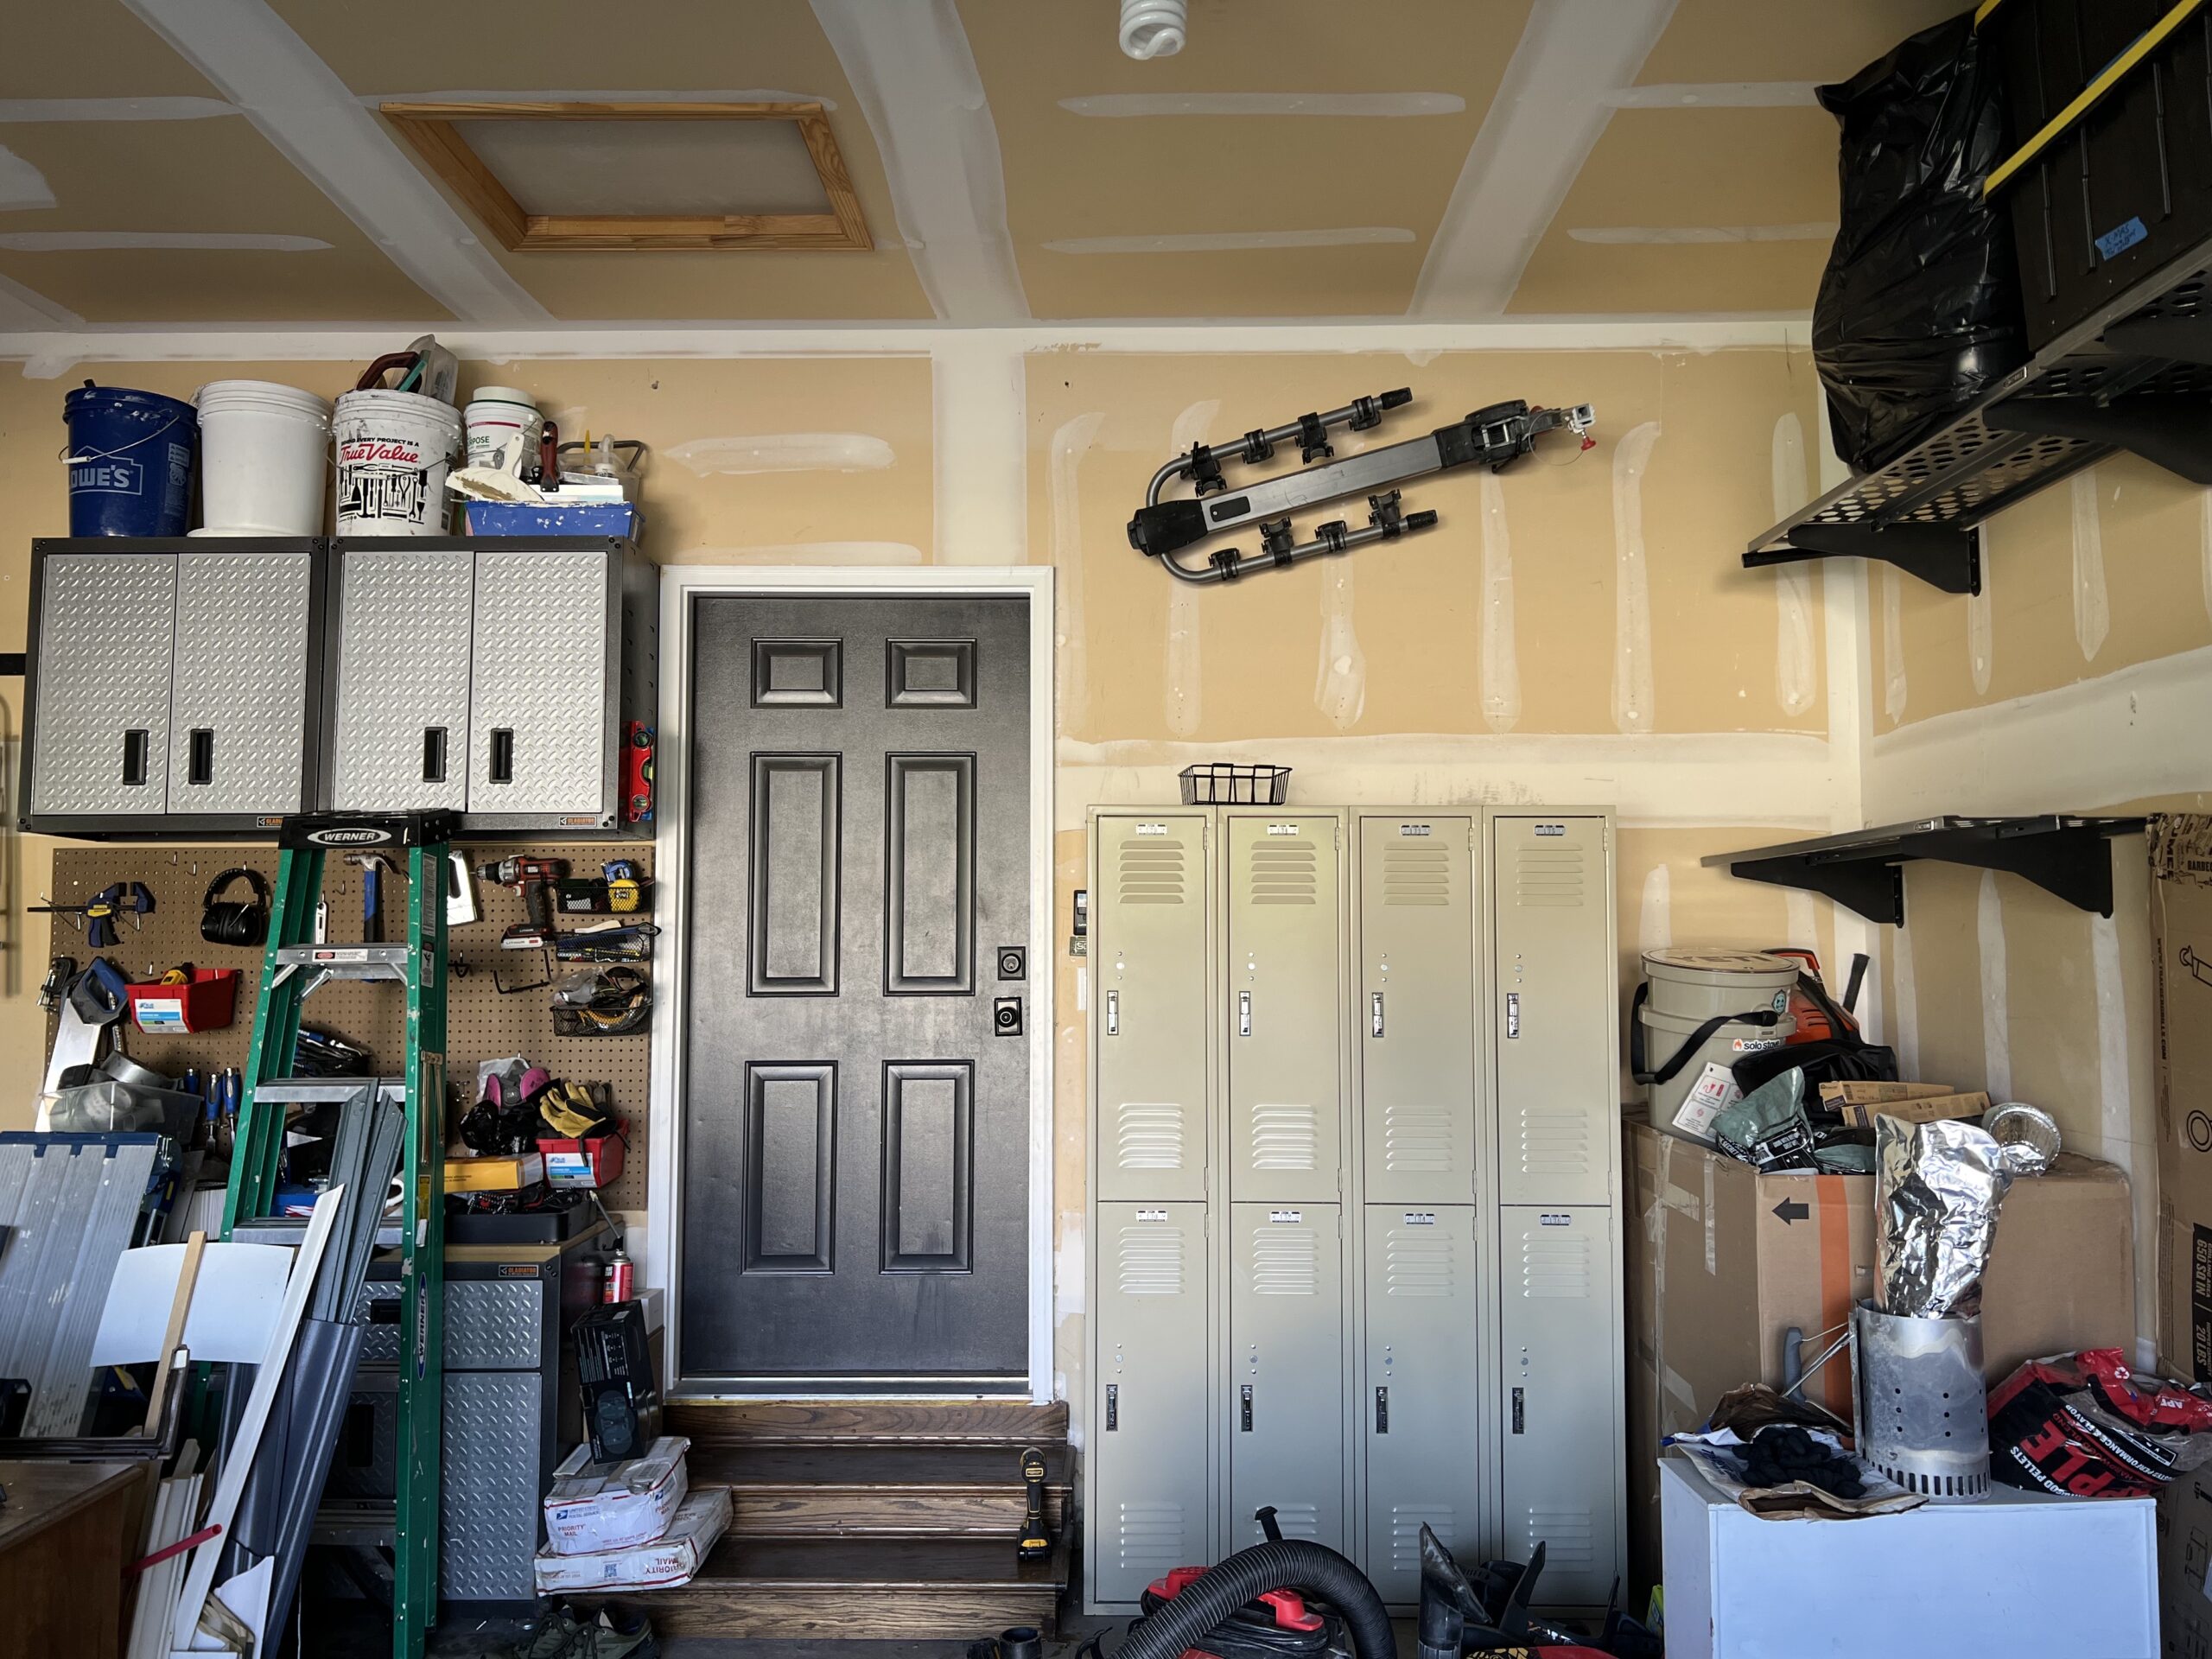
Some zones are broken down even further. I stored garden hand tools and gloves side-by-side. Rakes are all together. Paint rollers and brushes are in the same basket. Swimming accessories have a locker. Snow toys live in their own compartment.
The zones don’t have to make sense to everybody. What’s important is the people in your family/frequent users knowing where everything is/goes. My theory is this will help keep the chaos at bay; we’ll see if this theory holds. 😉
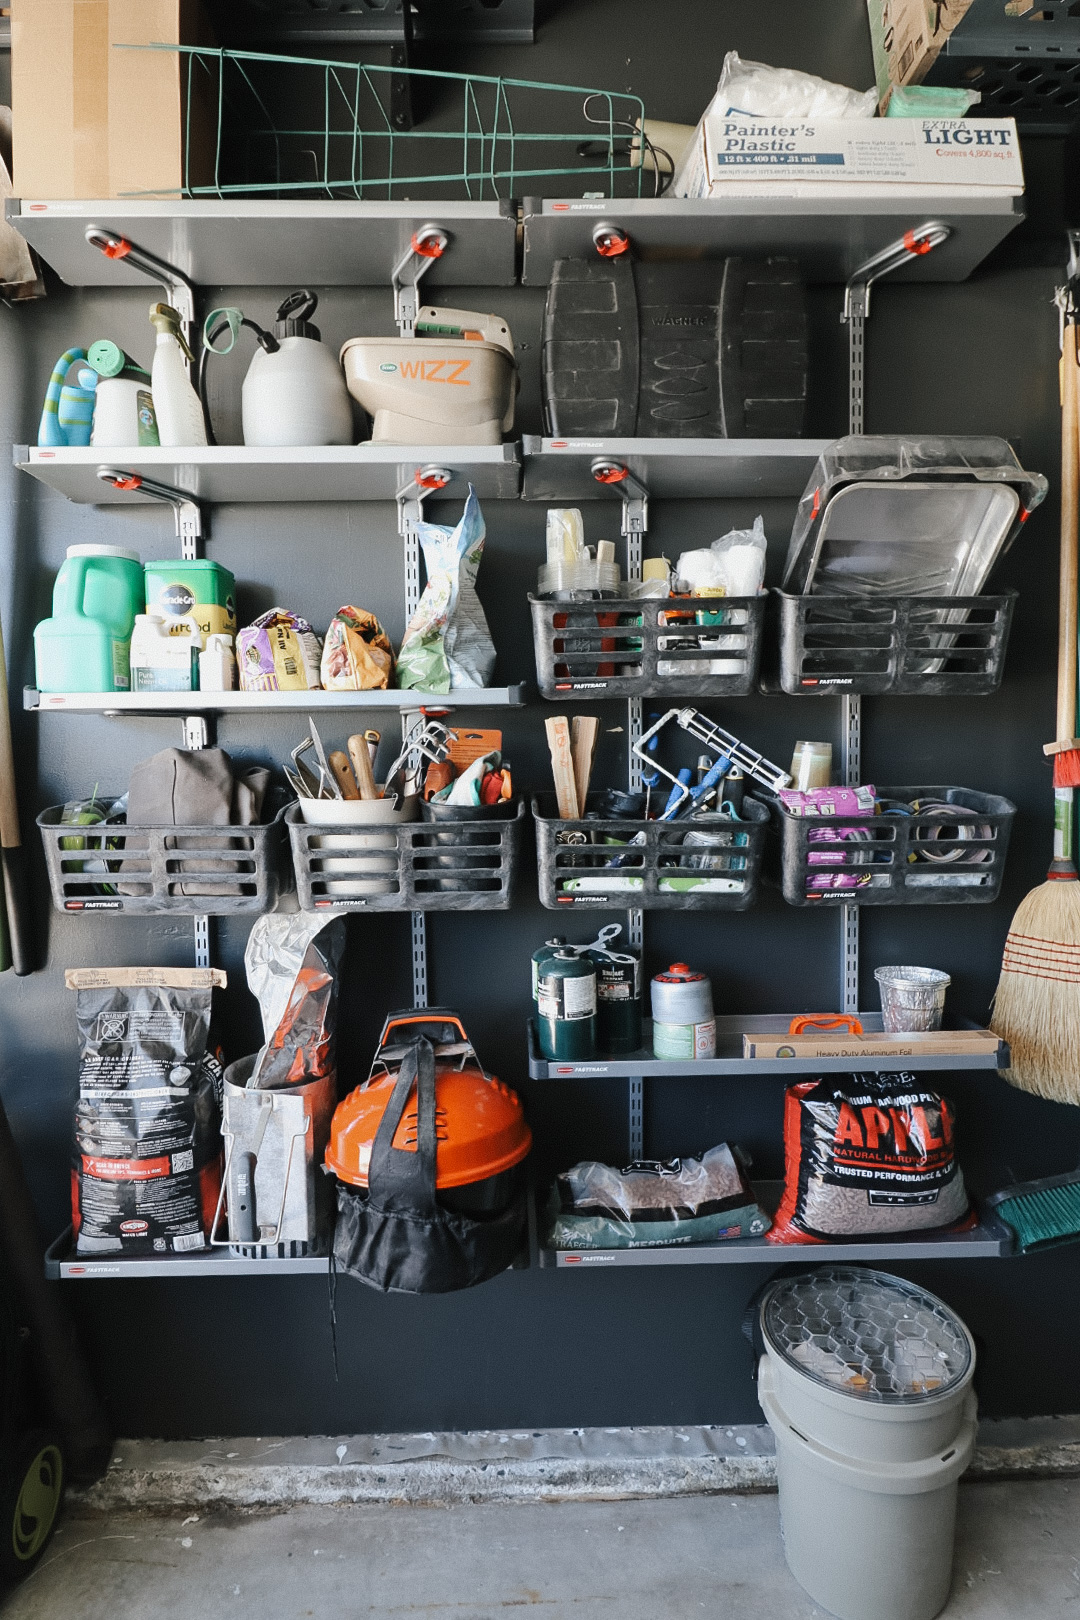
Utilizing Vertical Space
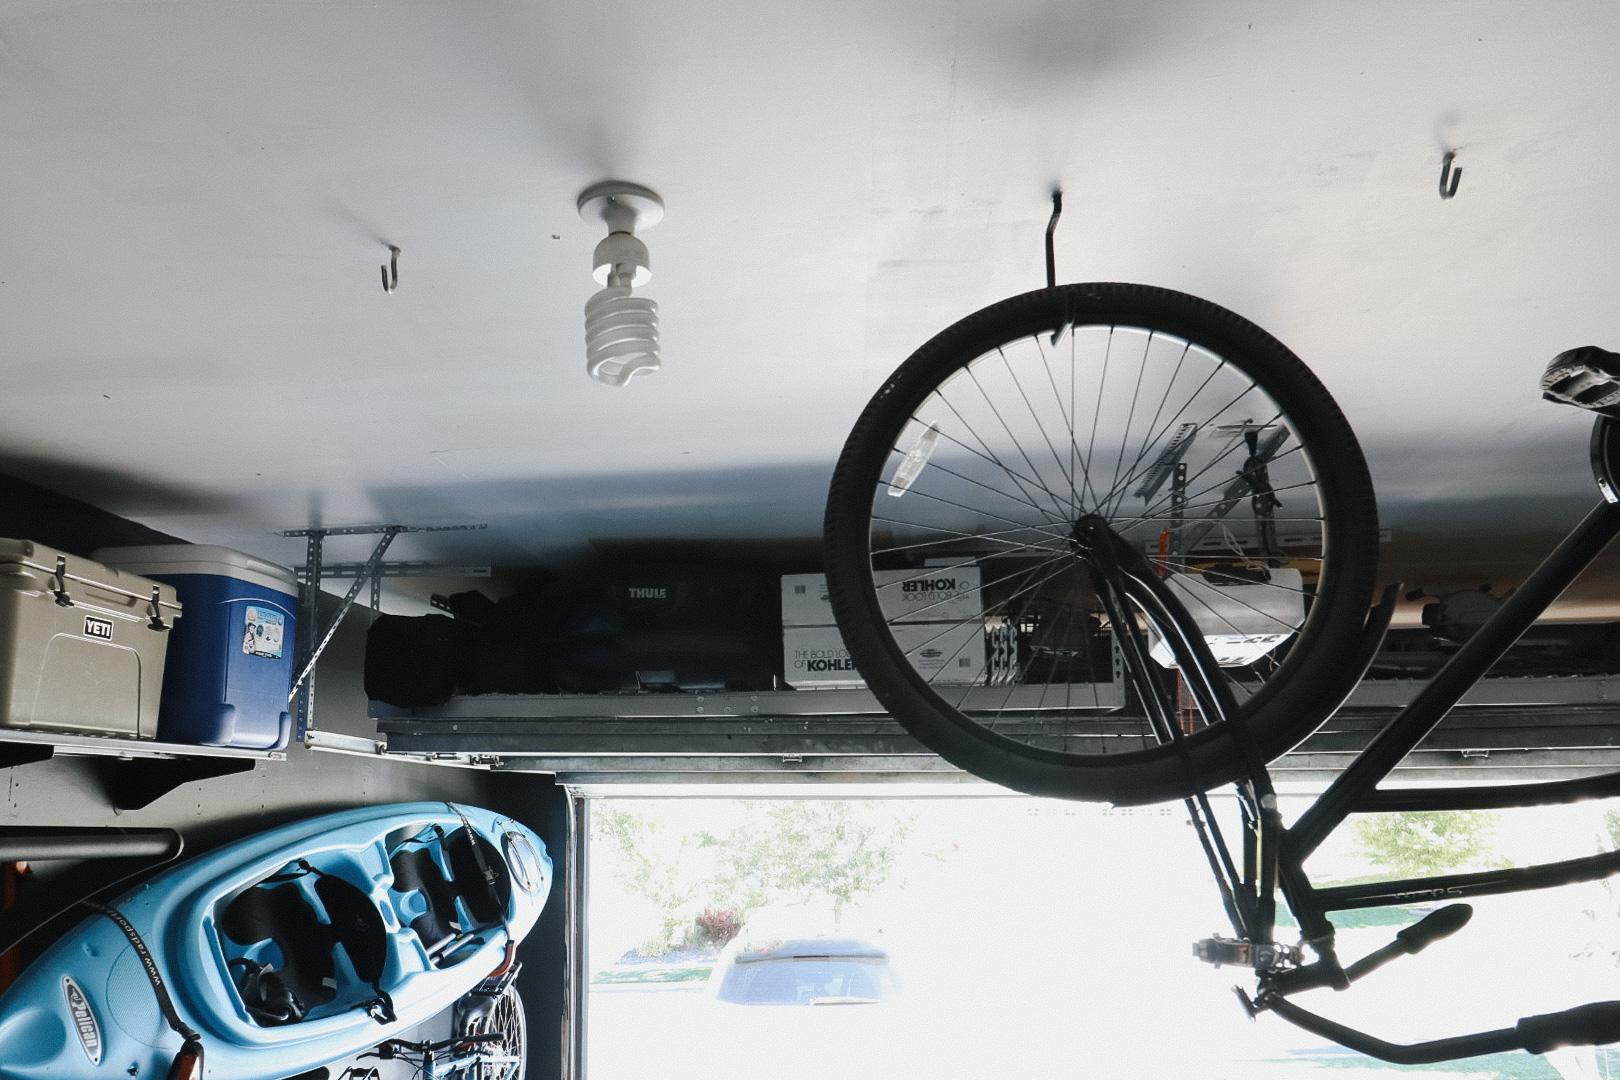
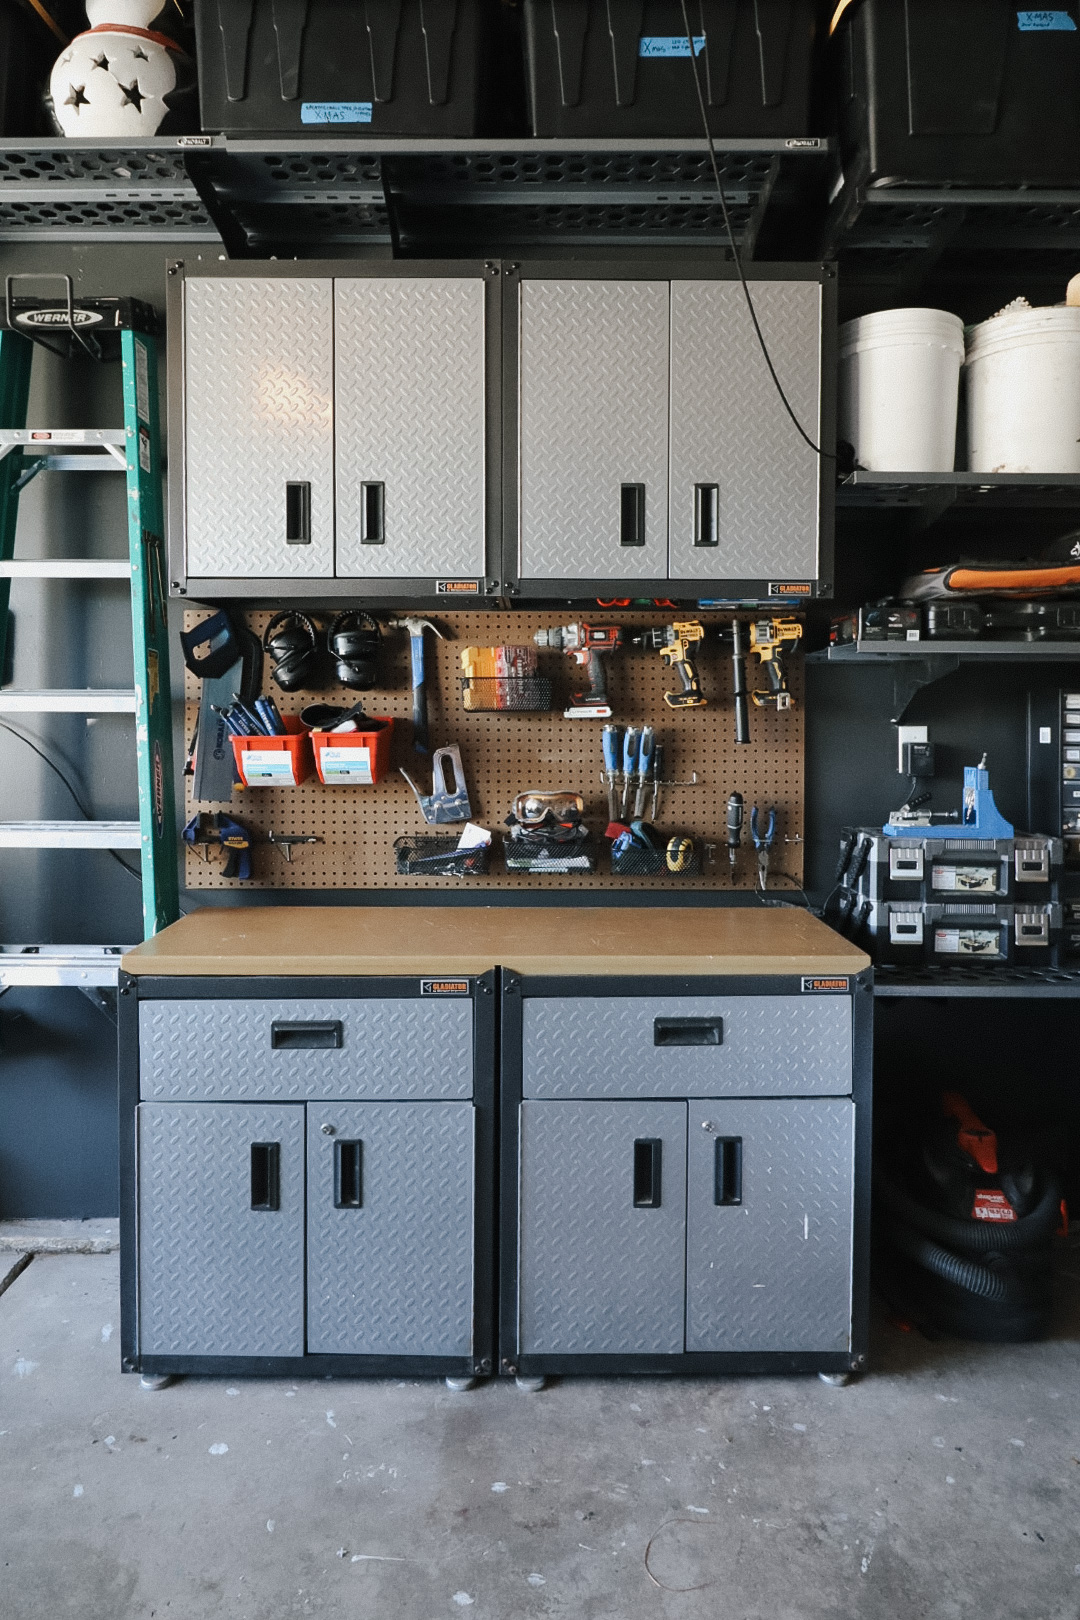
One way we took maximized space was by going vertical. We used deeper shelves up high to accommodate bulkier items like coolers and holiday bins. We also used lower, shallow shelves for more frequently grabbed items – this method has helped keep supplies from getting buried and encouraged us to actually use them.
Additionally, we took advantage of the ceiling. Things in these spaces are lesser used: car roof carrier, pop-up tents, spare garage organization supplies.
Make Frequently Used Items at Arms Reach


Accessibility increases use. Accessibility increases likeliness for organization. Previously, the ladder hung on the far side of the paint supplies, just beyond the lumber/scrap wood piles. It rarely made it back to its home. You’ve seen the before picture. Need I say more?
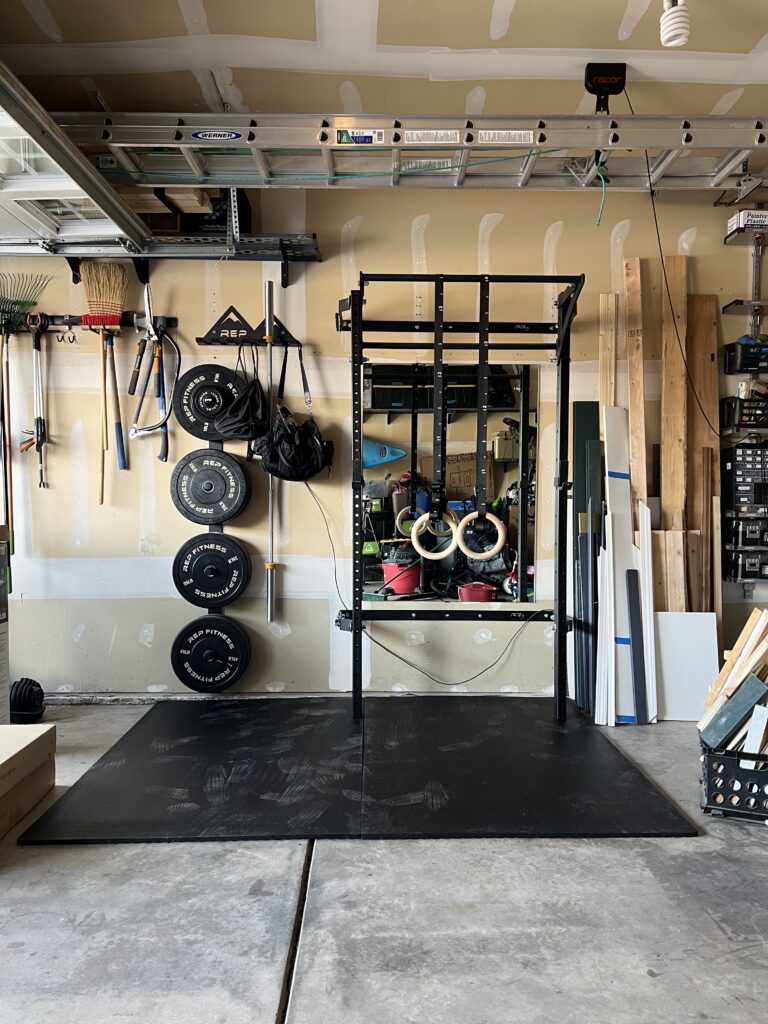
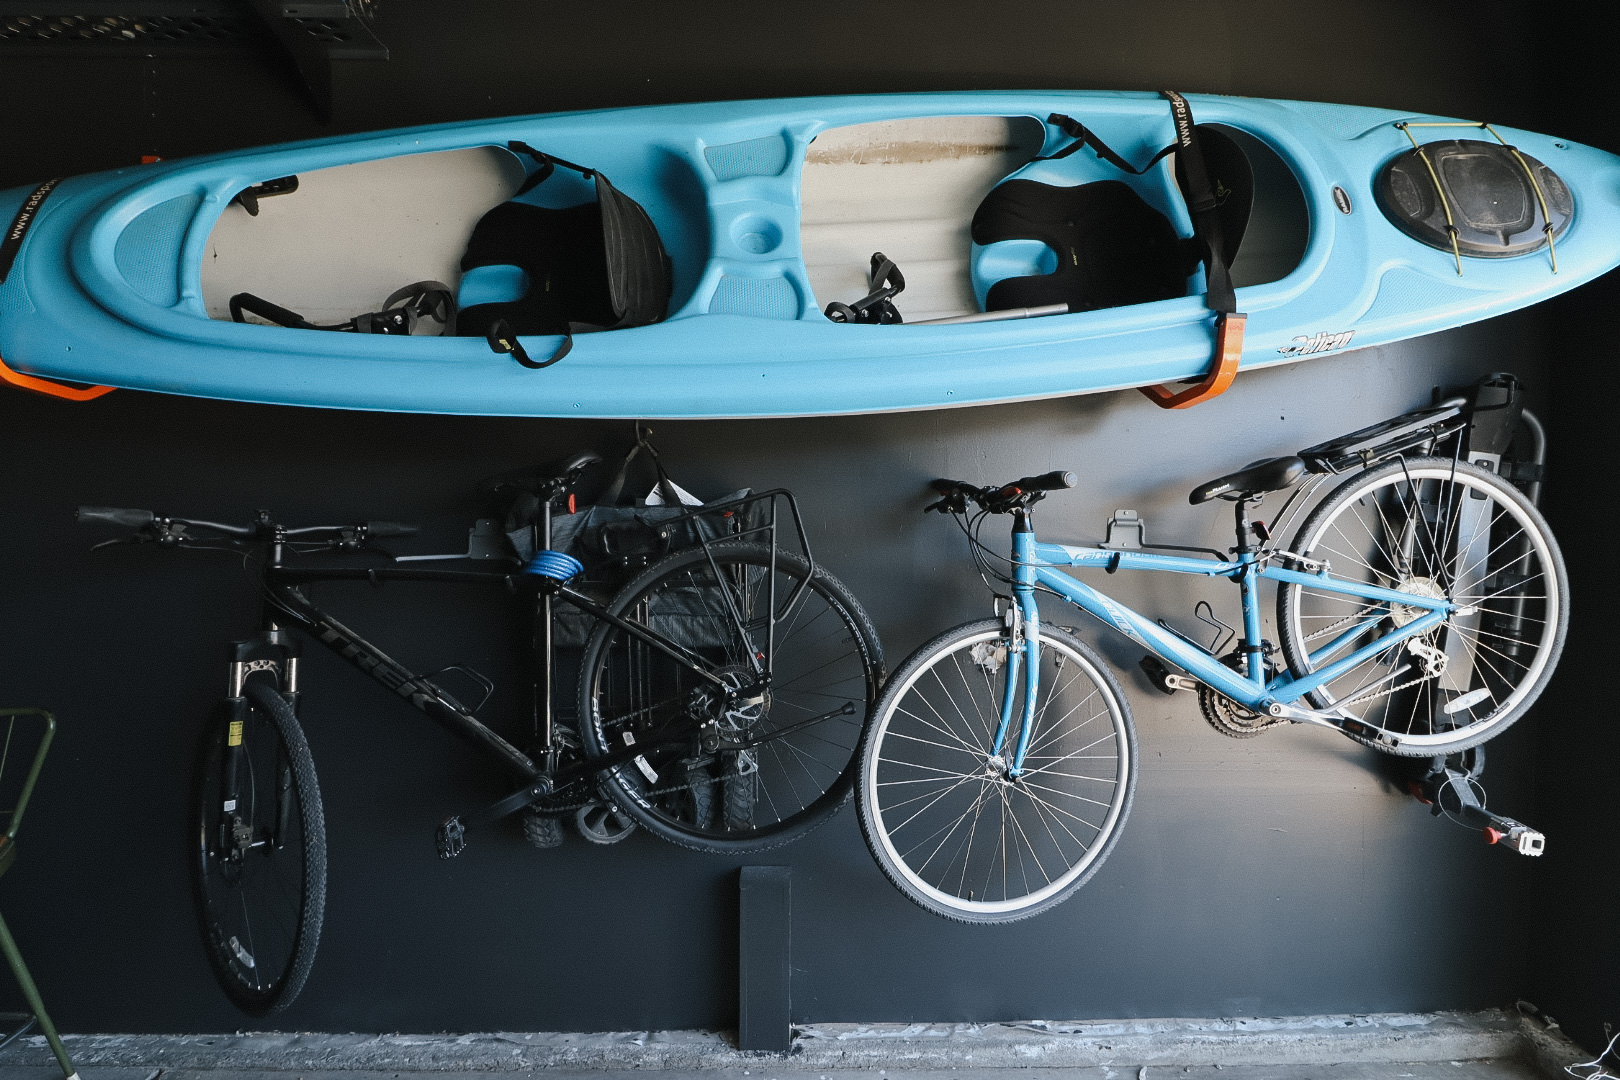
Moving our bikes from a high vertical hanger to this horizontal method was a game changer. As already regular bikers, we have reached for our bikes even more now that they’re not suspended from a high peak of the ceiling. No extra height or tools necessary!
Planning the Space for Our Lifestyle

As a family who loves to do house projects and prioritizes moving our bodies and getting outdoors, the two main sections we have in our garage are: building/tool and gym/recreation. They’re both humble but functional, and support our current needs. Allotting the most space for these activities makes sense for us. Forget squeezing both of these activities into the same part of the garage if we can afford to spread it out. I know better now!
Some tips that have helped us keep the garage footprint of these activities relatively compact are:
1) limiting the amount of niche tools we purchase
- buying tools we use regularly allows us more organization and less headache digging for what we need
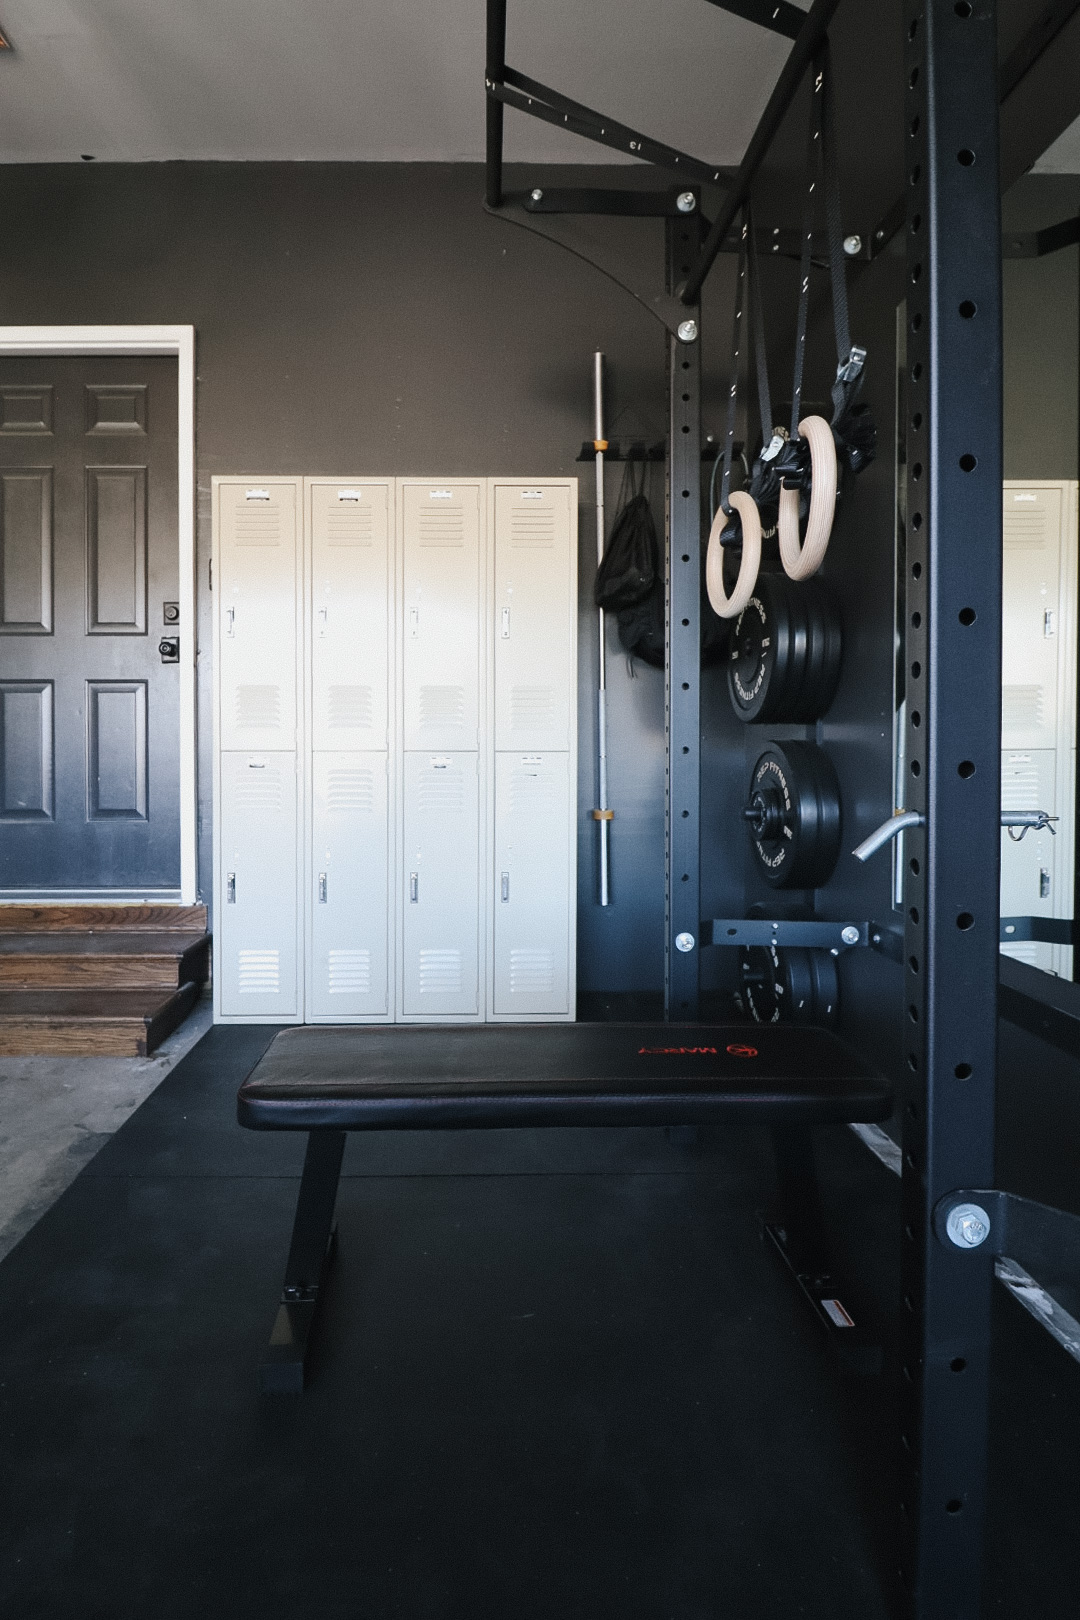
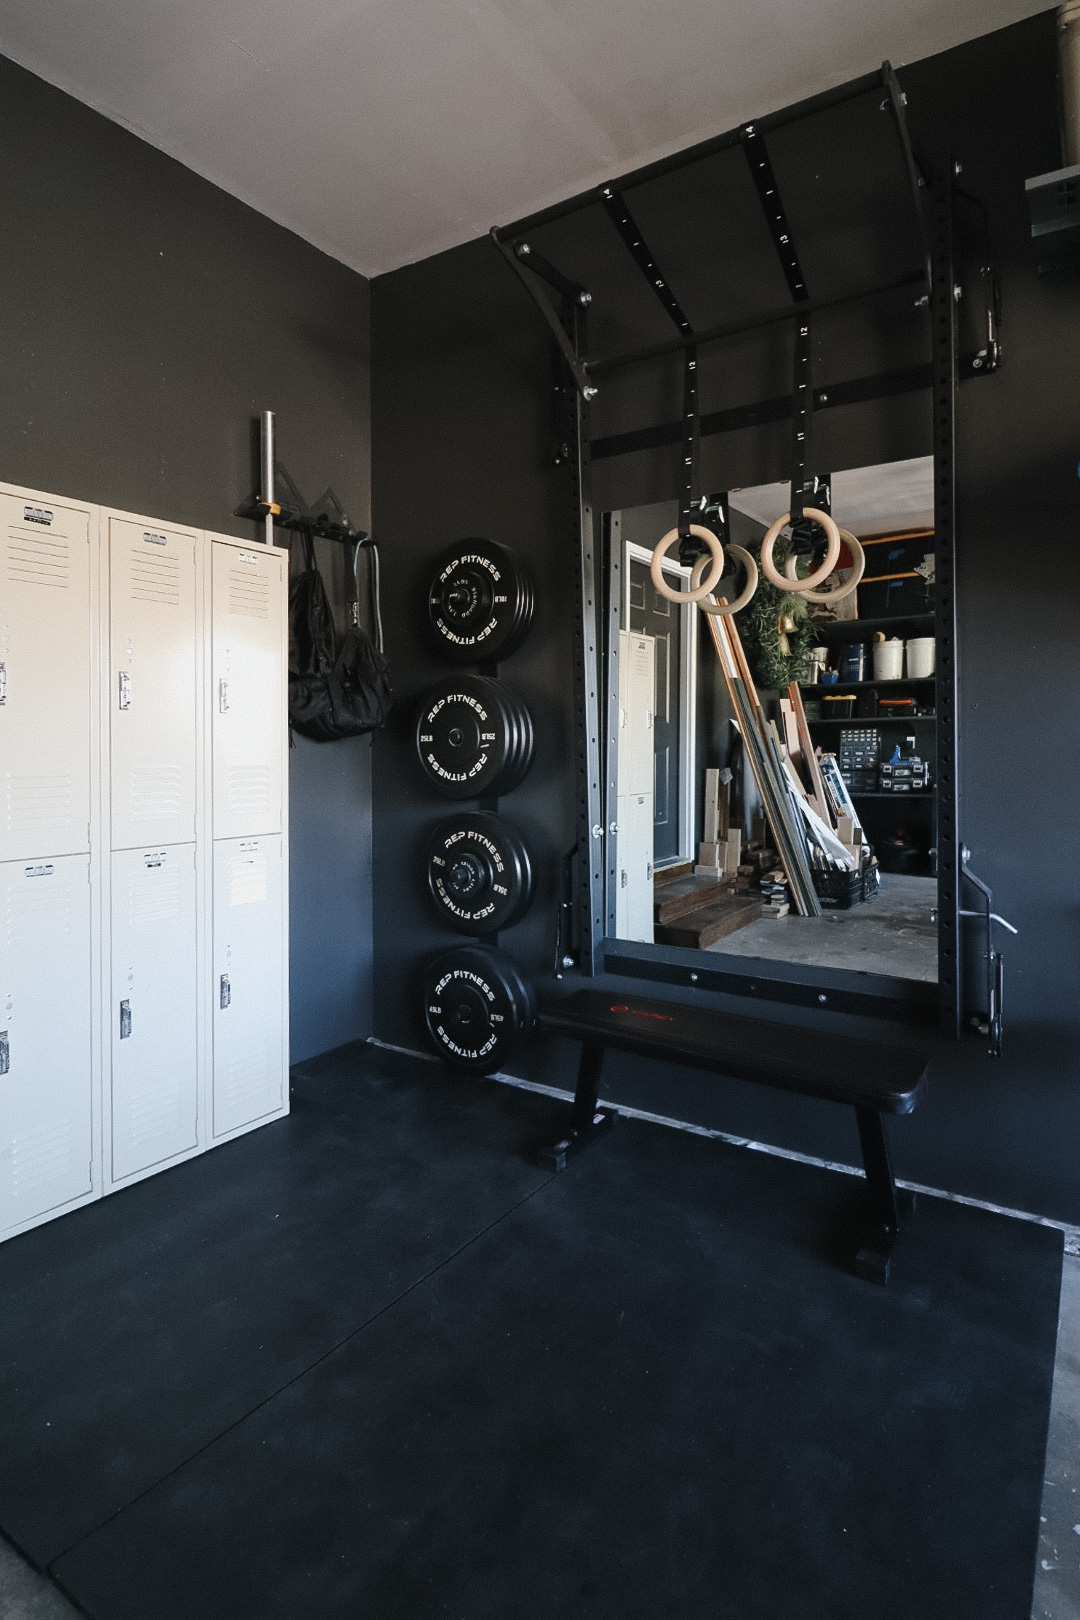
2) researching and buying a folding squat rack
- when I’m not lifting I can fold the rack up to use the space for different workouts/movements or even park inside
Function and beauty: this moody garage reorg has been the best of both worlds.

Project Sources for a Moody Garage Organization
Primer
Paint – Benjamin Moore’s Iron Ore in Satin
Higher, deeper shelves – Kobalt Steel 16.5″ deep x 48″ (no longer sold)
Shallow shelves – Rubbermaid FastTrack Utility Hooks, All in One Rail Hook Kit, Shelves, Baskets
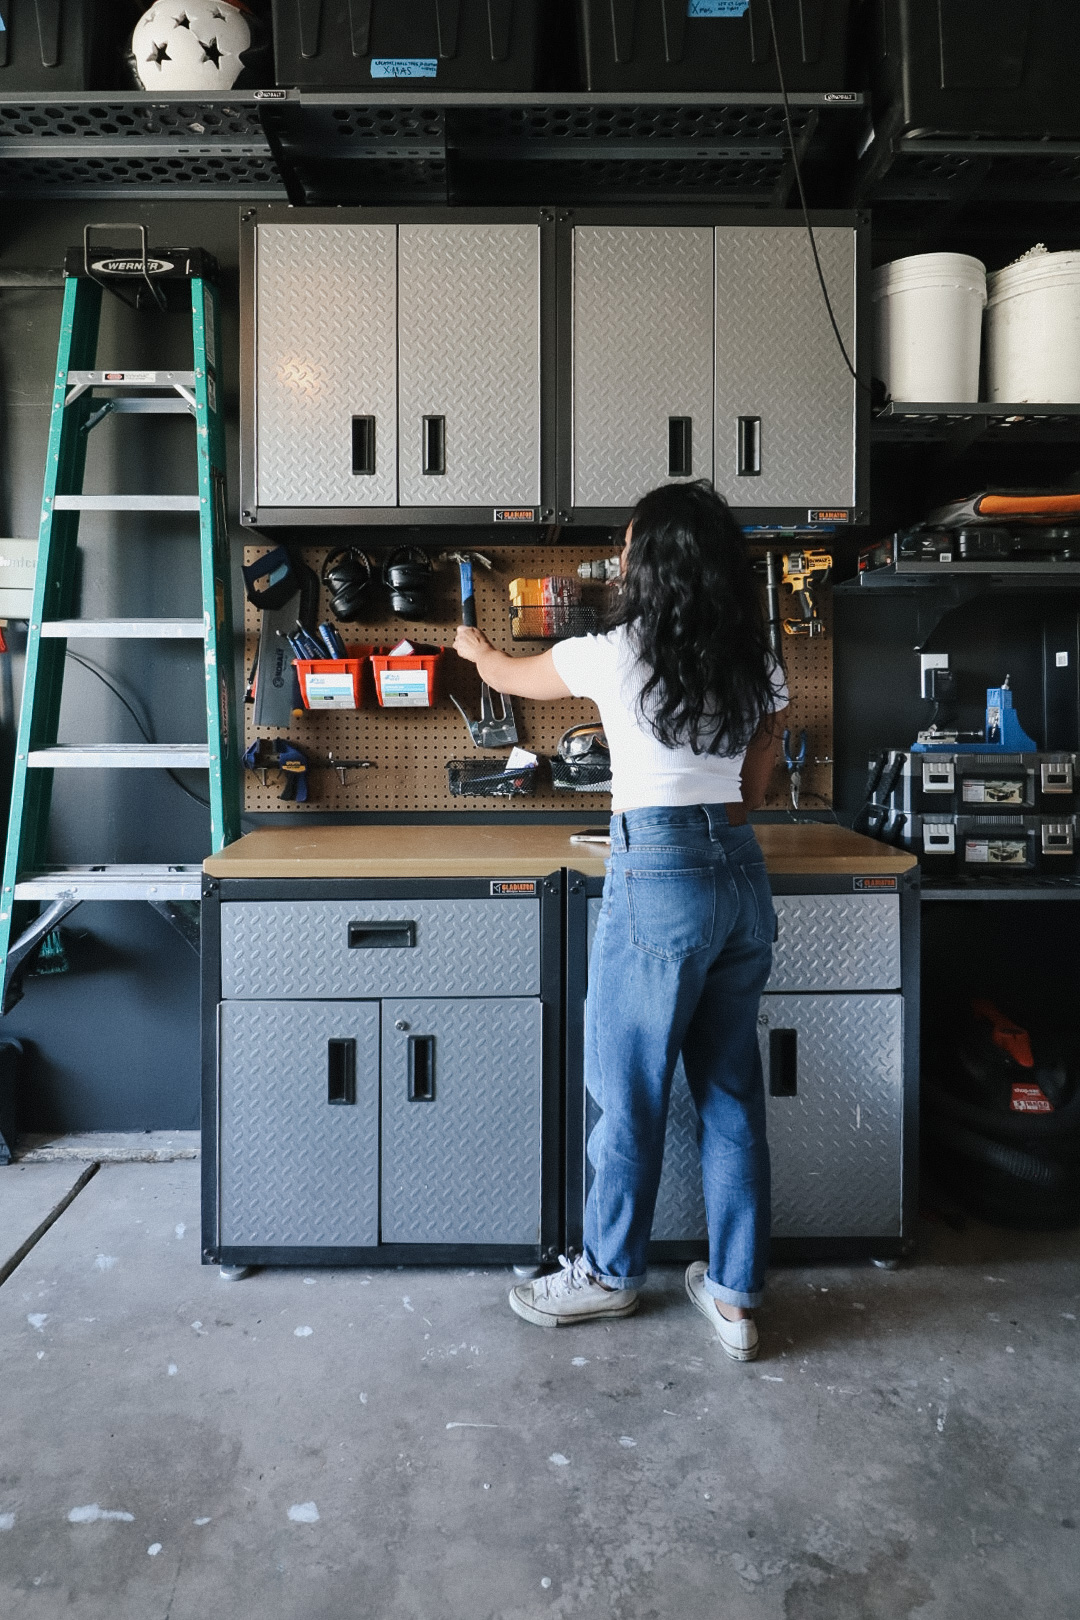
Work Bench – Gladiator Wall Cabinets, Base Cabinets
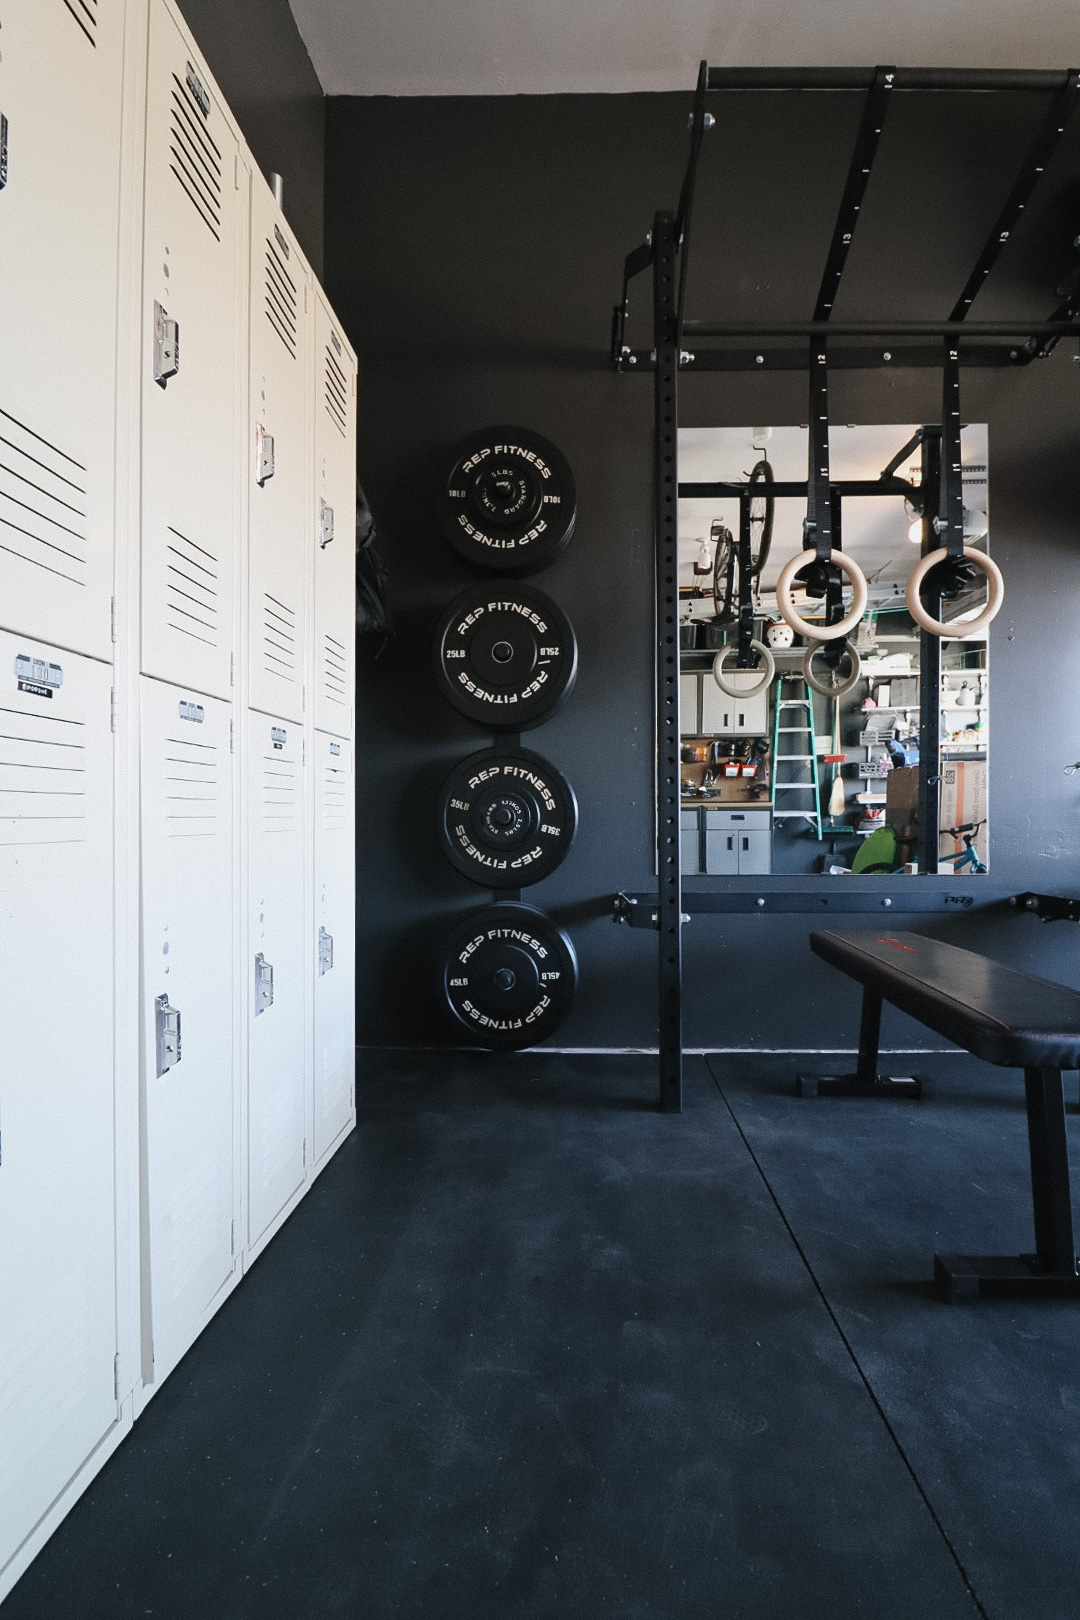
Folding Squat Rack – PRx Profile® ONE Squat Rack with Kipping Bar™
Vertical Weight Plate Storage – PRx Weight Plate Wall Storage (4-peg)
Bar/Equipment Holder – Rep Fitness Multi-use Wall Storage
Wooden Rings – 1.25″ WOOD GYMNASTIC RINGS (14′ straps)
Lockers – thrifted


