


This post contains affiliate links, which means I may earn a small commission on purchases made through the links provided, which enables me to provide more resources just like this; all at no extra cost to you. Thanks for your support!
The refreshed and expanded laundry/mudroom is one of those projects that simultaneously astounds and exhausts me when I think about how far it has come. After almost a year of living in this space, it’s safe to say I am elated with the outcome. Not only do I love its new form and function, but I appreciate it THAT much more knowing and feeling the hard work that it took to get here.
The Road to a Happier Homecoming & Laundry Situation
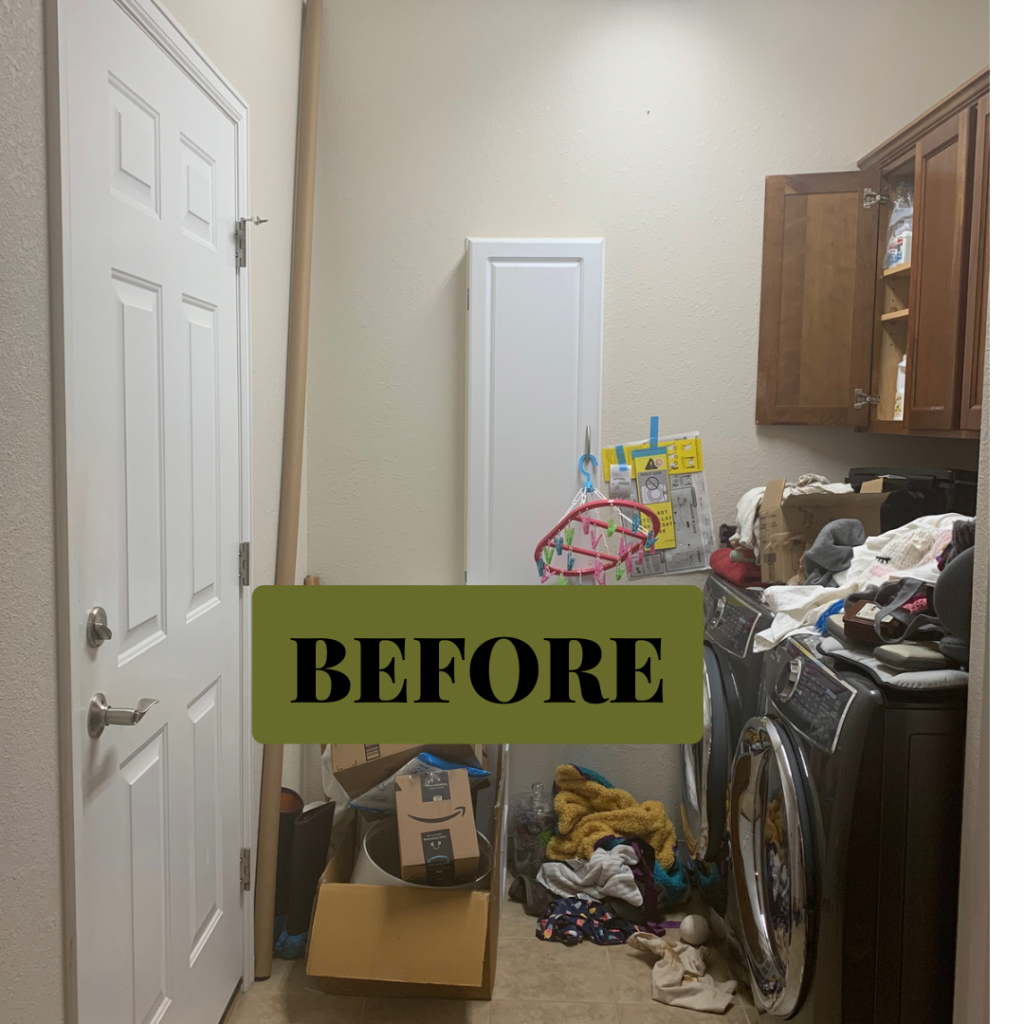
Coming home to the cluttered laundry room used to be chaos. Even if everything was perfectly tidy, it was a maze of one door swinging into another…into another. It was rushing to put on shoes – or loading and unloading laundry – so you wouldn’t get crushed by a door. It was pending laundry loads competing with walking space. It was screaming for a change.
Sticker Shock
I started with contractor quotes . The estimates were right around $8000 just to move the wall and plumbing. I respect and admire tradespeople and their craft but those numbers just weren’t in the budget. PLUS, I still had big dreams of additional cabinets, seating, and a worktop!
So, we instead of footing that big bill and forgoing the details of the visions albeit having relative instant gratification, we took tips from the contractors, loaded YouTube, submitted permits with the city, and rolled up our sleeves for the next several months to make my vision a reality.
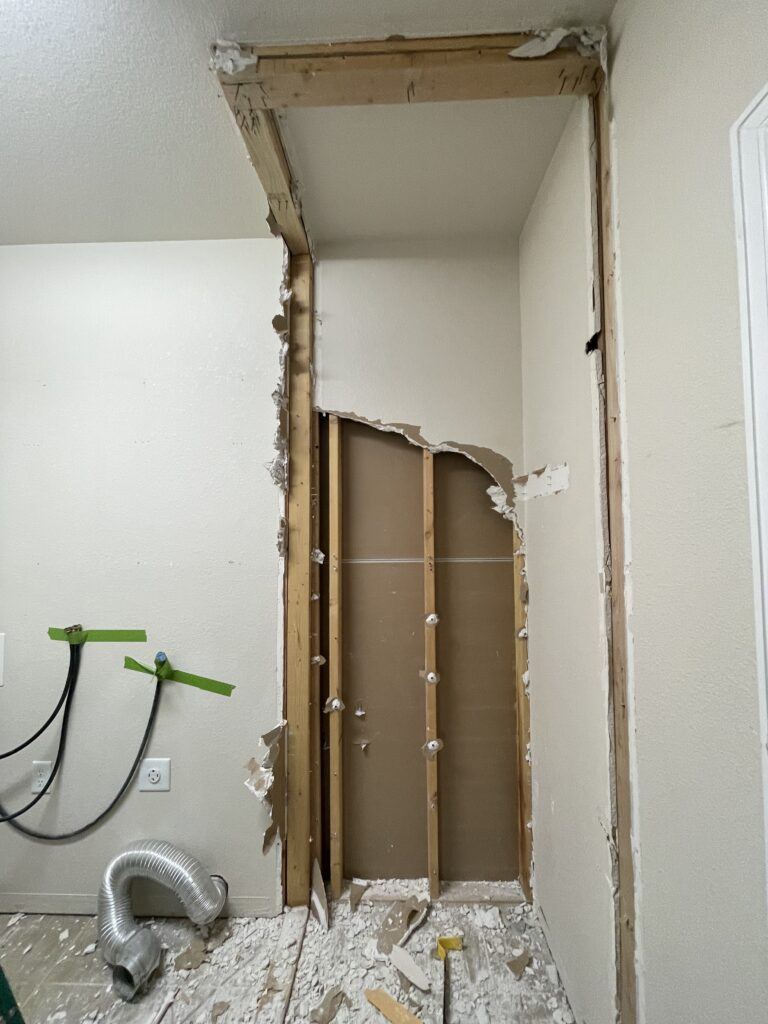
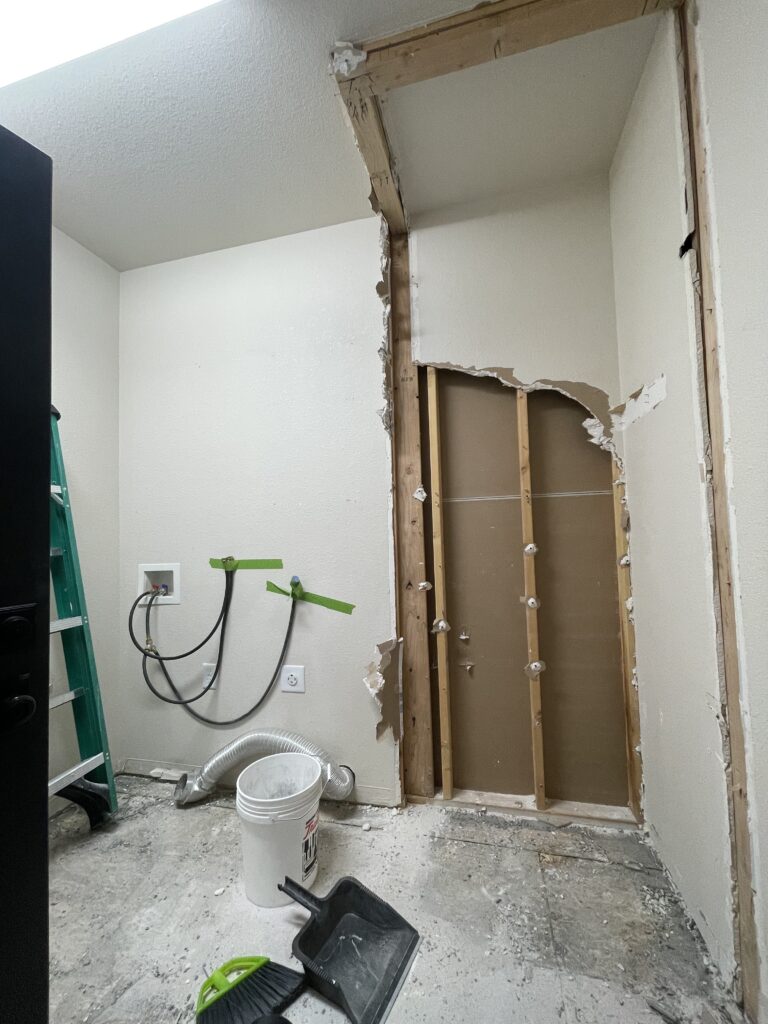
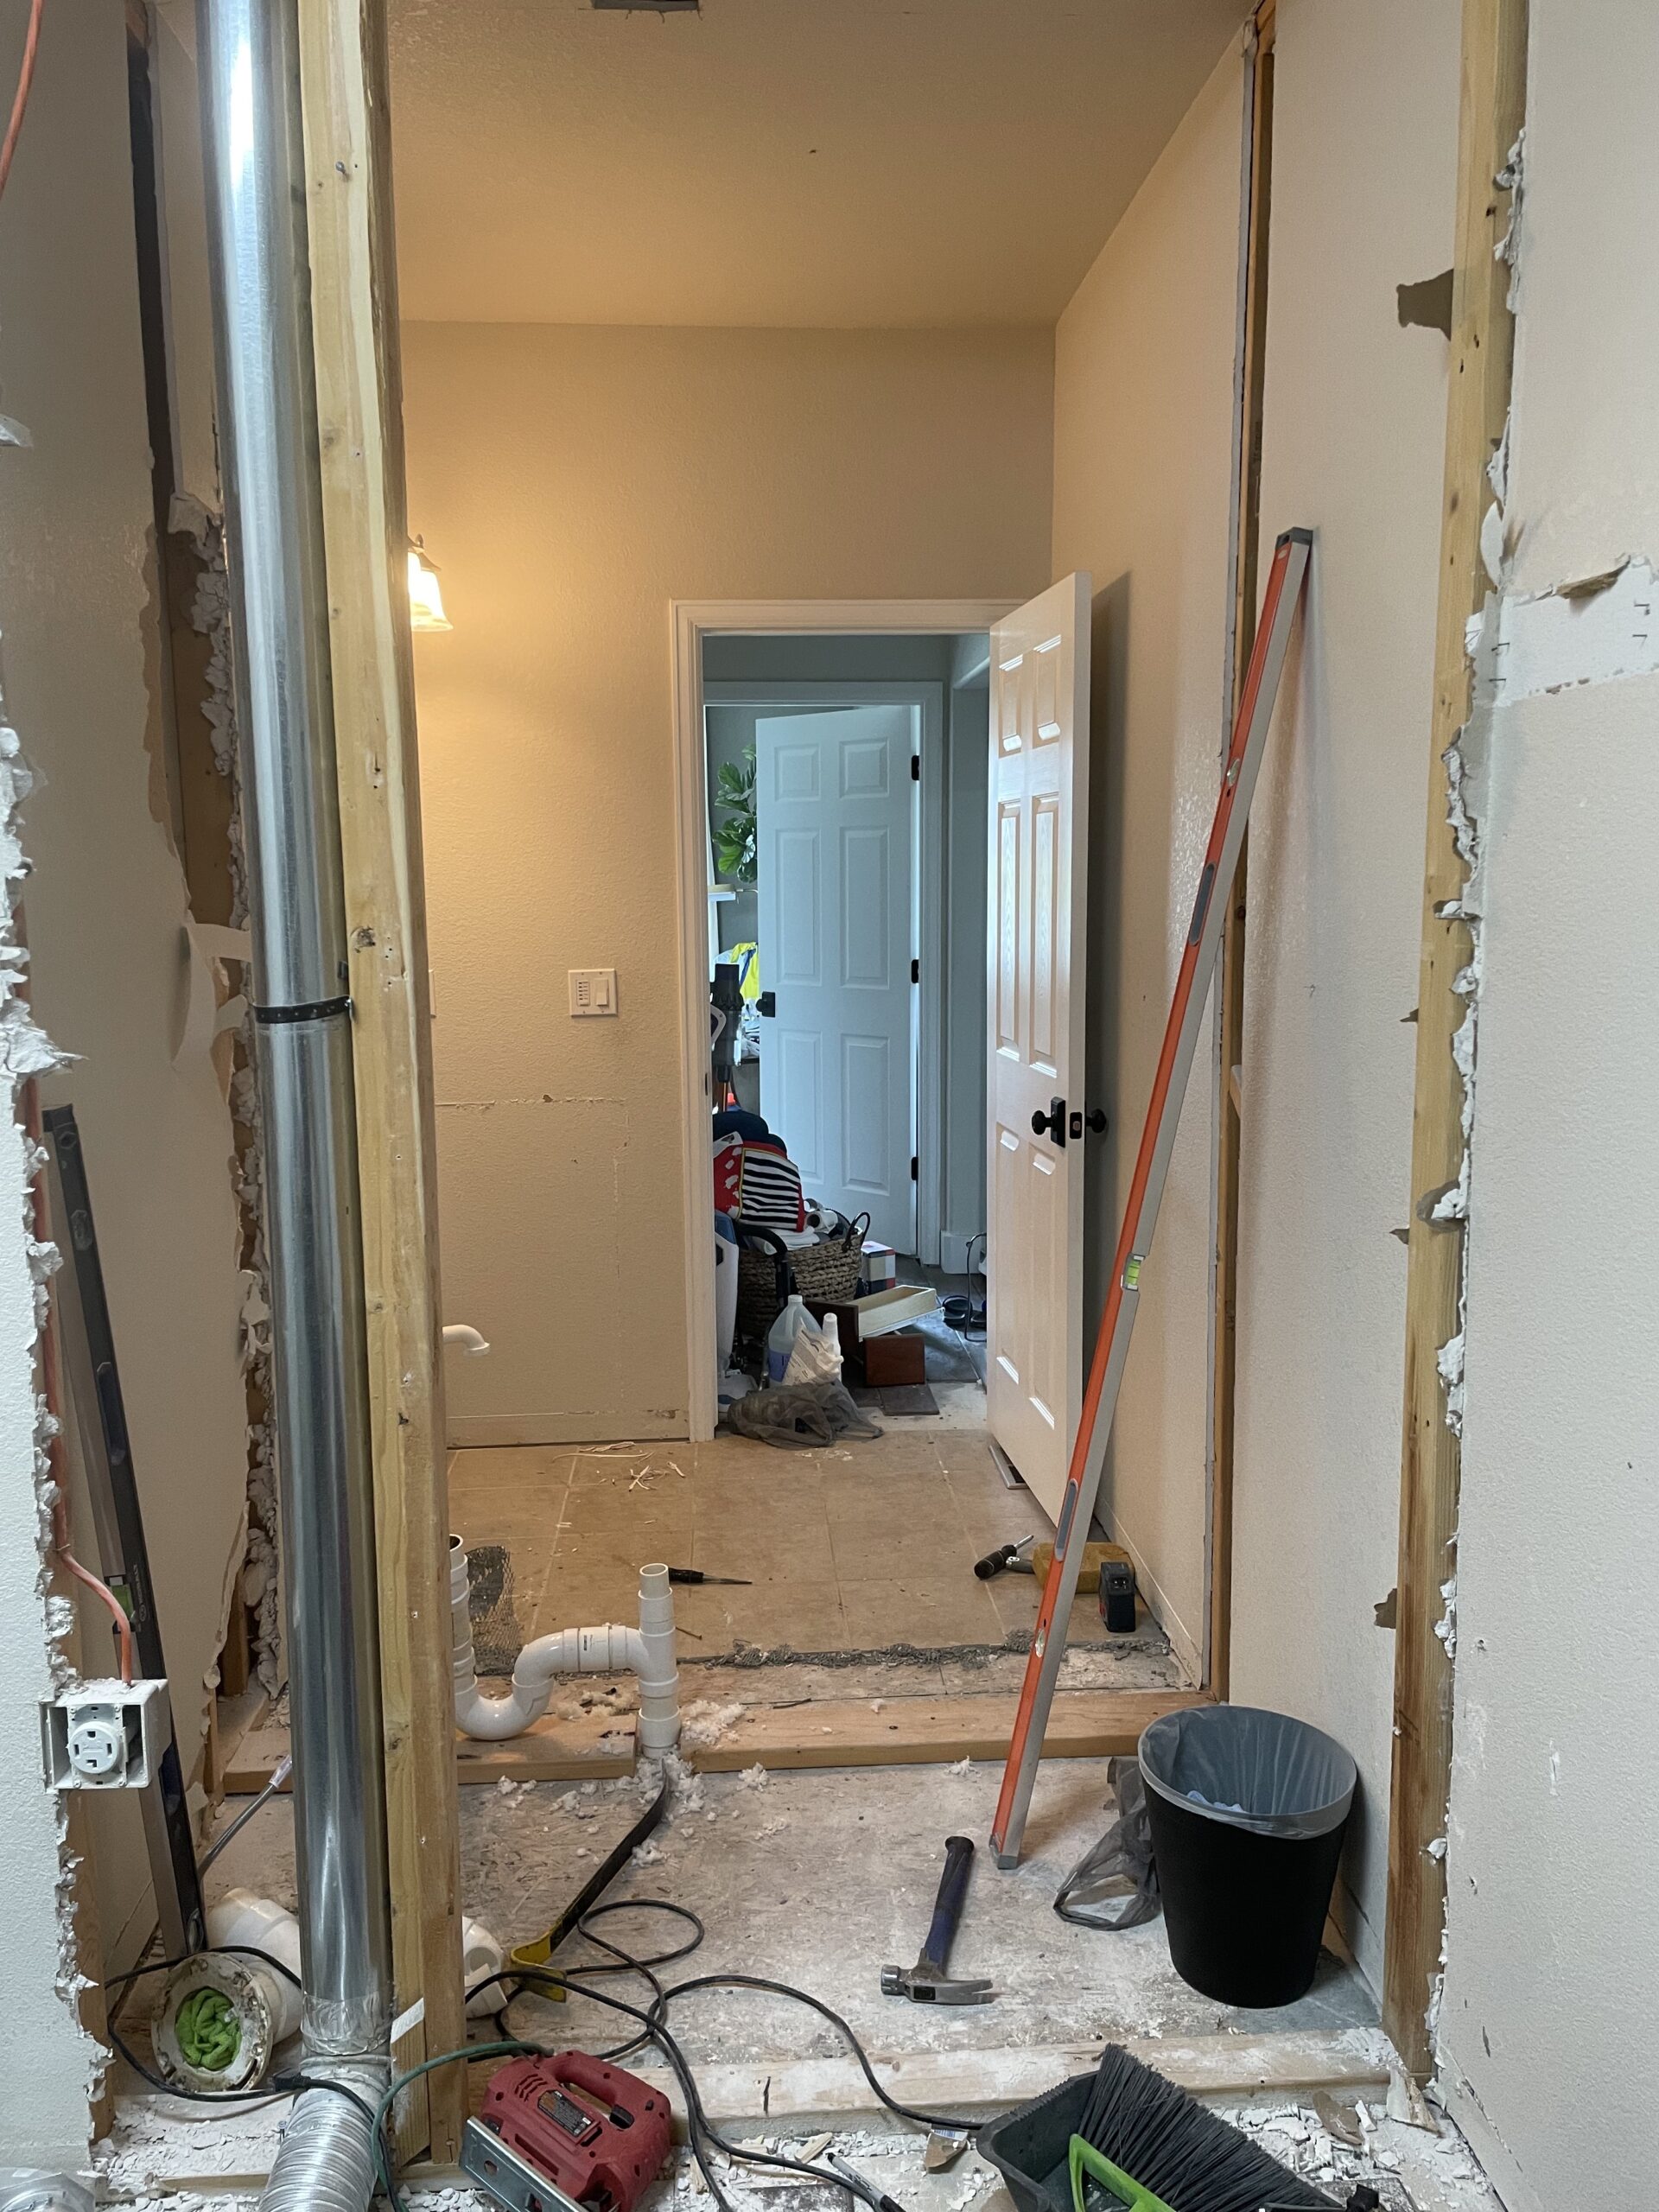
The Undoing
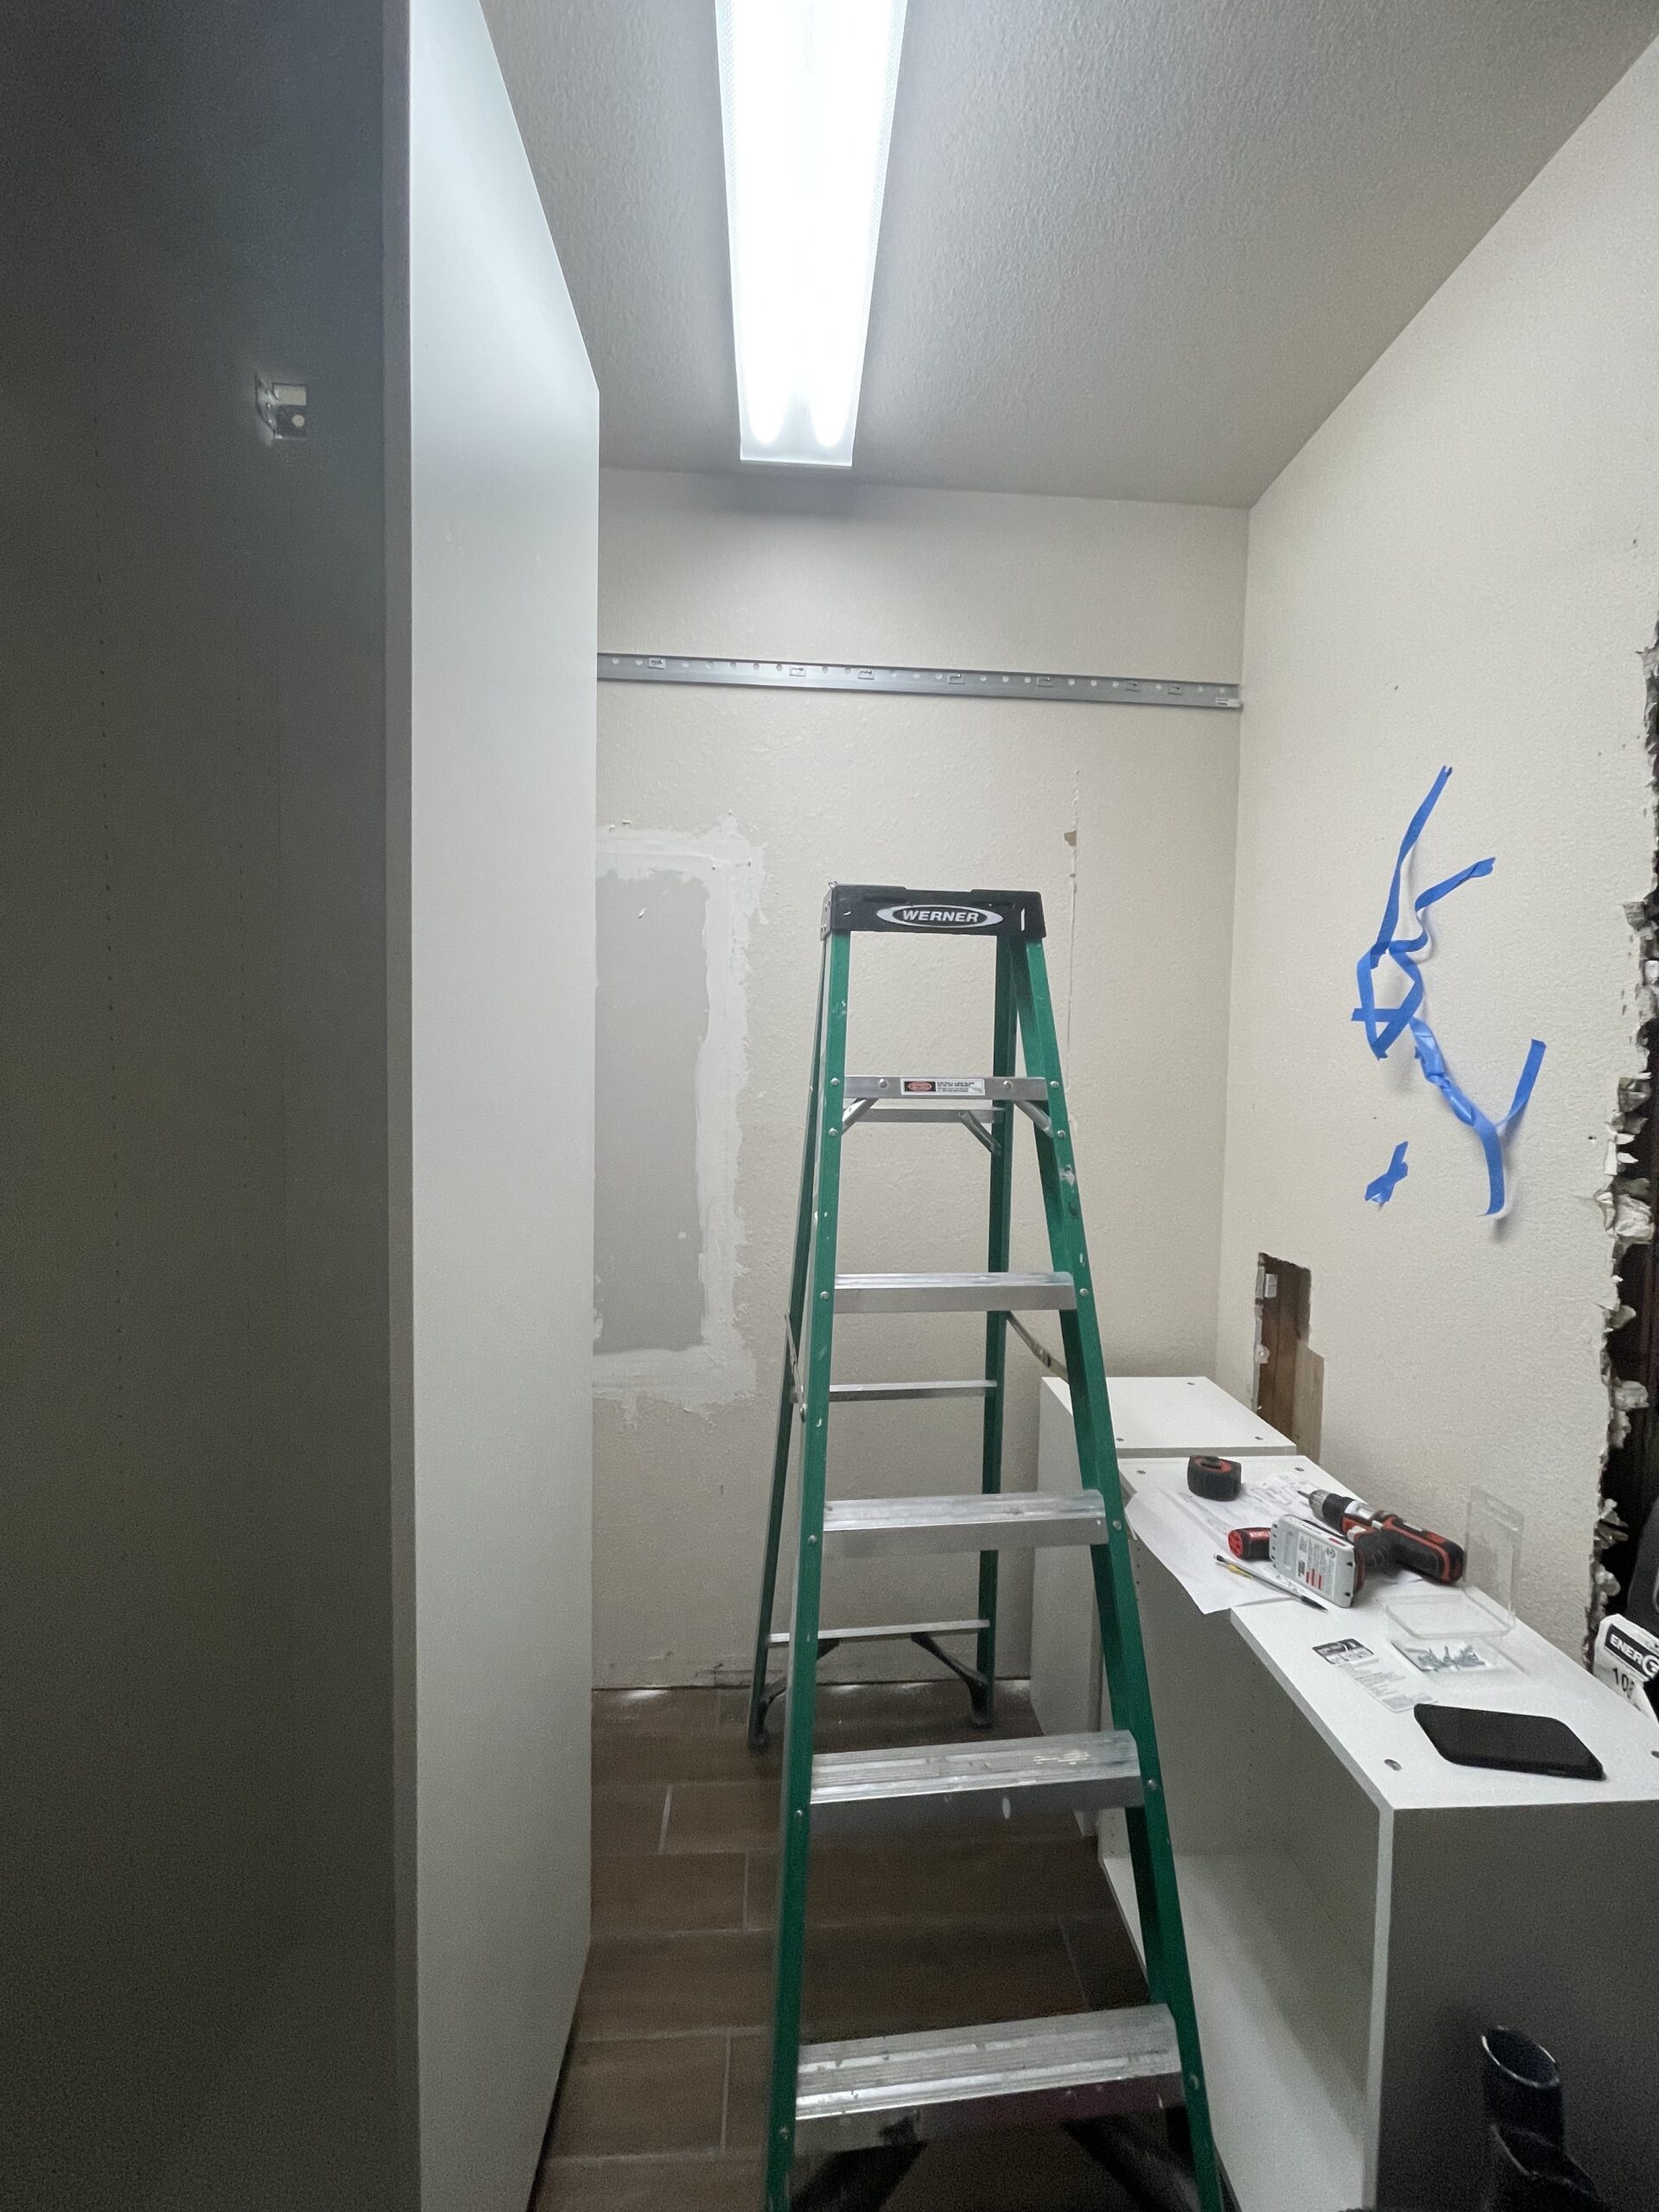
After a heavy dose of dreaming, planning, and measuring… and planning and measuring some more, it was time for THAT part of home remodeling: the part where everything looks worse before it gets better. In the midst of change, whether intentionally or reluctantly, I have to remind myself the undoing is part of the becoming. There’s a feeling of excitement and anticipation with initial demolition, but honestly there’s fear there too.
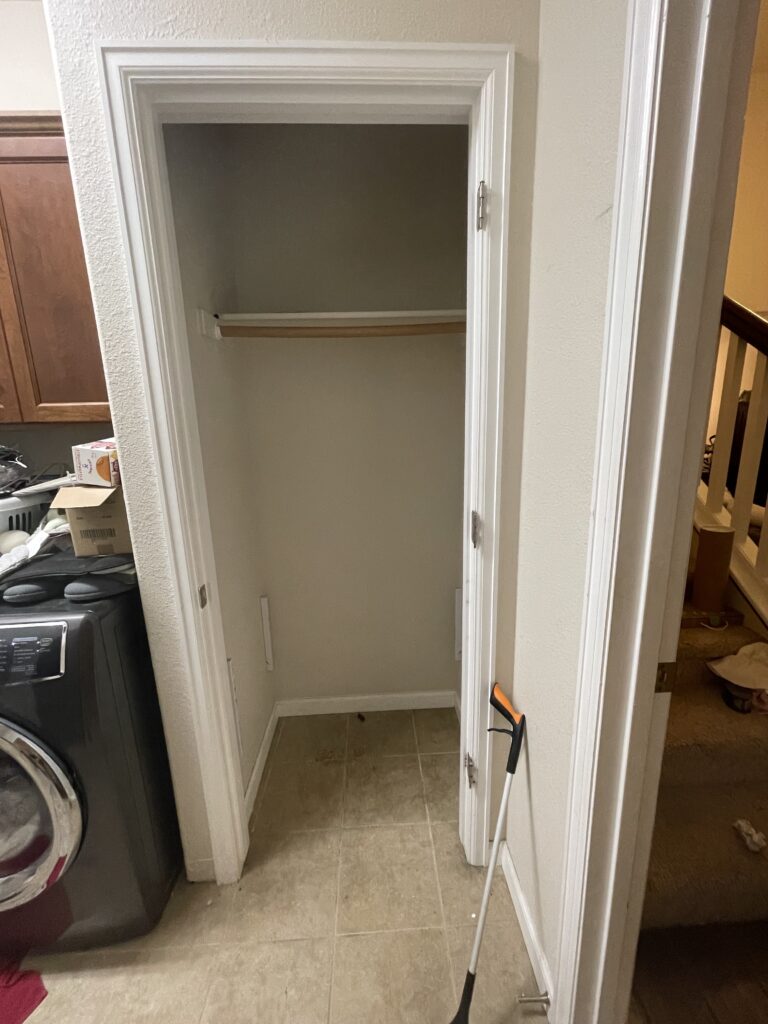
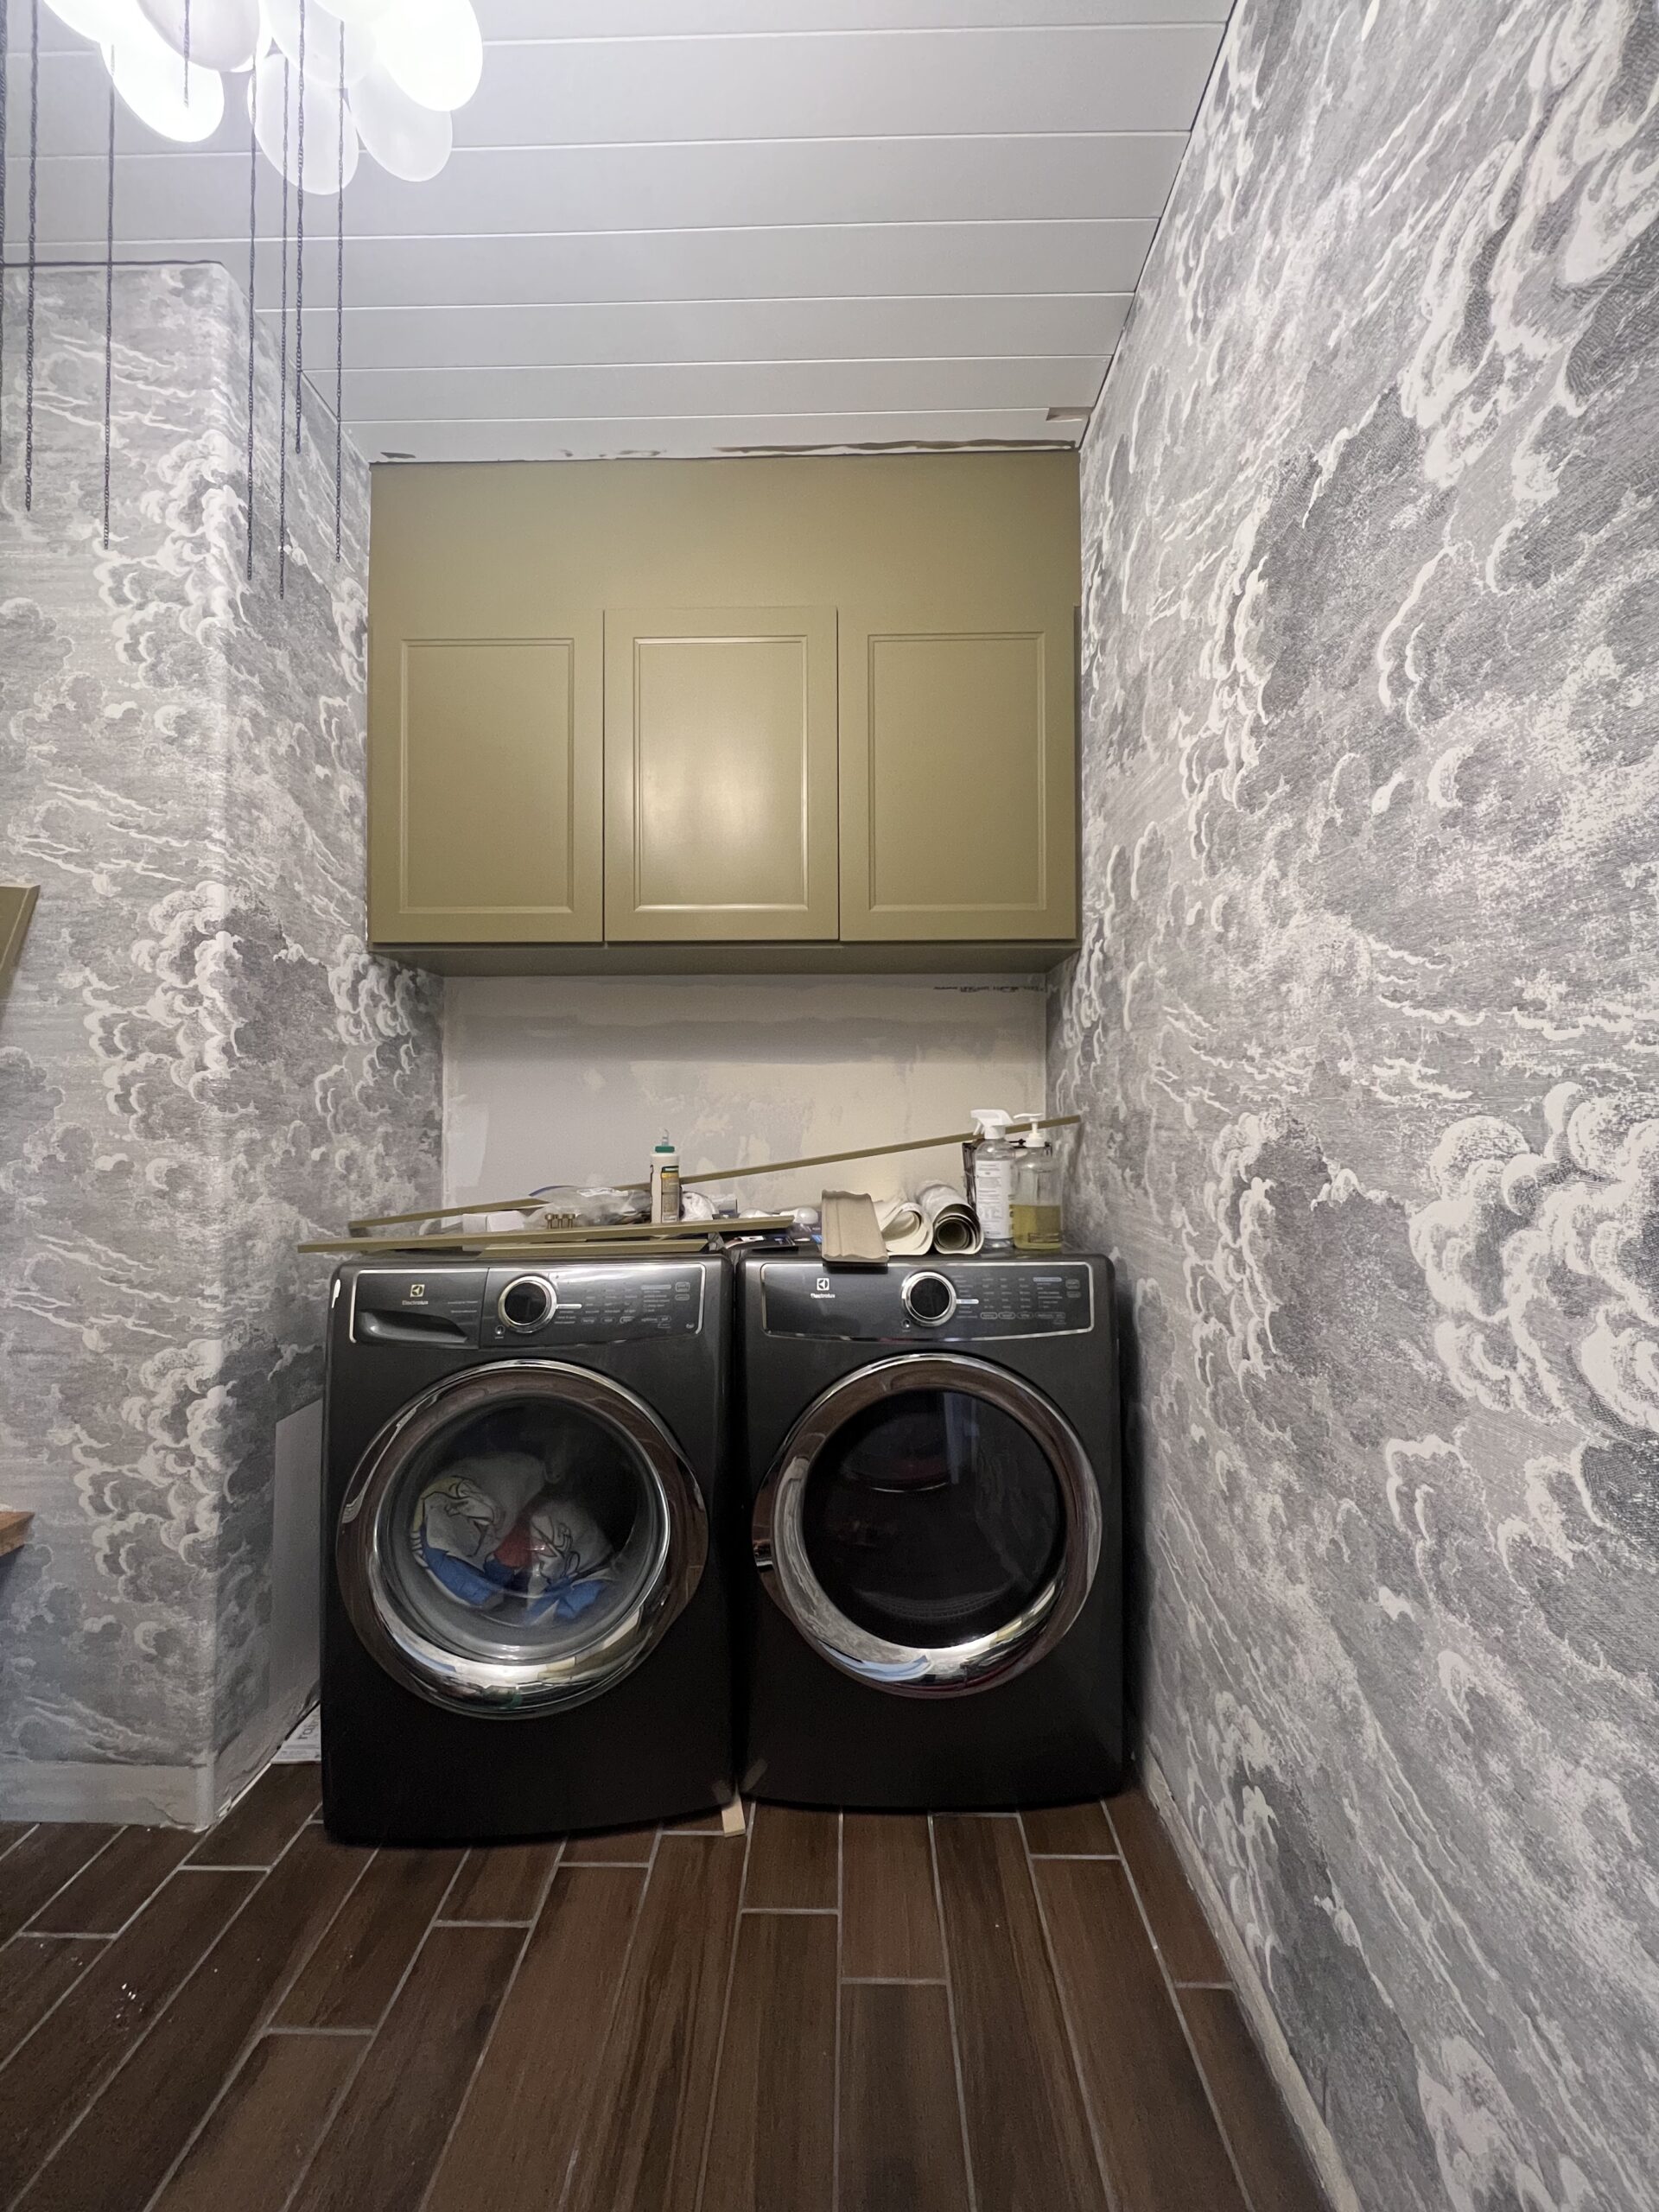
First it was closet demolition time – one door source removed! The walls came down relatively easily. The closet construction intrigued me. Not that I think it was anything unique but I have yet to build a closet – there’s learning in the undoing! Once we took the closet walls down, it was time to remove the original tile, which was also relatively seamless…but loud. Fortunately this demo coincided with 4th of July so neighbors were already awake and the booming sound of independence outside masked the sounds of demolition inside.
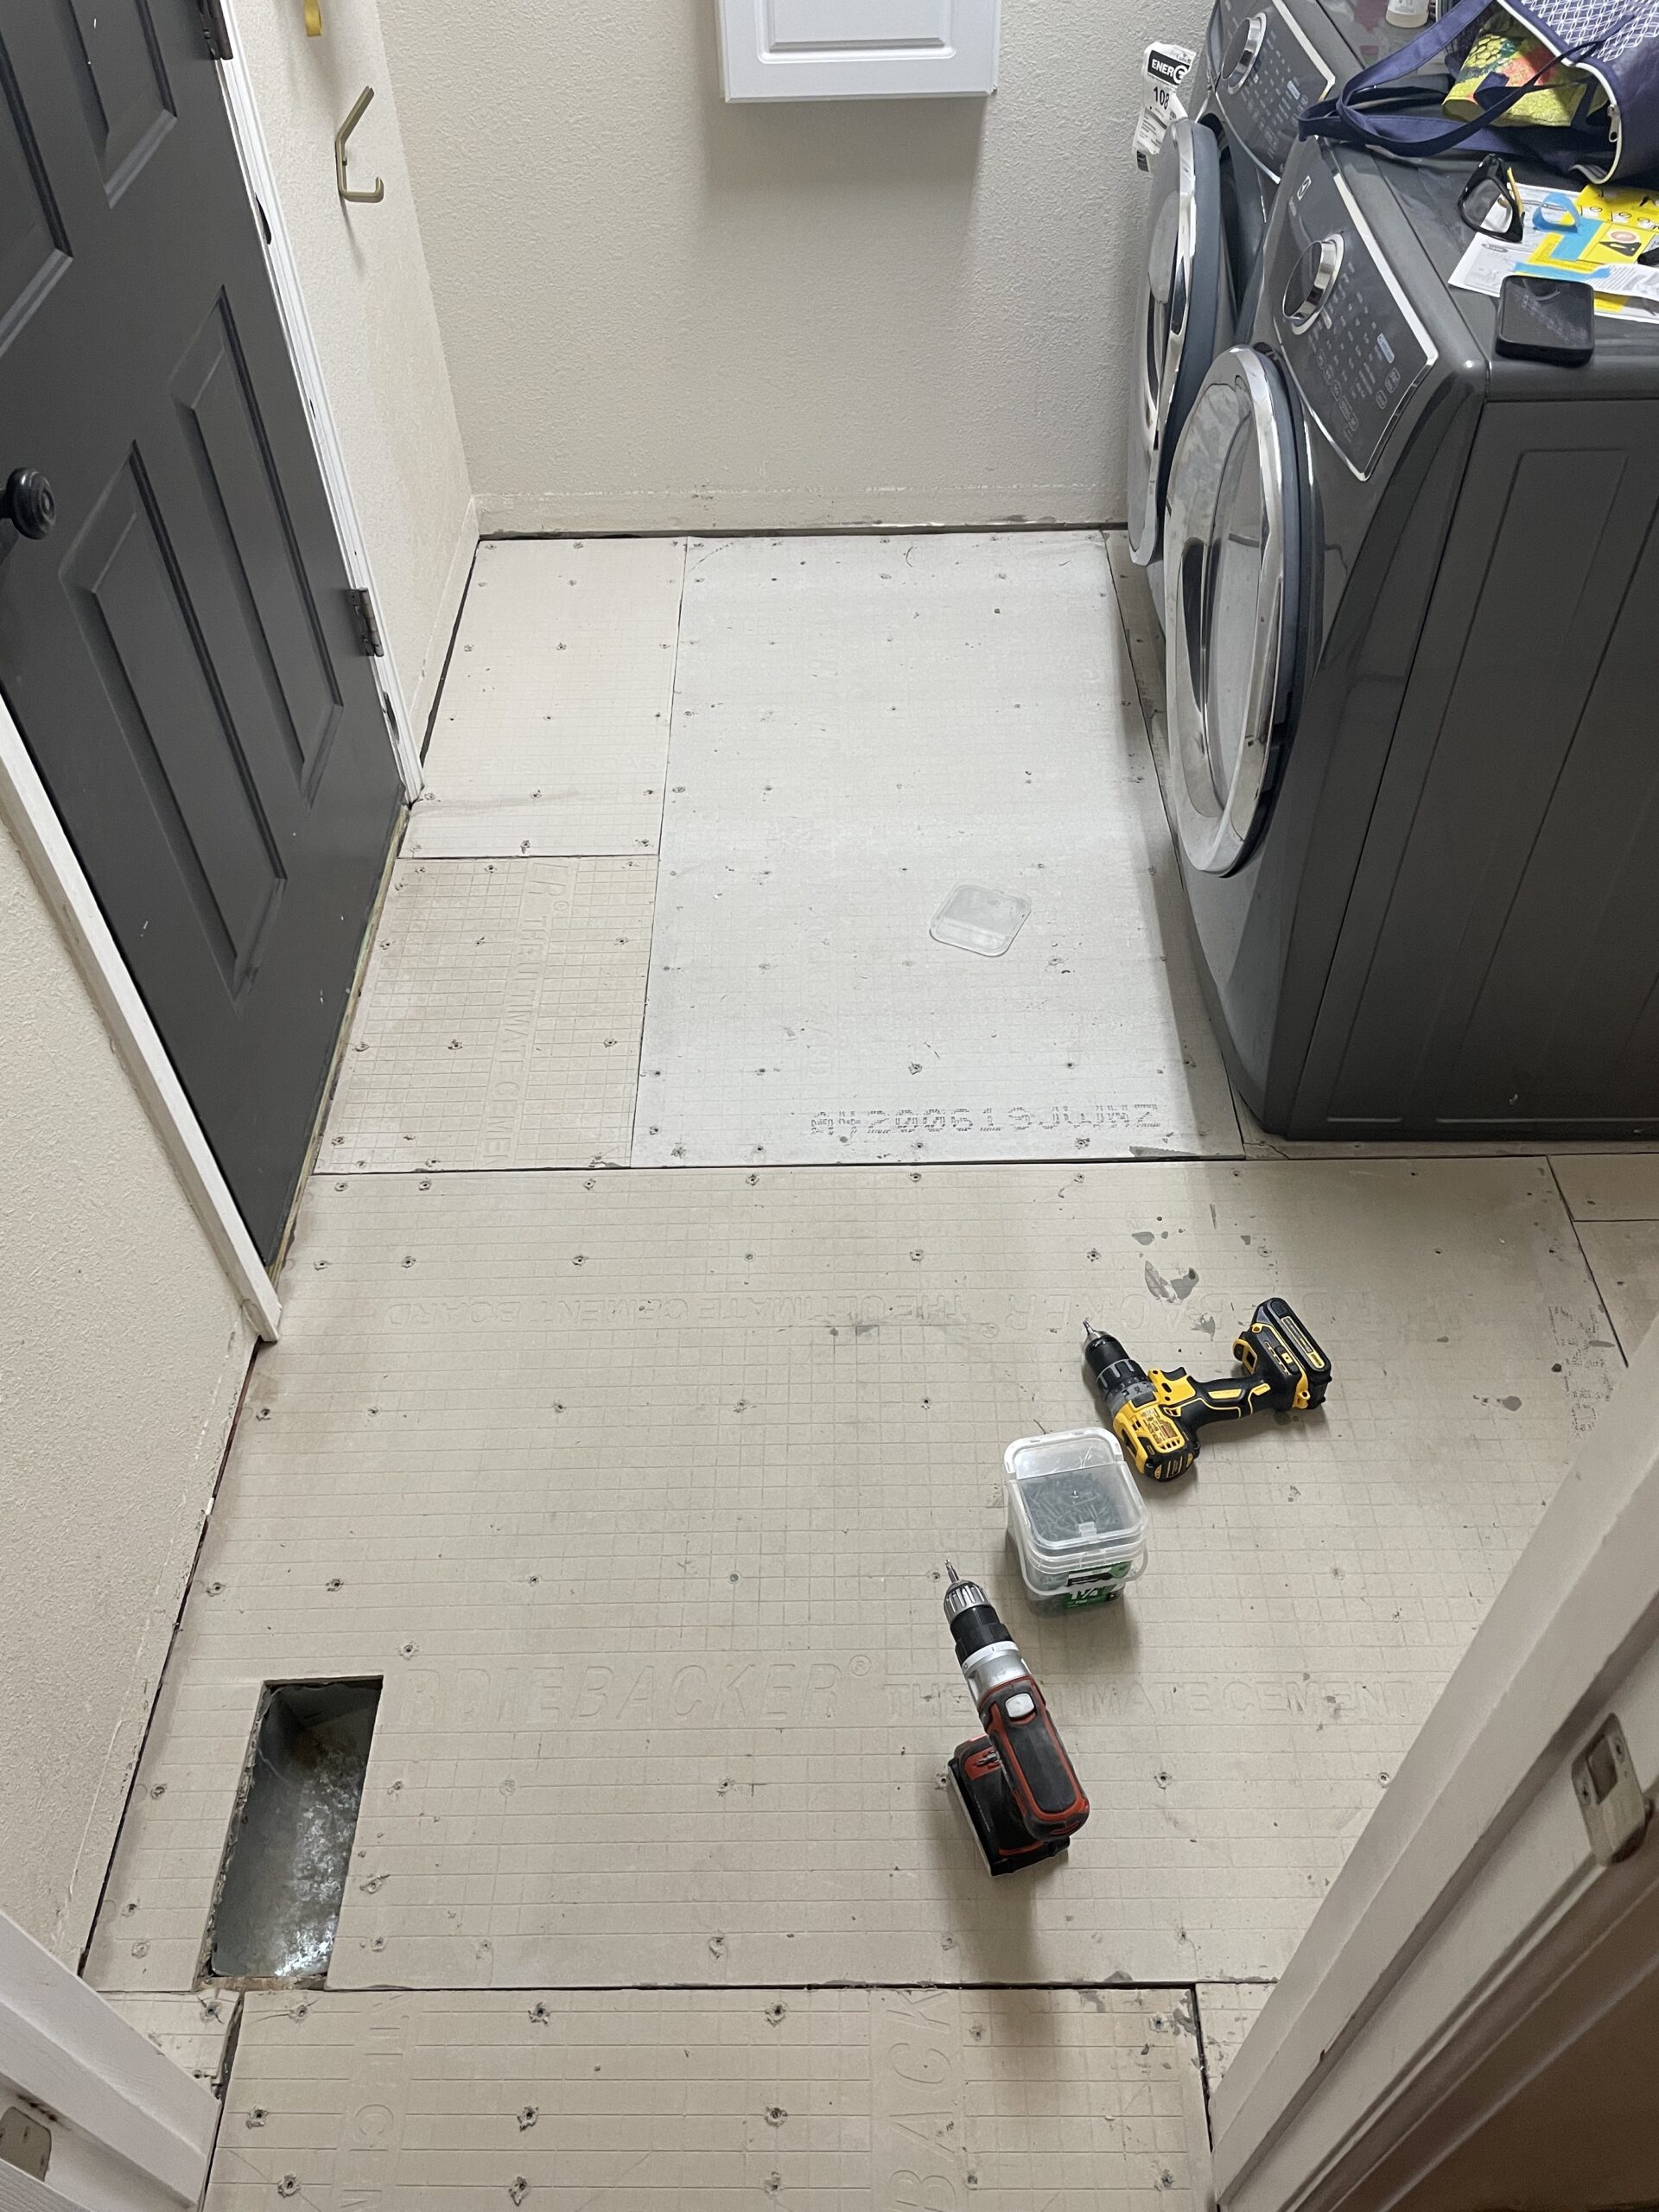
Adding New Flooring
We decided to use the same tile from the main living area since we had plenty of leftovers. While I would love to play with different tile options/patterns in the future, I was happy to have one less decision to make. Even when there’s a vision, big projects – especially in DIY – contain so. many. decisions. and decision fatigue gets real, really quick.
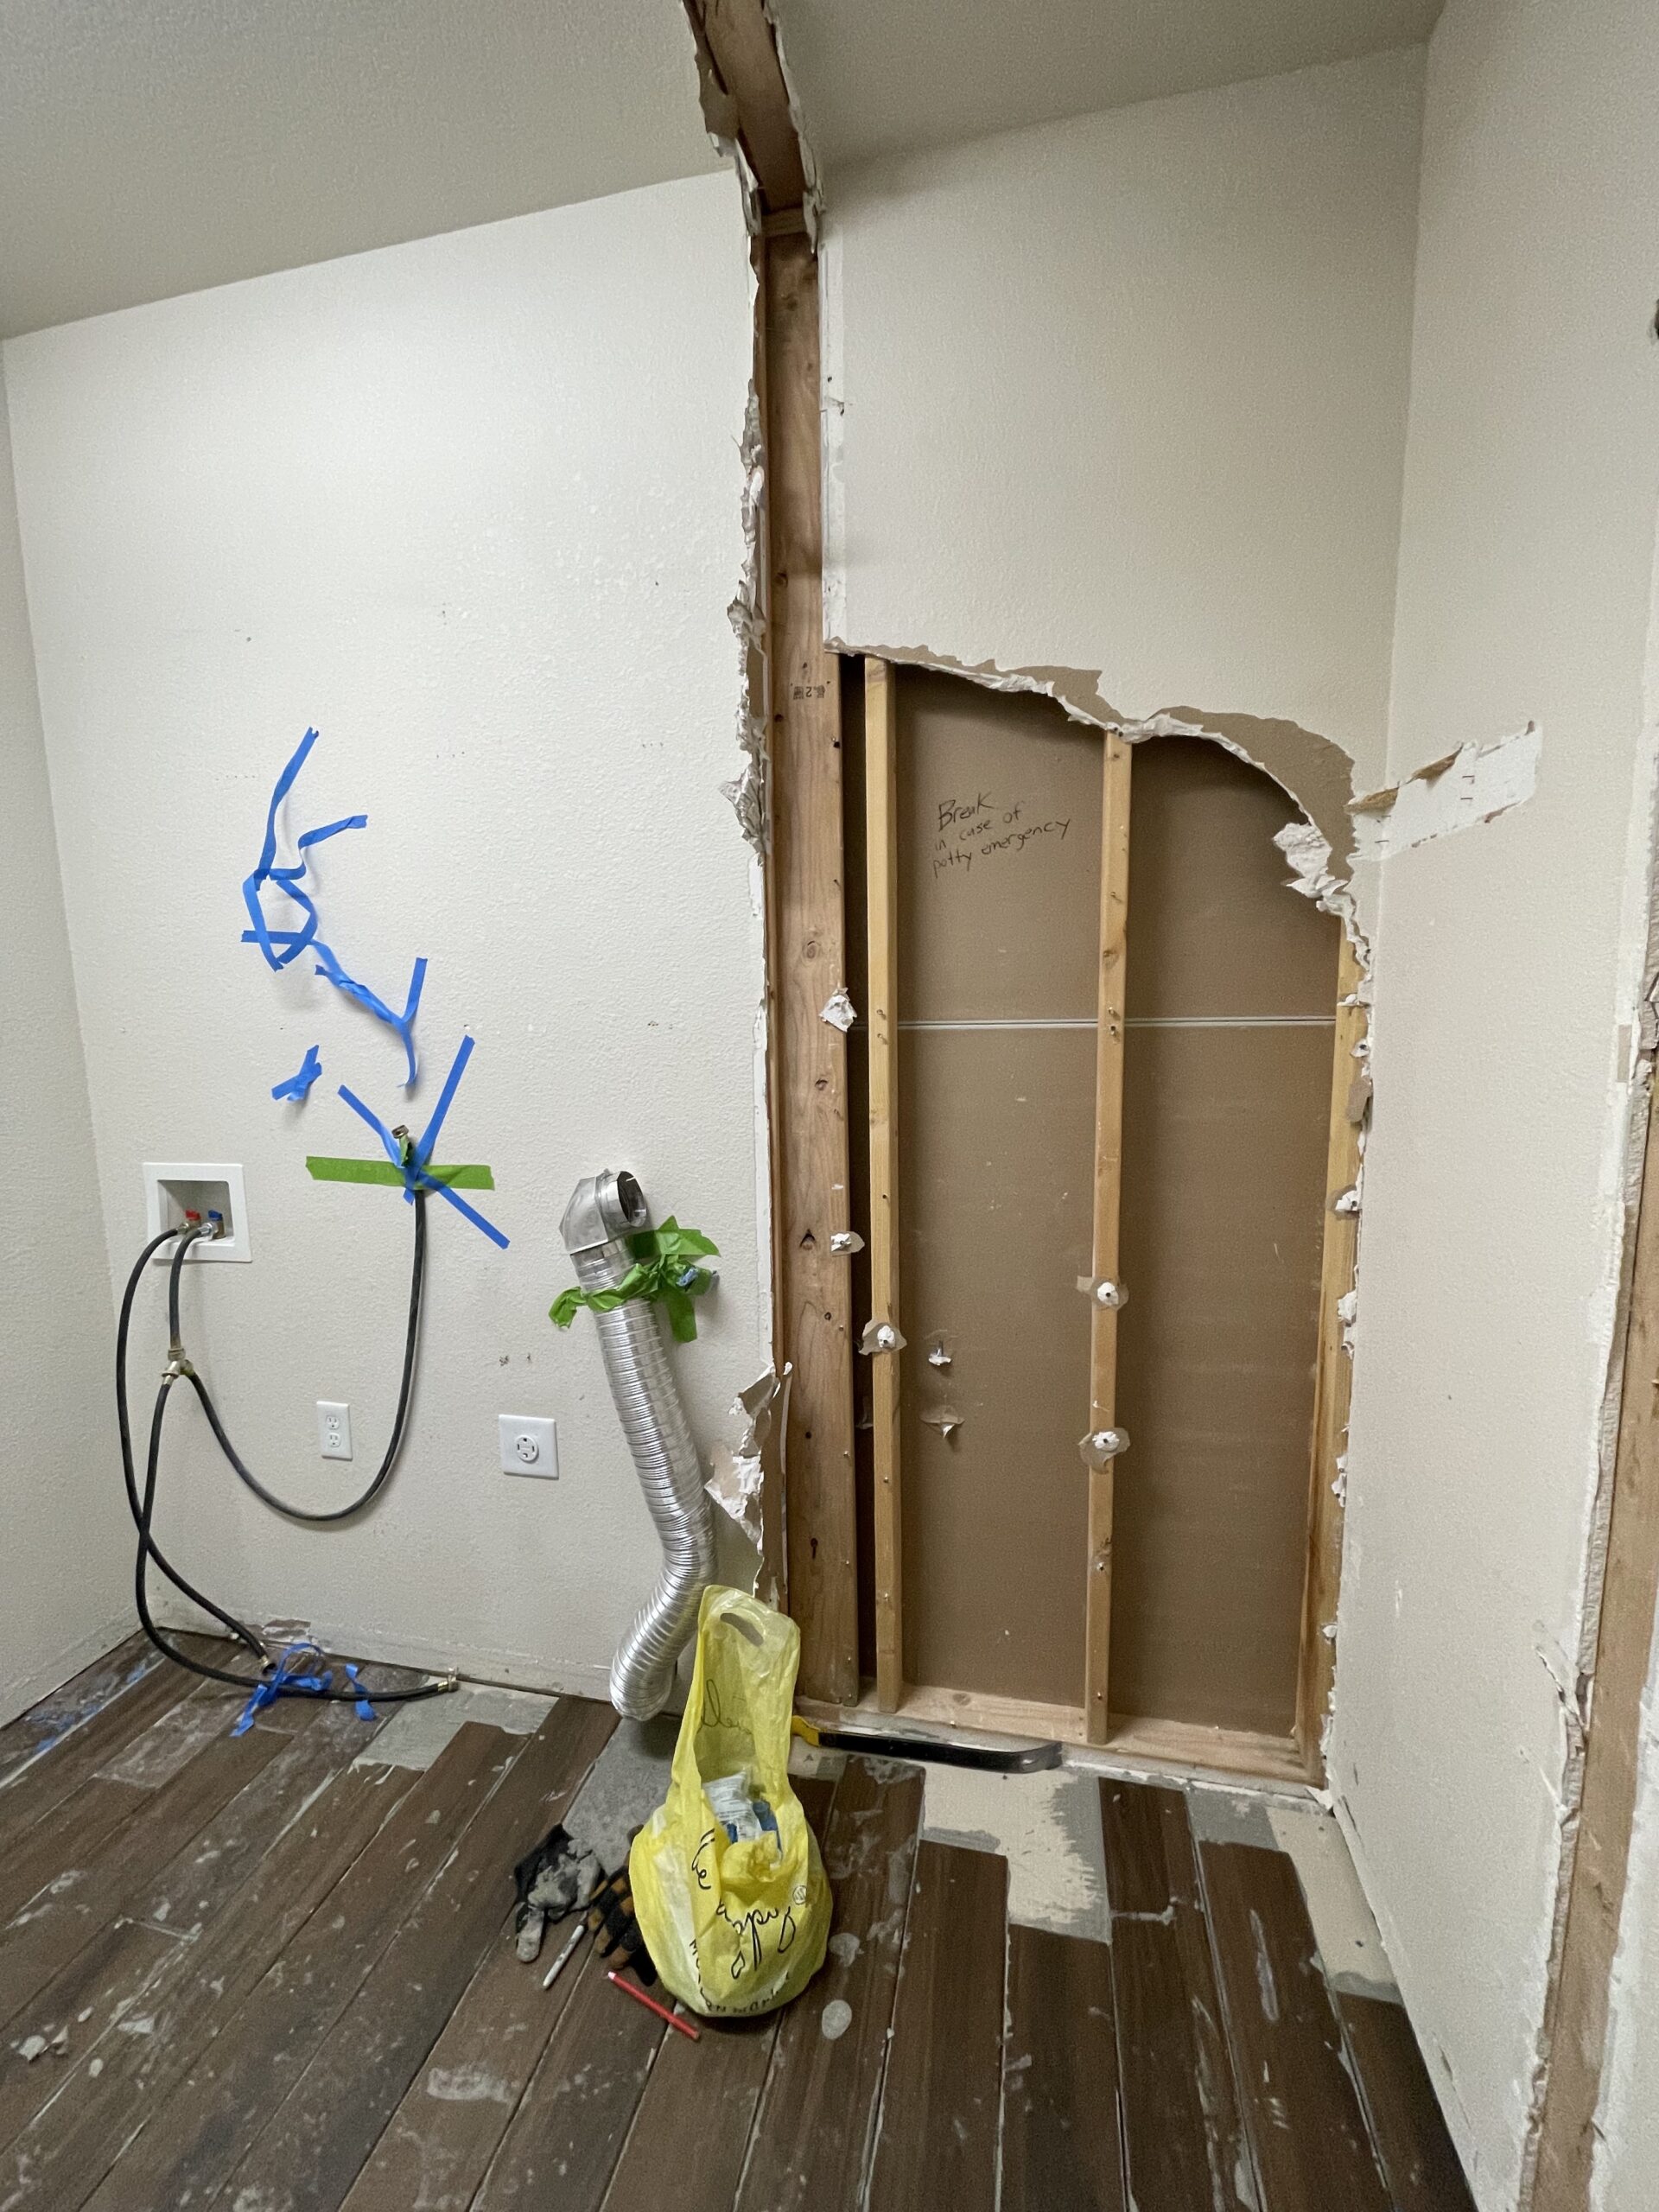
Working around daytime work schedules, our prime projecting hours became the evenings and weekends. Instead of task blocking (e.g., taking care of all of the tile/drywall/painting) at one time, we focused on what tasks we could get done with the time we had any given evening/day.
Part of this methodology meant that we moved around appliances or couldn’t enter the house through this room. Not pictured, but a true workhorse throughout the entire projected were these straps. I lost count of the number of teams we moved the washer and dryer to and from the living room in order to work in the space and subsequently reinstall the machines so we could do laundry for the week.
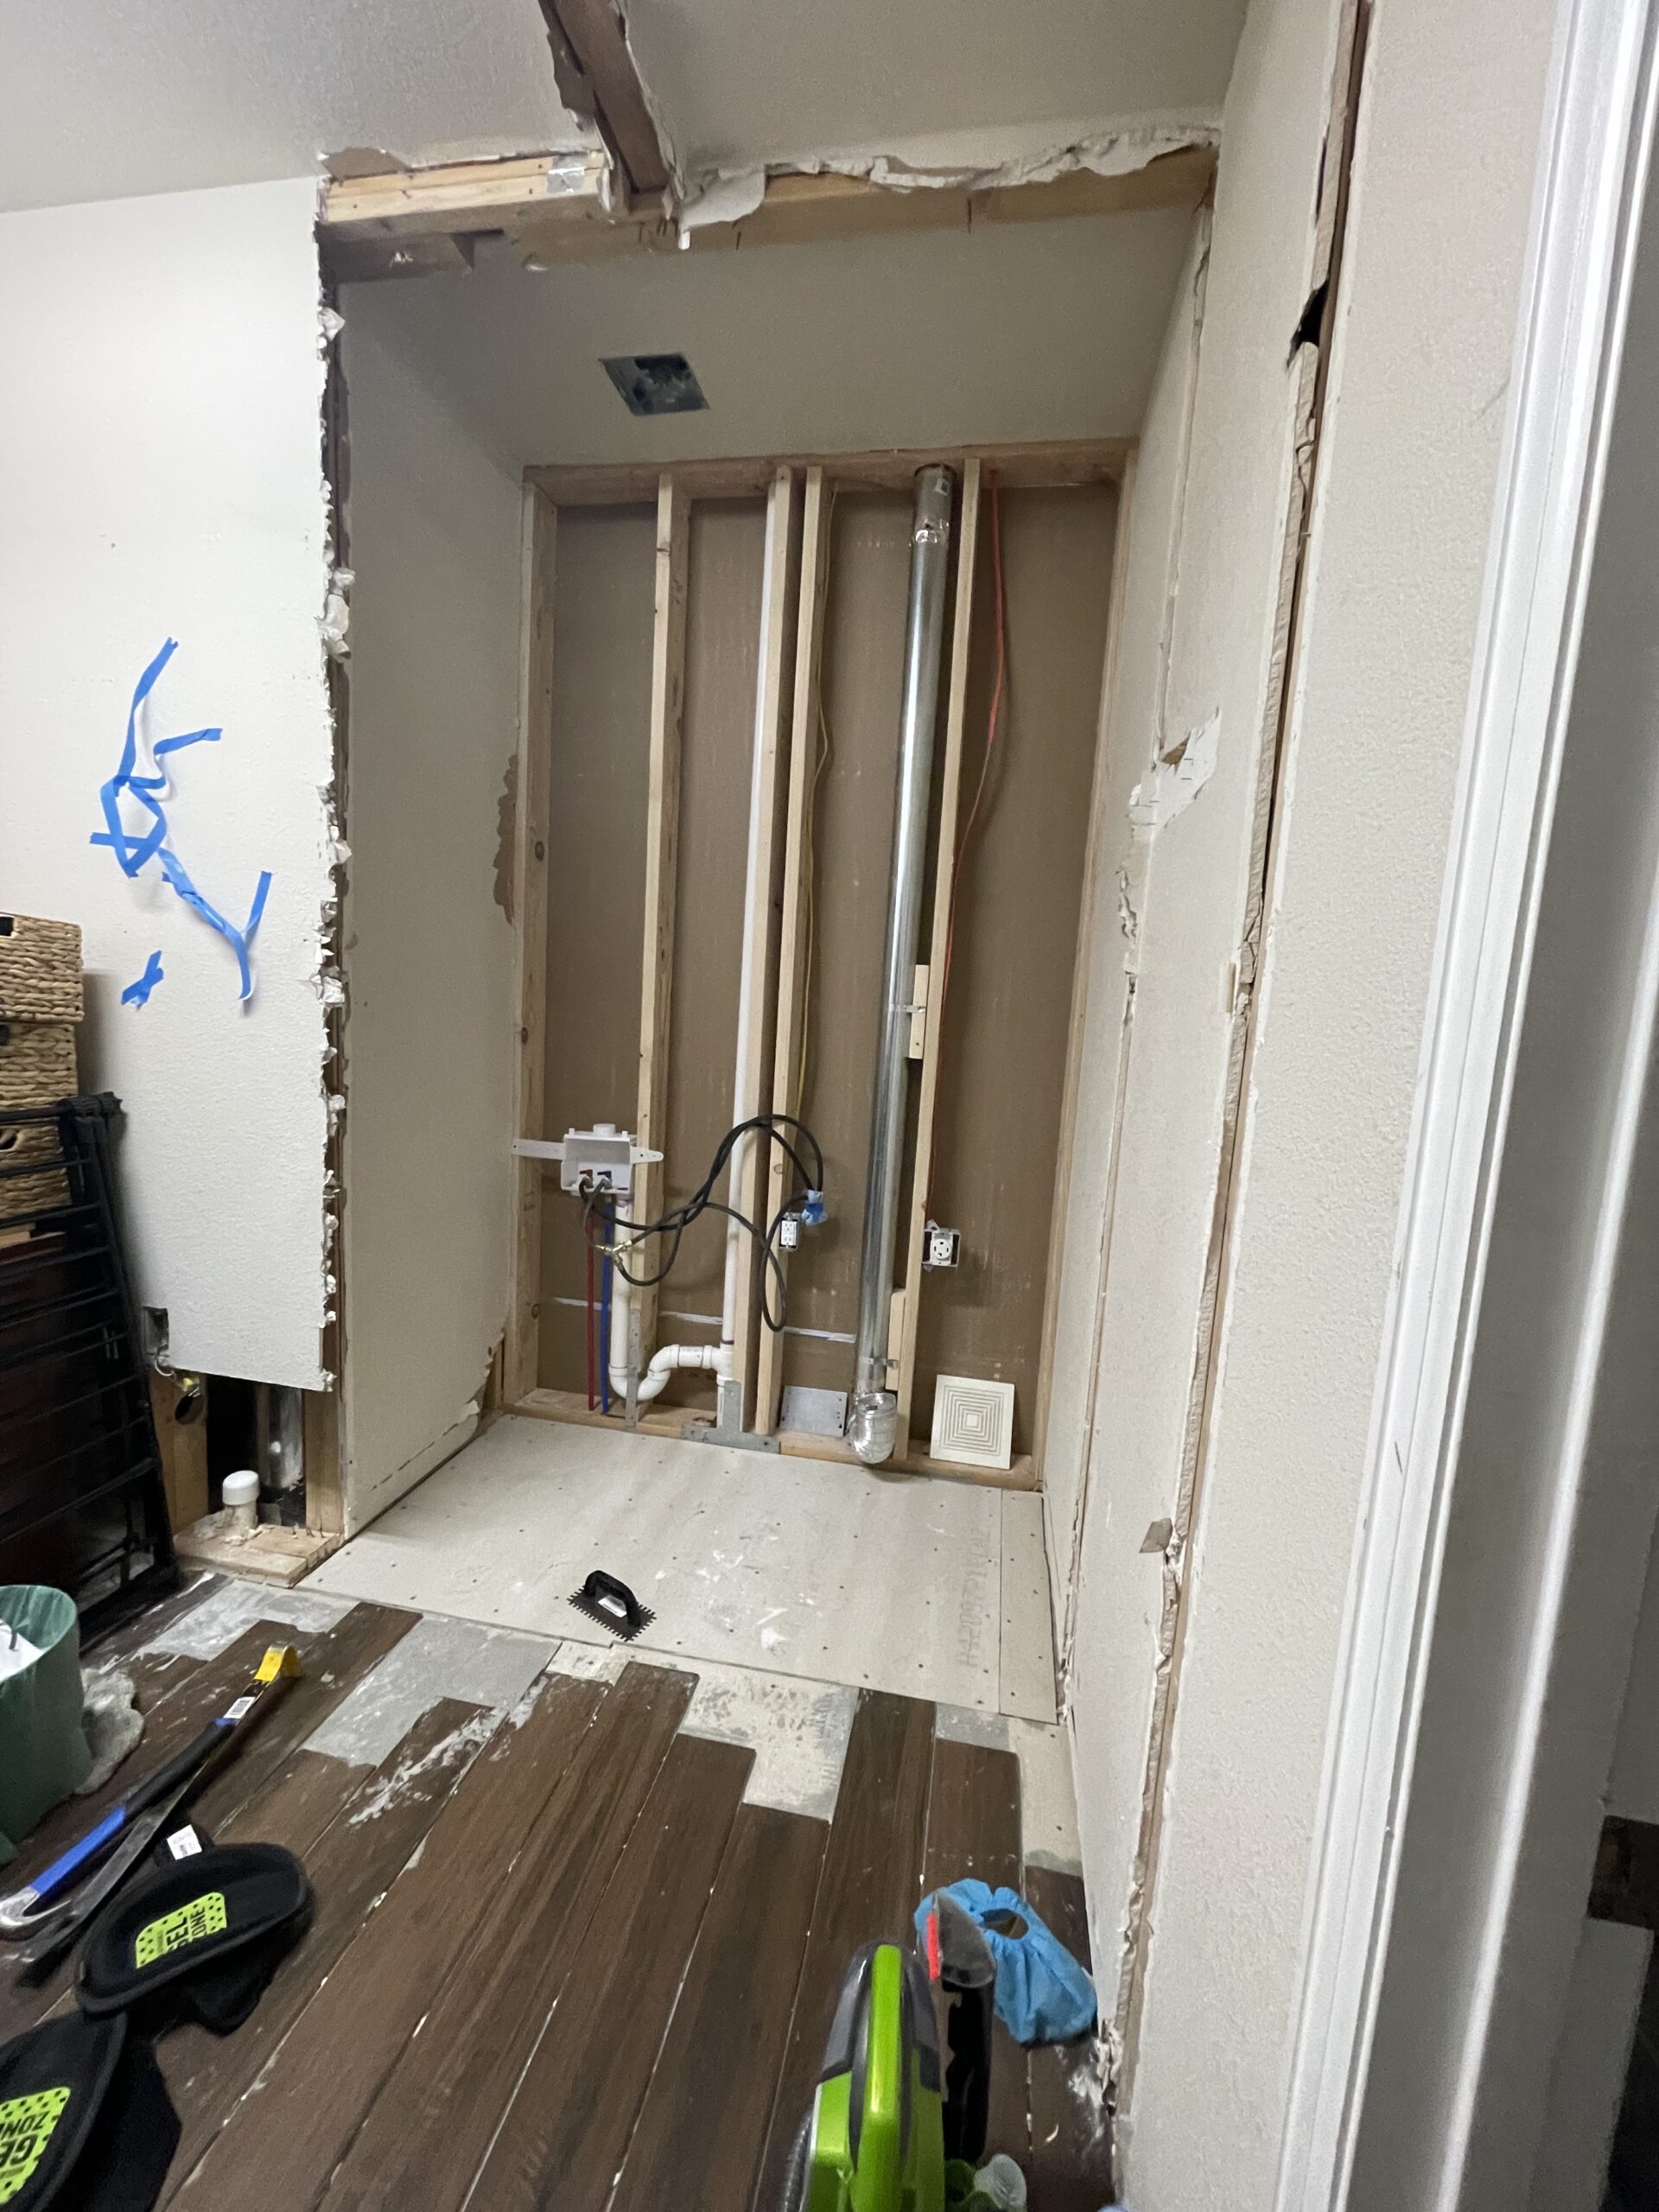
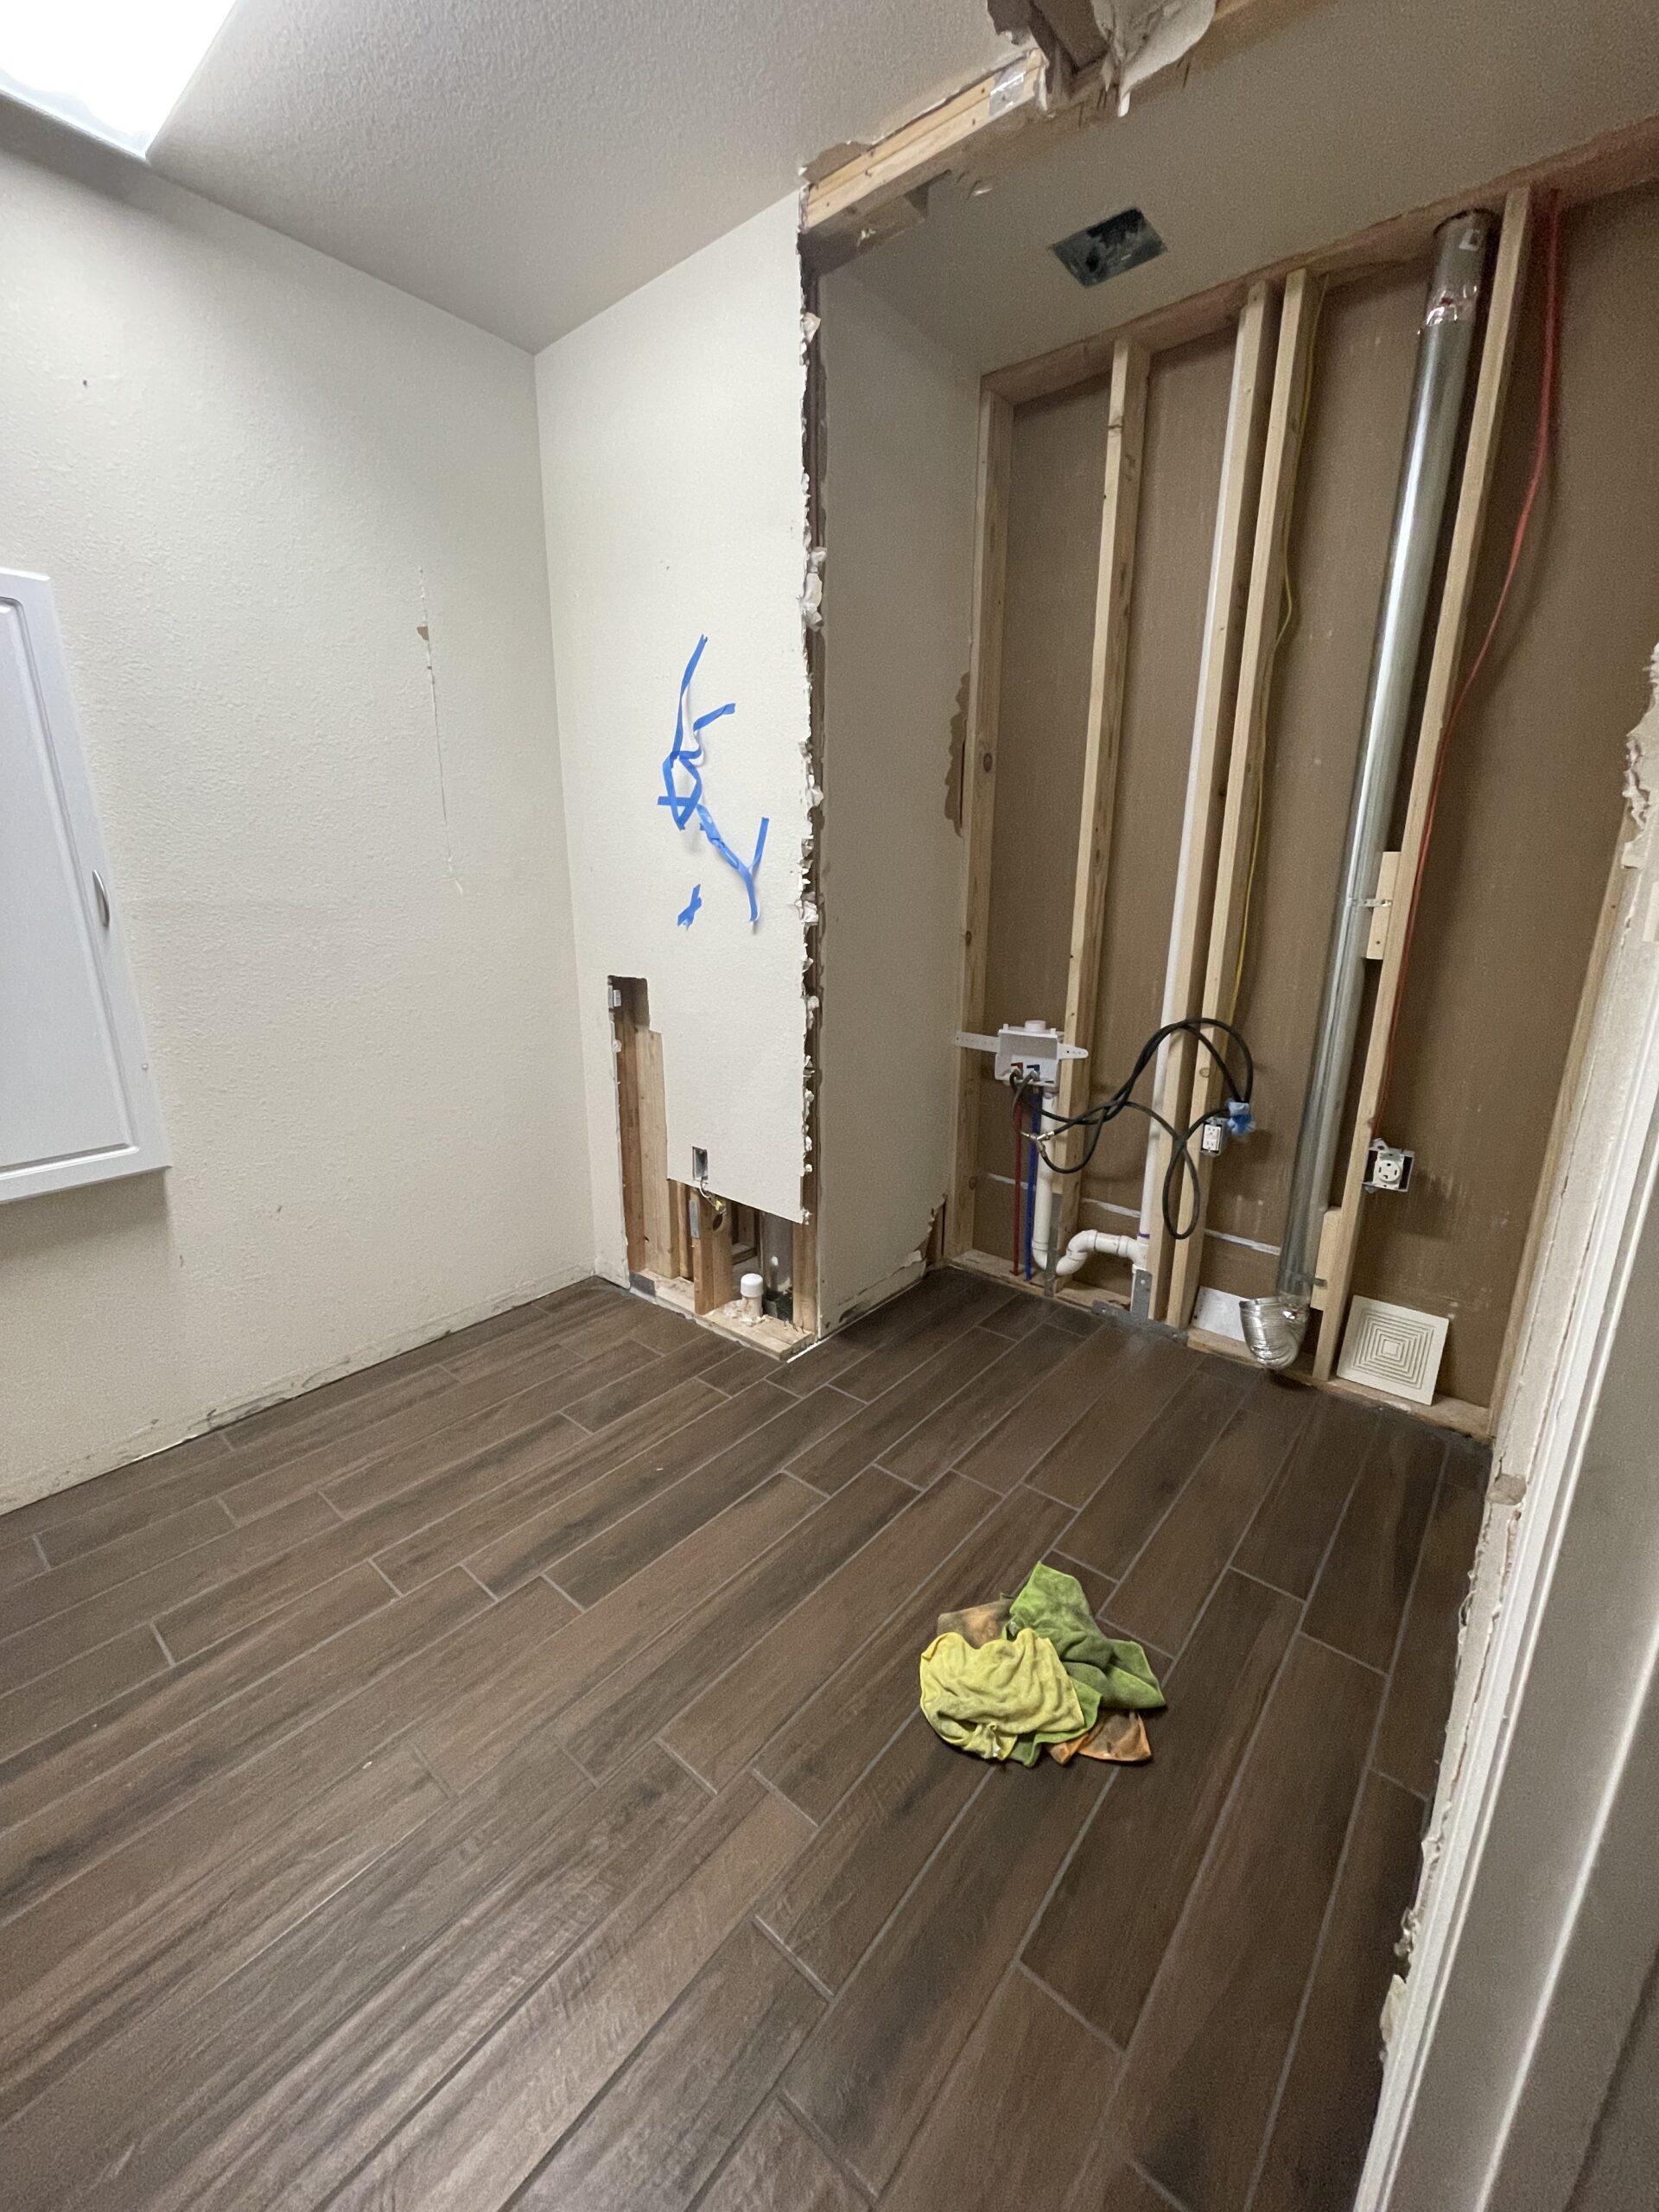
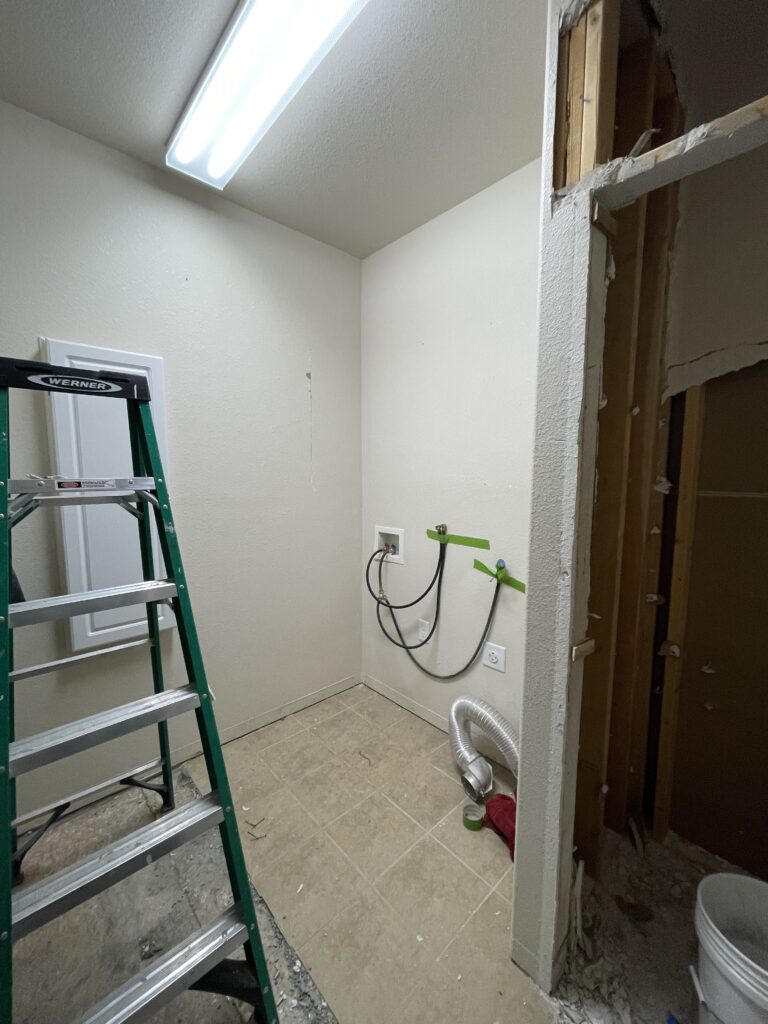
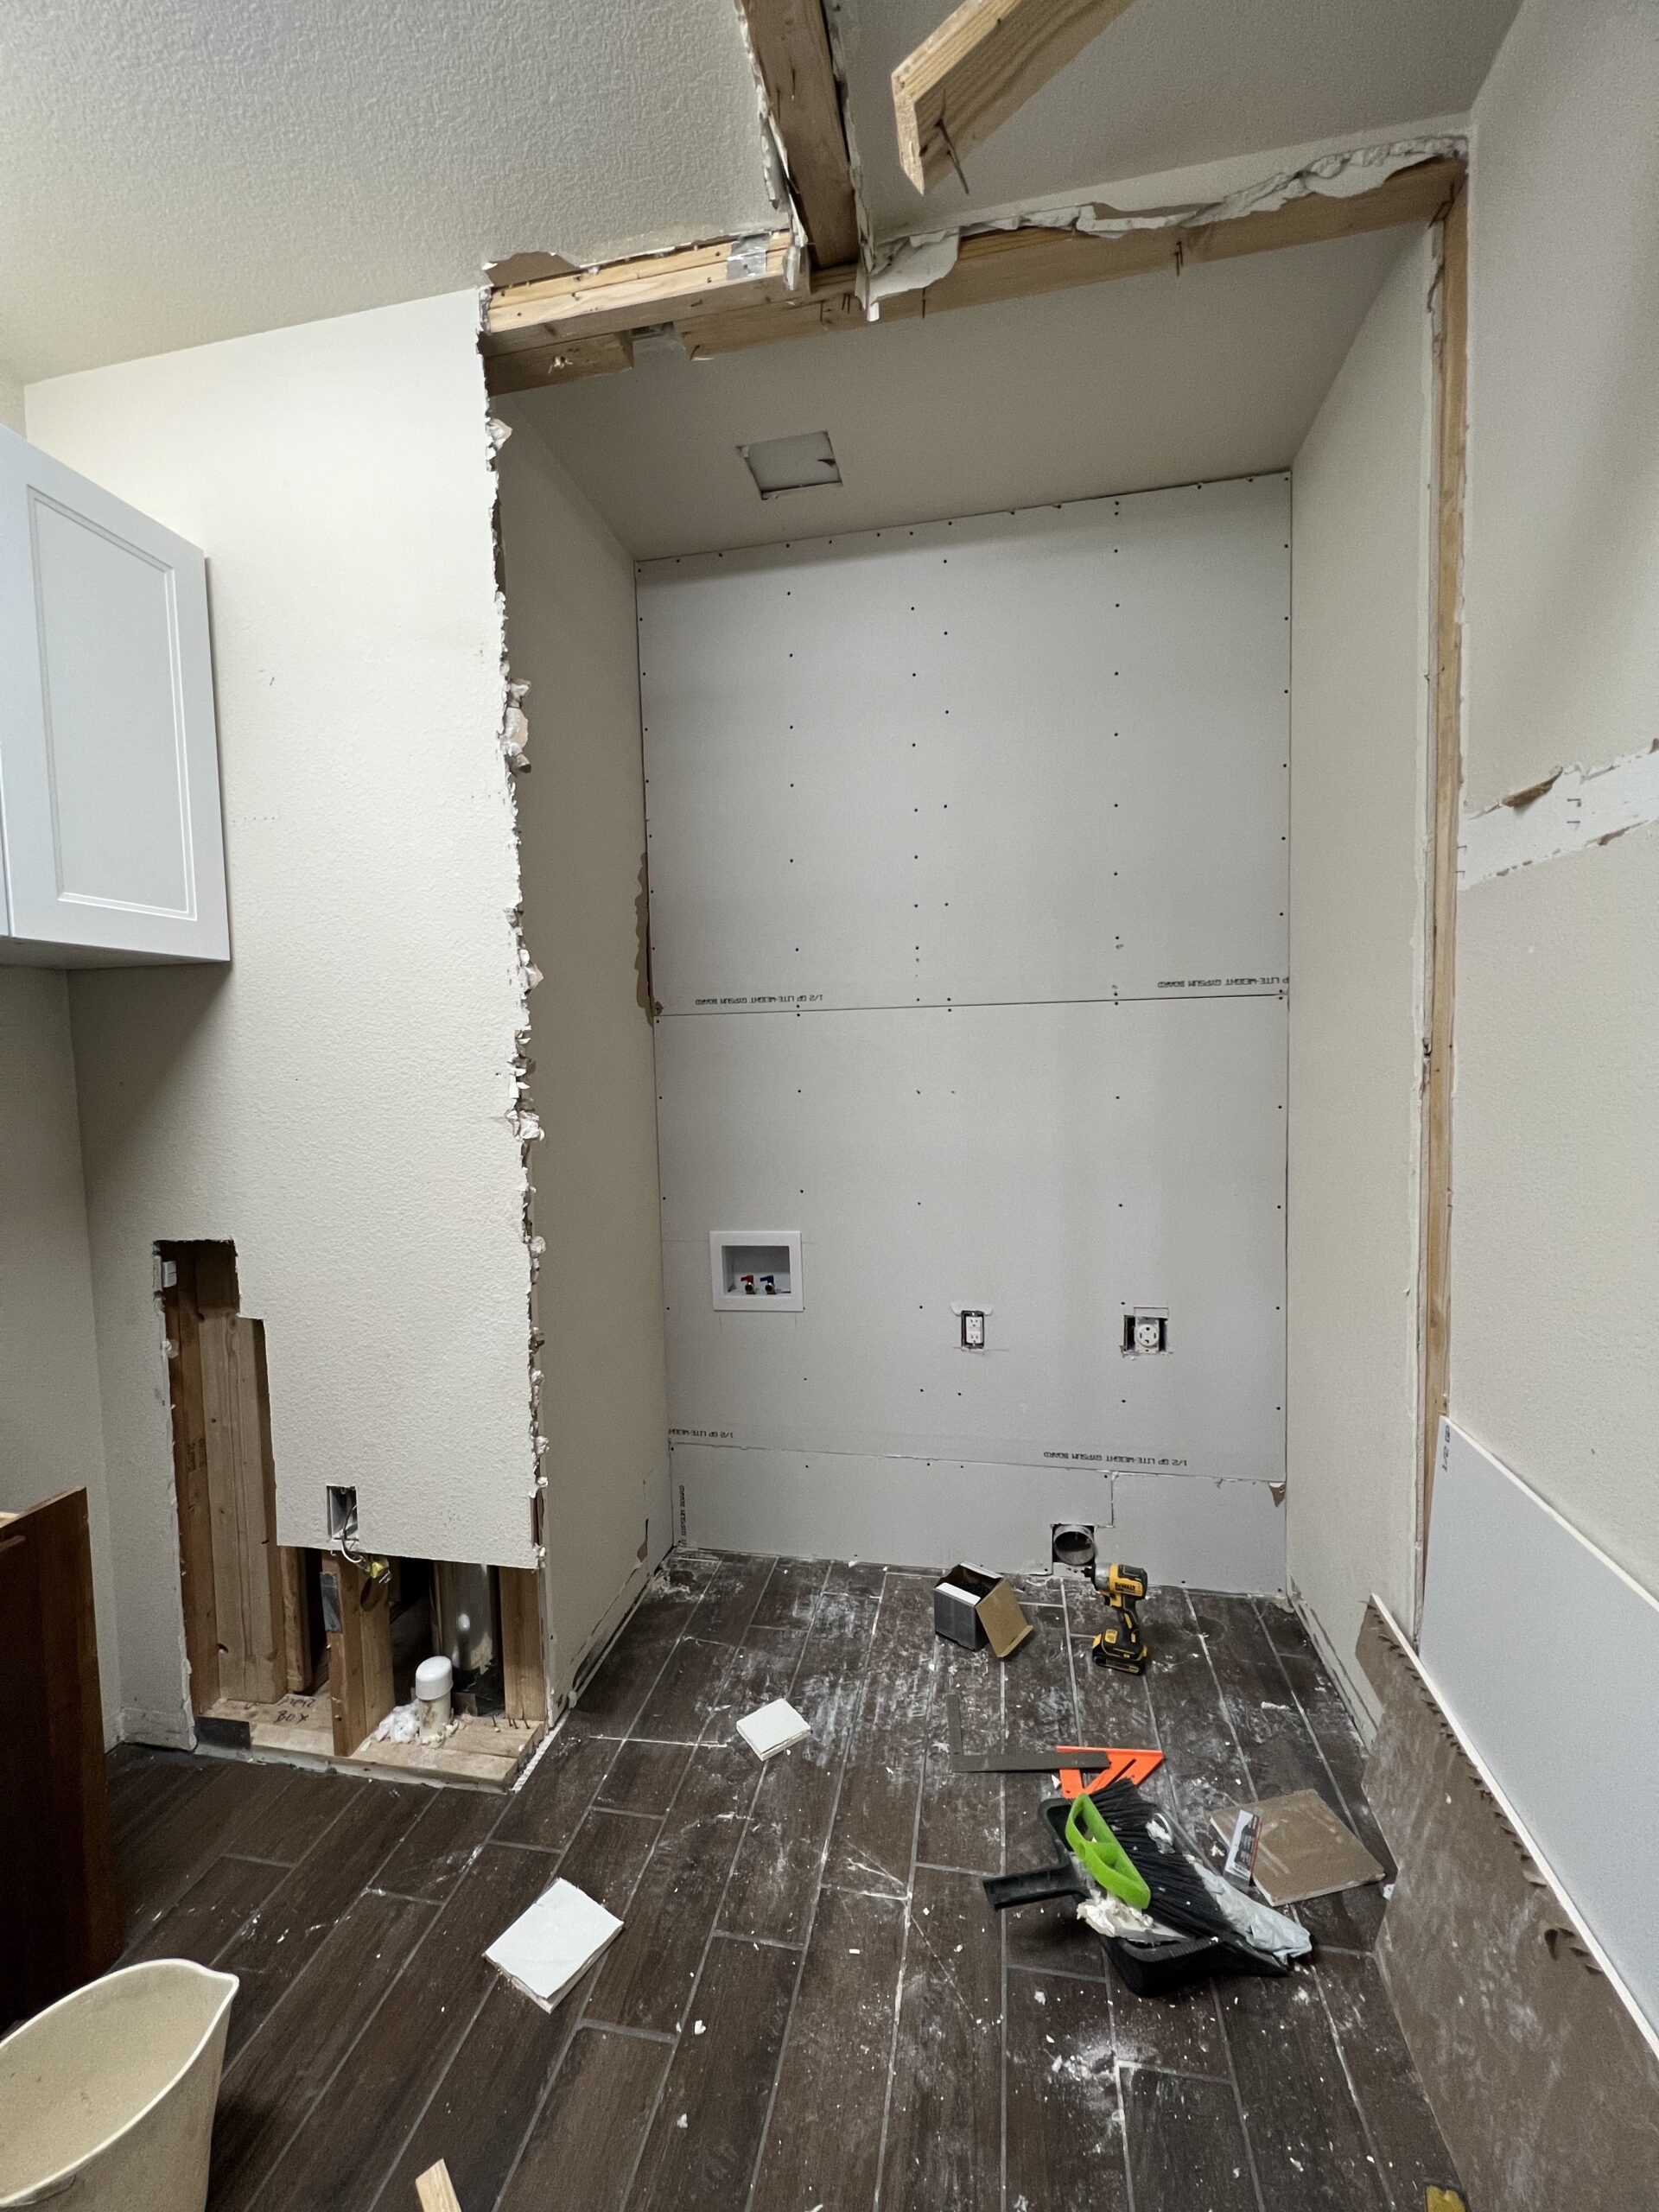
The Room is Bigger!
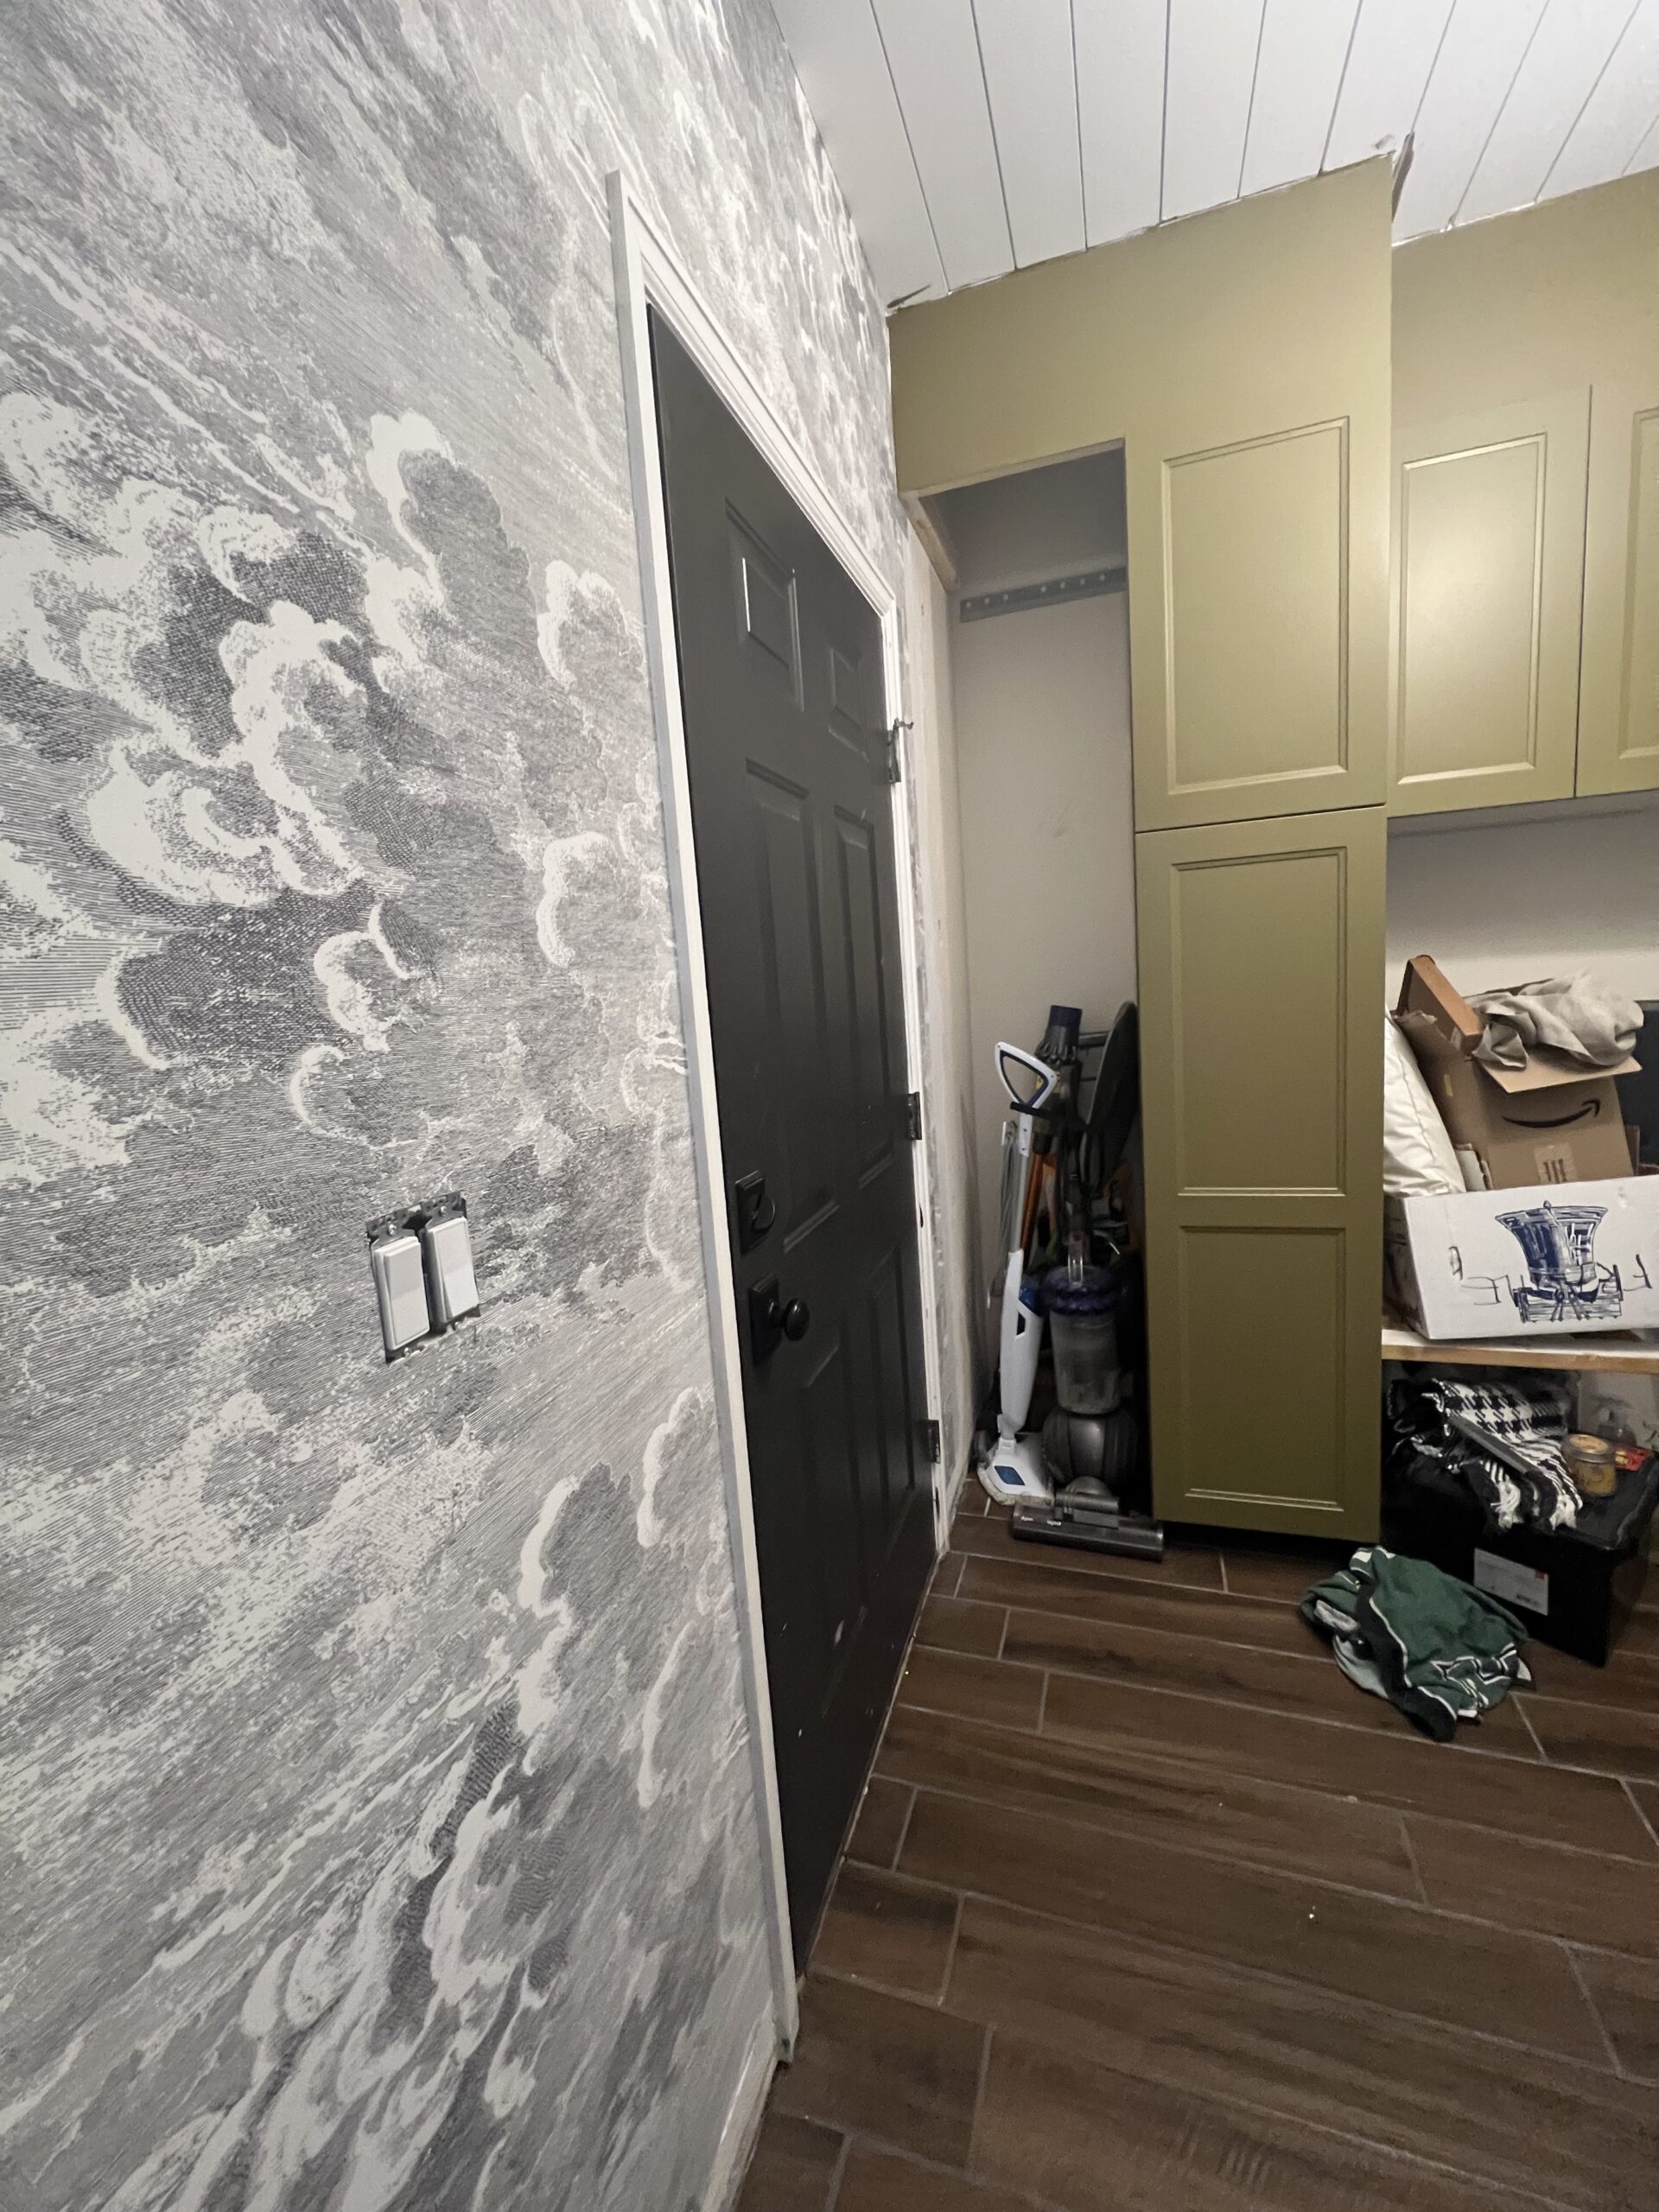
I felt in the thick of it once you could see straight from the front of the house to the back. (We took room from an over-sized powder room to make the laundry/mudroom bigger) Fortunately the see-through stage didn’t last long, as T worked around-the-clock to get the plumbing and electric systems hooked back up. AND we had family in town that unquestionably helped us get drywall installed. It may have helped that everyone was in town for a big birthday party we were throwing at our house. =D
But look! A little drywall, a lot of tile and the laundry/mudroom was finally bigger! (And the powder room on the other side private again). It was a huge turning point.
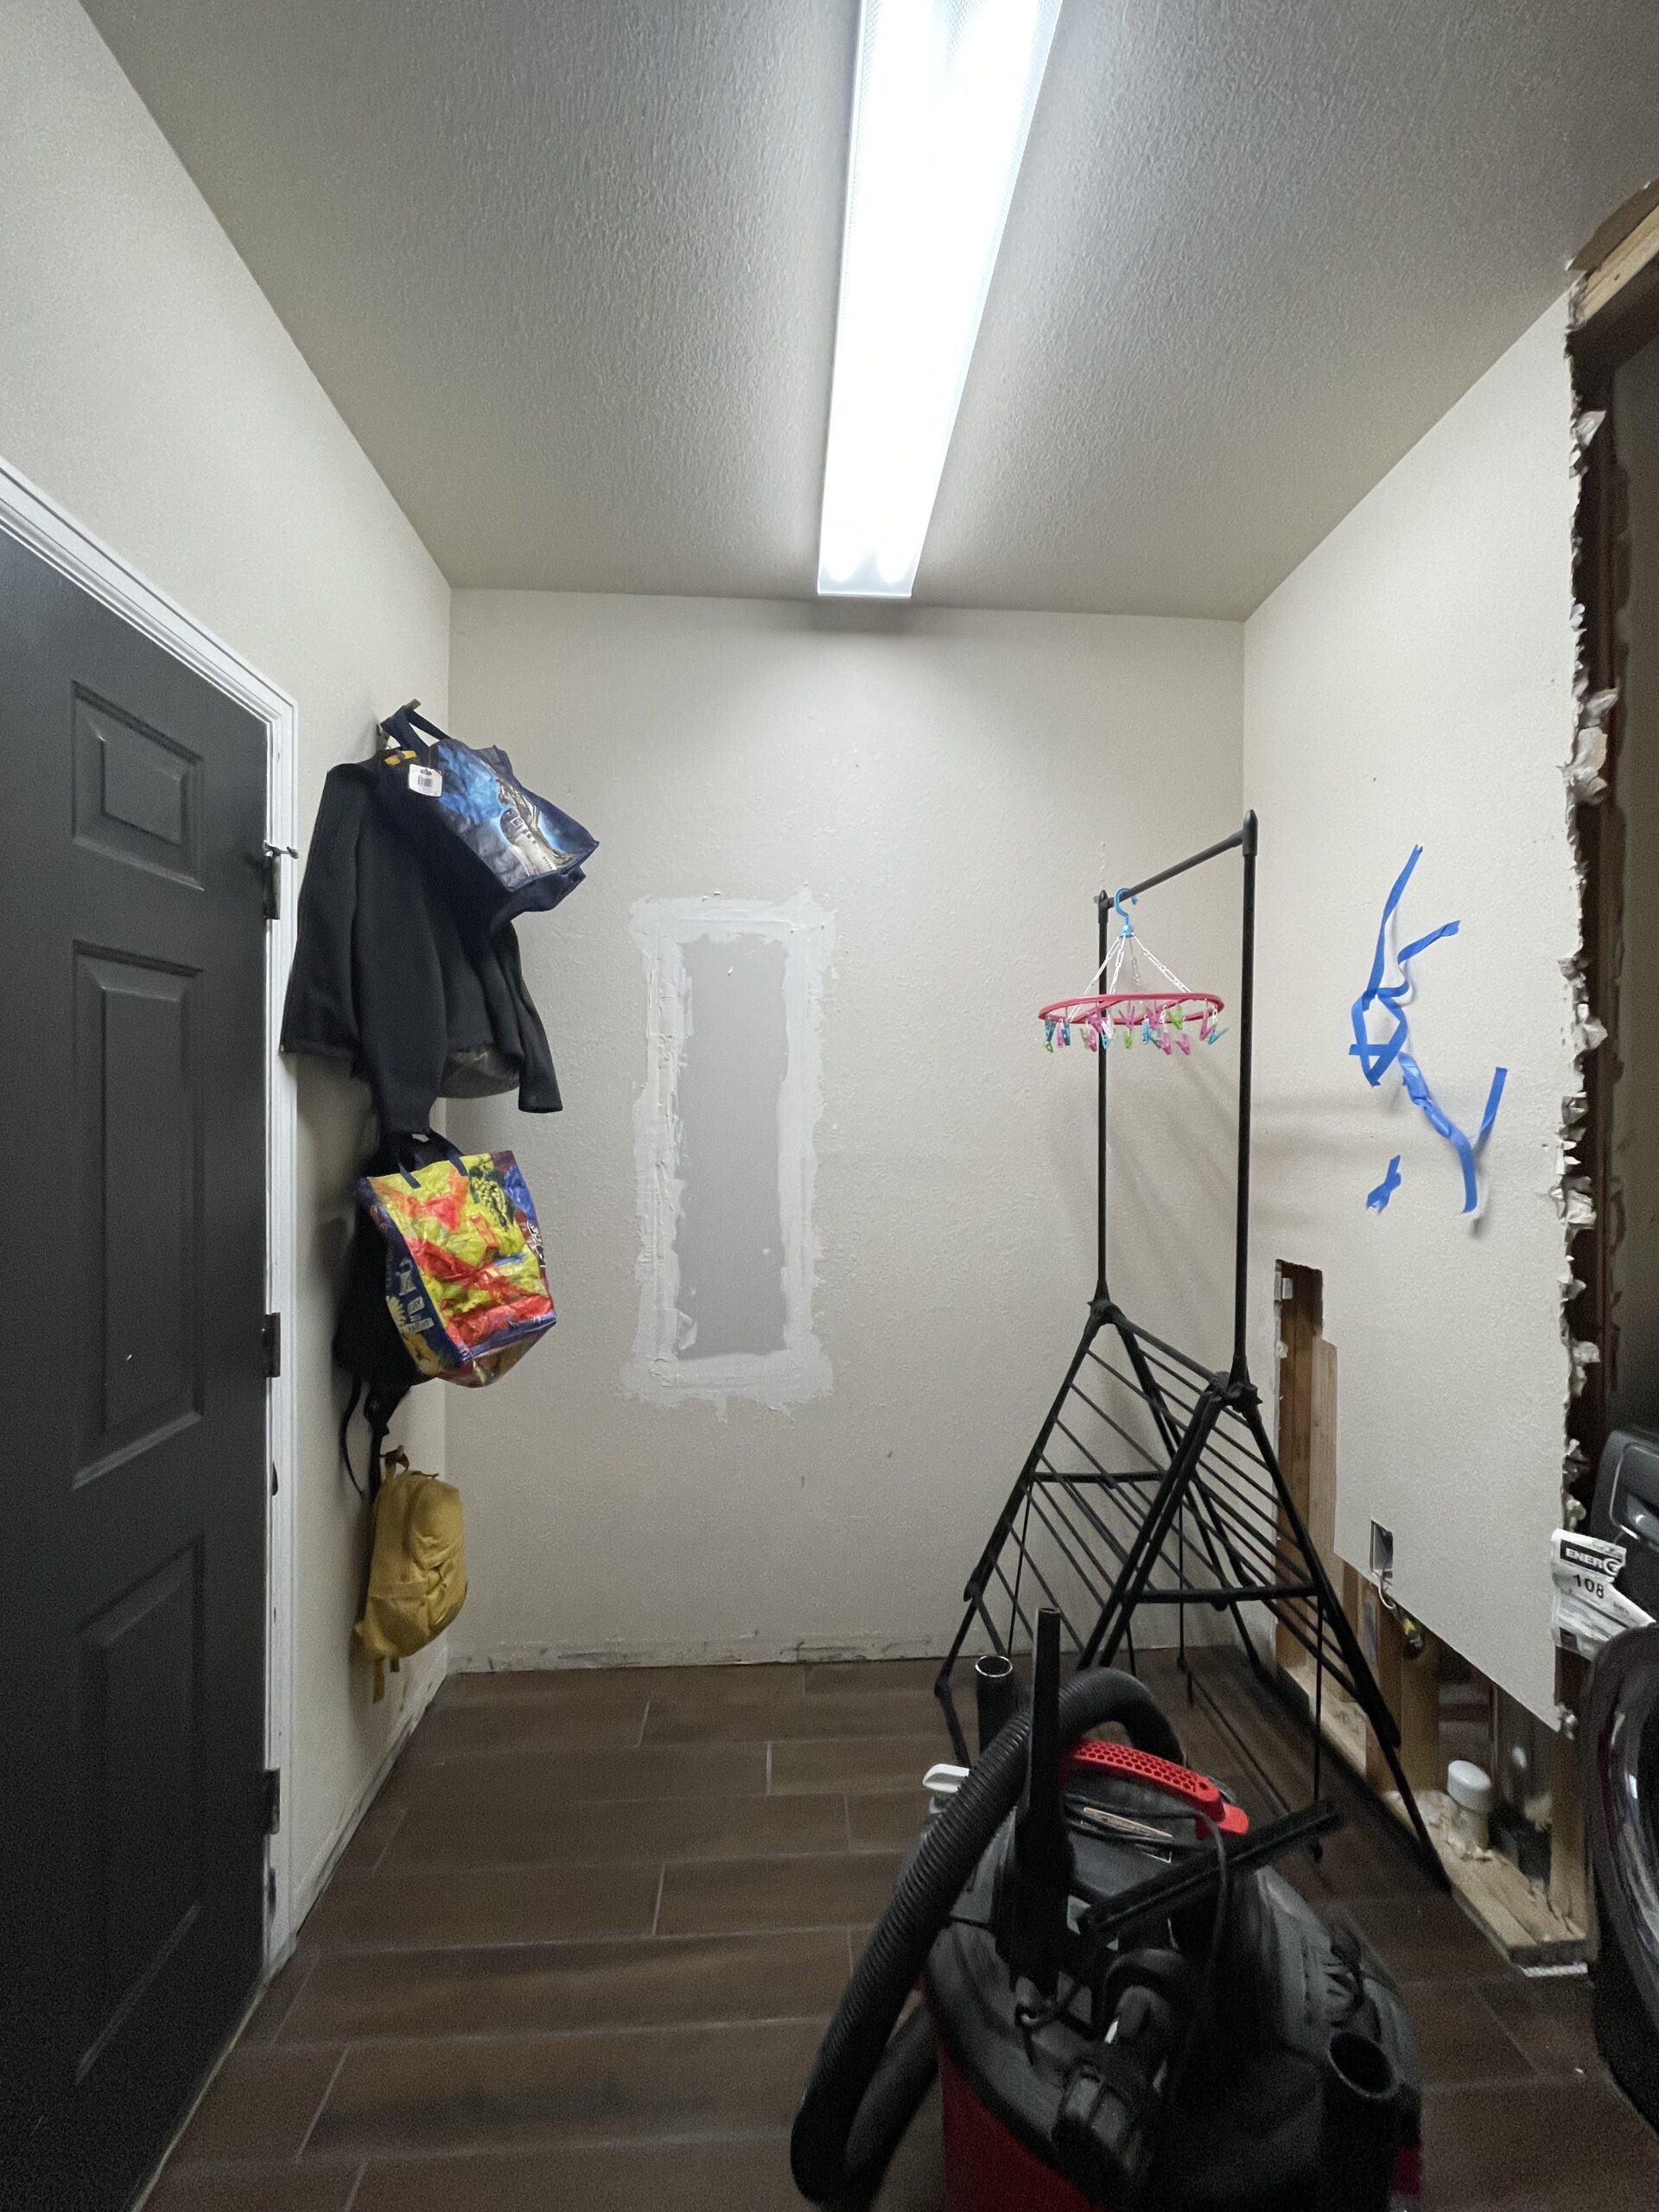
Doing Our Best With What We Had
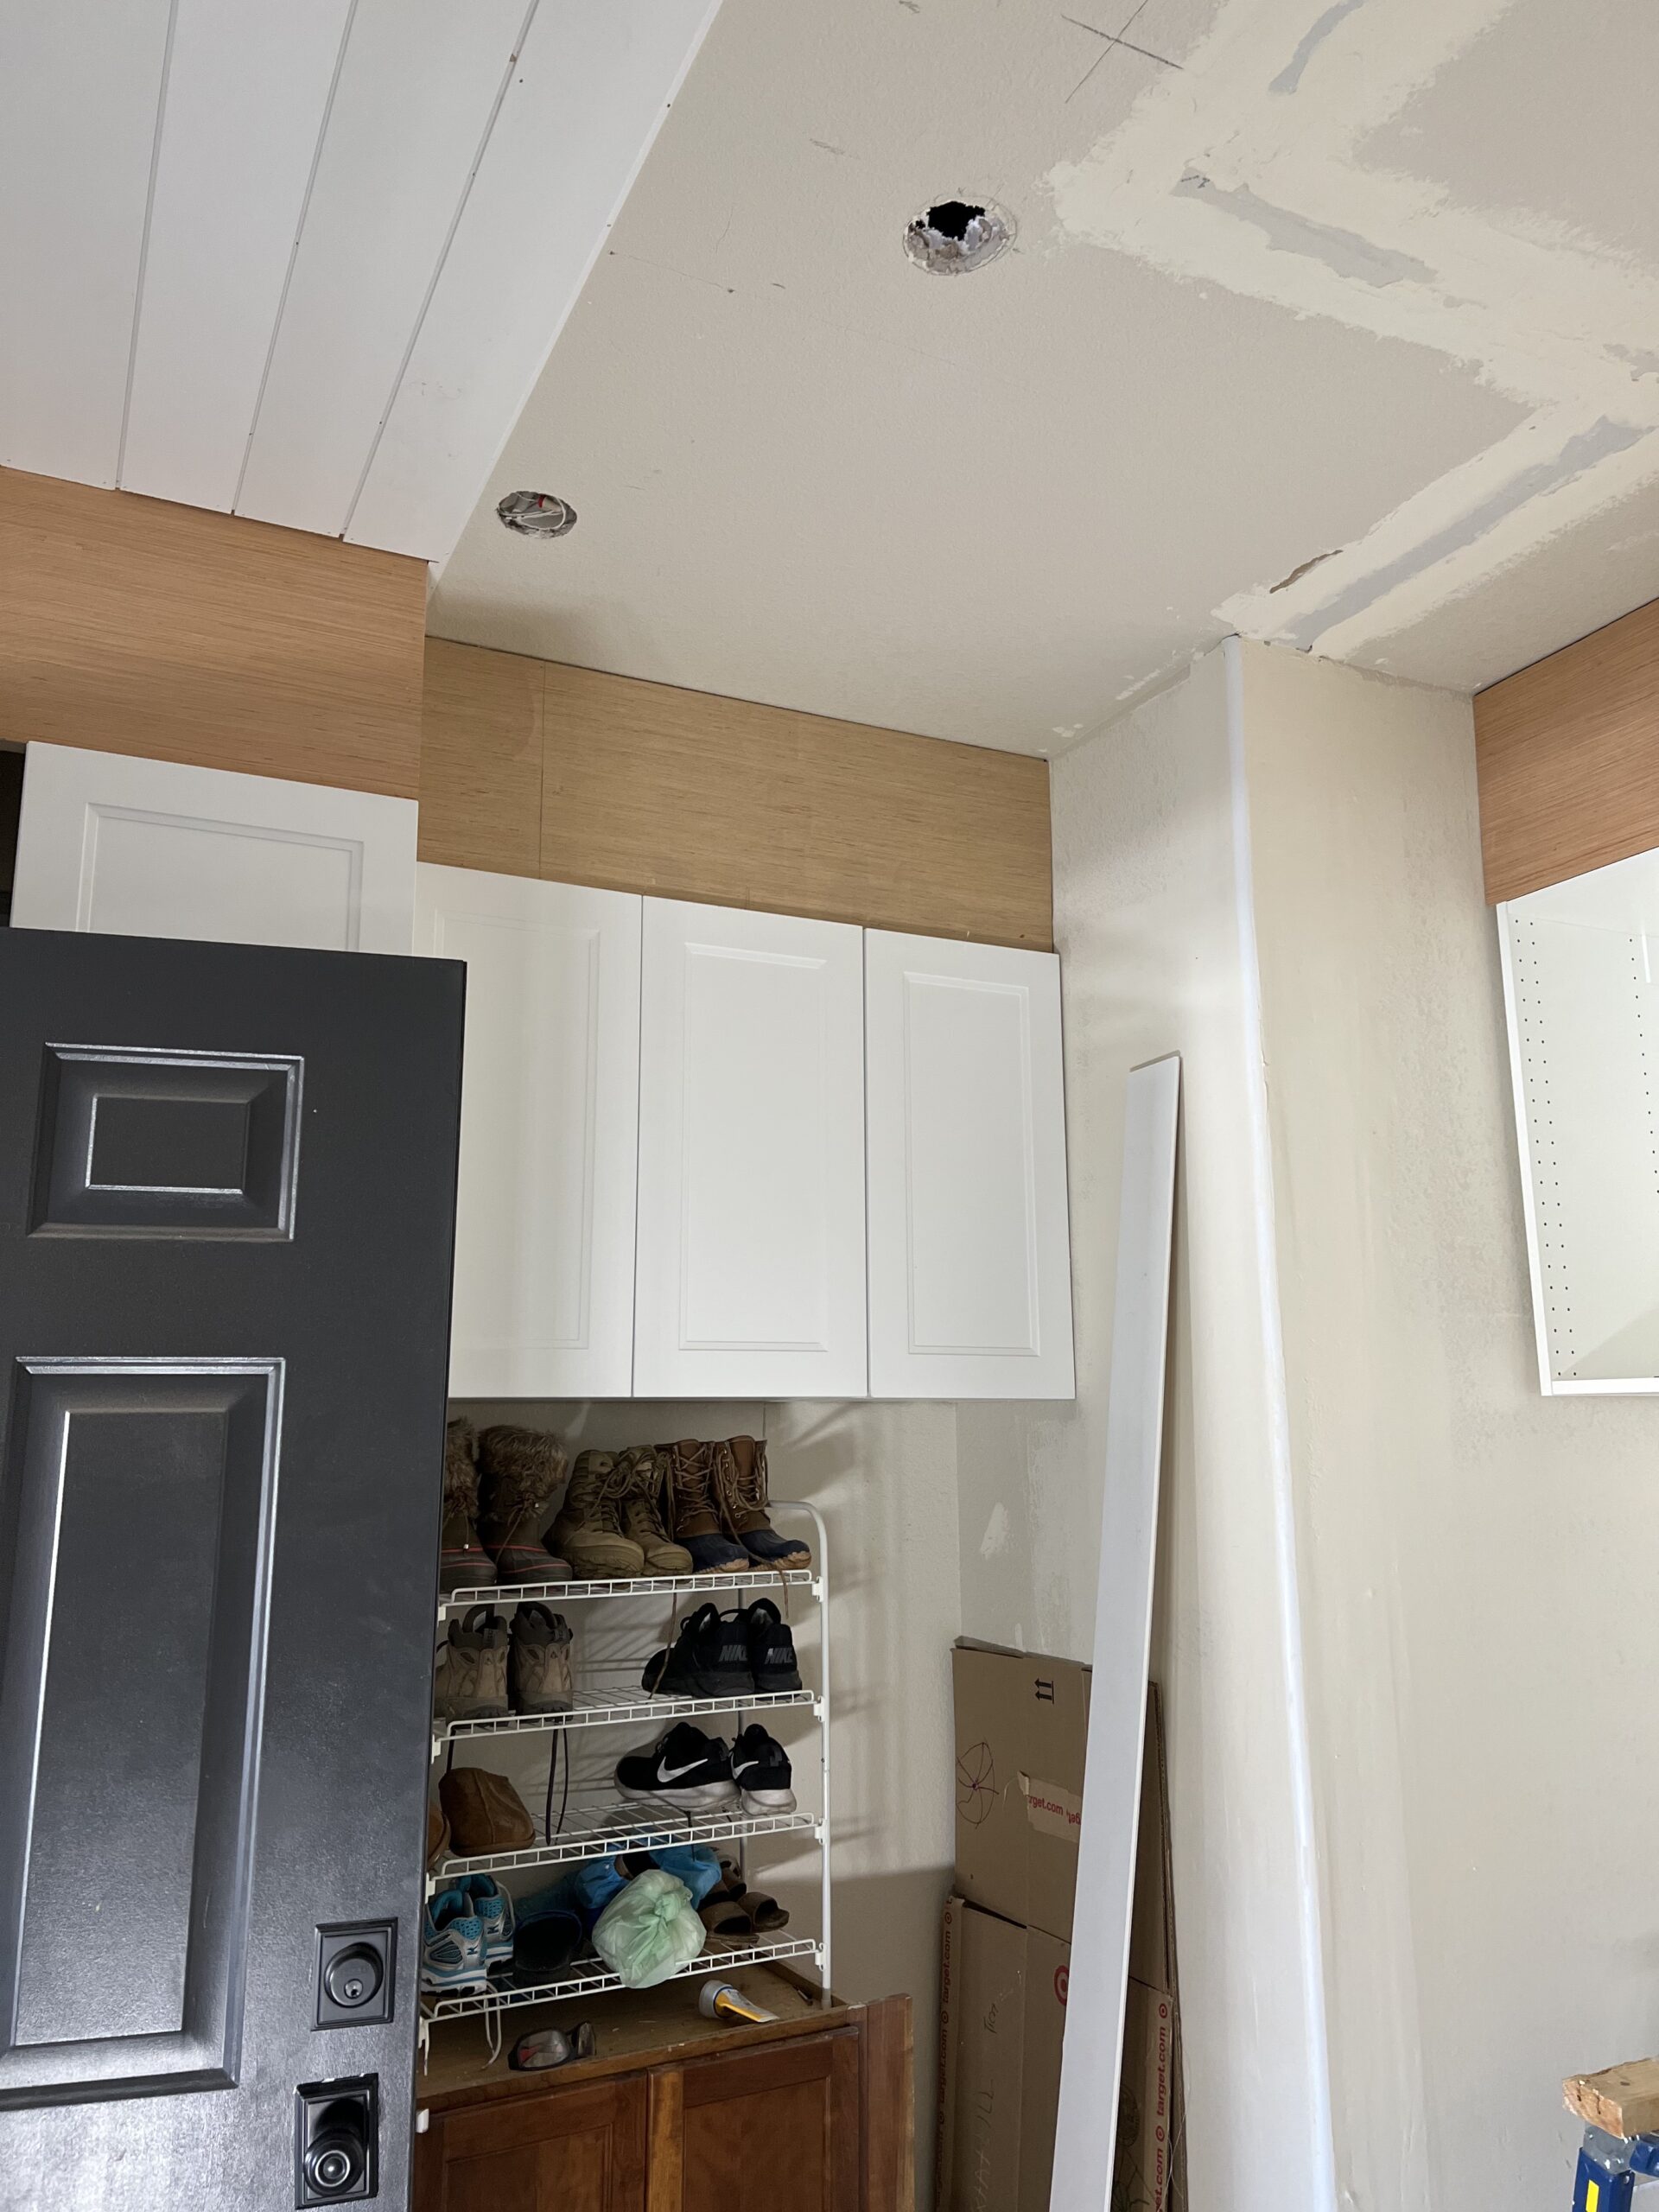
Again, we worked evenings and weekend to to what we could with the time we had. We installed more drywall. We installed cabinets. We ripped out the old ironing board cabinet. This method also proved helpful to keep up momentum with this project. There were daunting, laborious tasks we undoubtedly avoided. However, had we focused on doing those things first, it may have slowed us down even more.

Dedicated Help Arrives!
First and foremost: shoutout to the skilled and willing people in my life who are willing to do the damn thing with me to achieve my vision.
My brother-in-law visited for a long weekend as my Christmas present (this is my kind of present!!) to help me with drywall everywhere needing it in the laundry/mudroom. LOOK AT HOW MUCH AMAZING PROGRESS WE WERE ABLE TO ACHIEVE. The drywall was a messy project made lengthier by utilizing scraps from the previously removed drywall in order to save money. Although this undertaking made the process a little slower, the domino effect on the rest of this room was incredible: there was taped and mudded drywall to attach cabinets to (bye-bye old laundry supply cabinet on the floor), to attach a future door to (see ya later laundry machine noise!), and to attach structure to in order to make the cabinets look taller.

The Real Fun Begins
After my usual madness of fervently picking a paint color, I finally landed on Valspar’s Valencia Moss and had Behr cabinet paint in Satin mixed with that color formula.
Once I had the paint mixed, I coated all of the cabinets and trim. I prefer to paint trim before I install it and then do minor paint touchups after installation.
Afterward, with all of the main cabinet painting behind me, I set out to install the wallpaper (Cole & Sons Wallpaper, Nuvolette in Dark Gray). This experience was my second time wallpapering and my first time installing by myself, and wouldn’t you know it, it’s reassuringly easier to install than installing wallpaper on the ceiling, especially when the ceiling is your first ever attempt at wallpaper. ;D
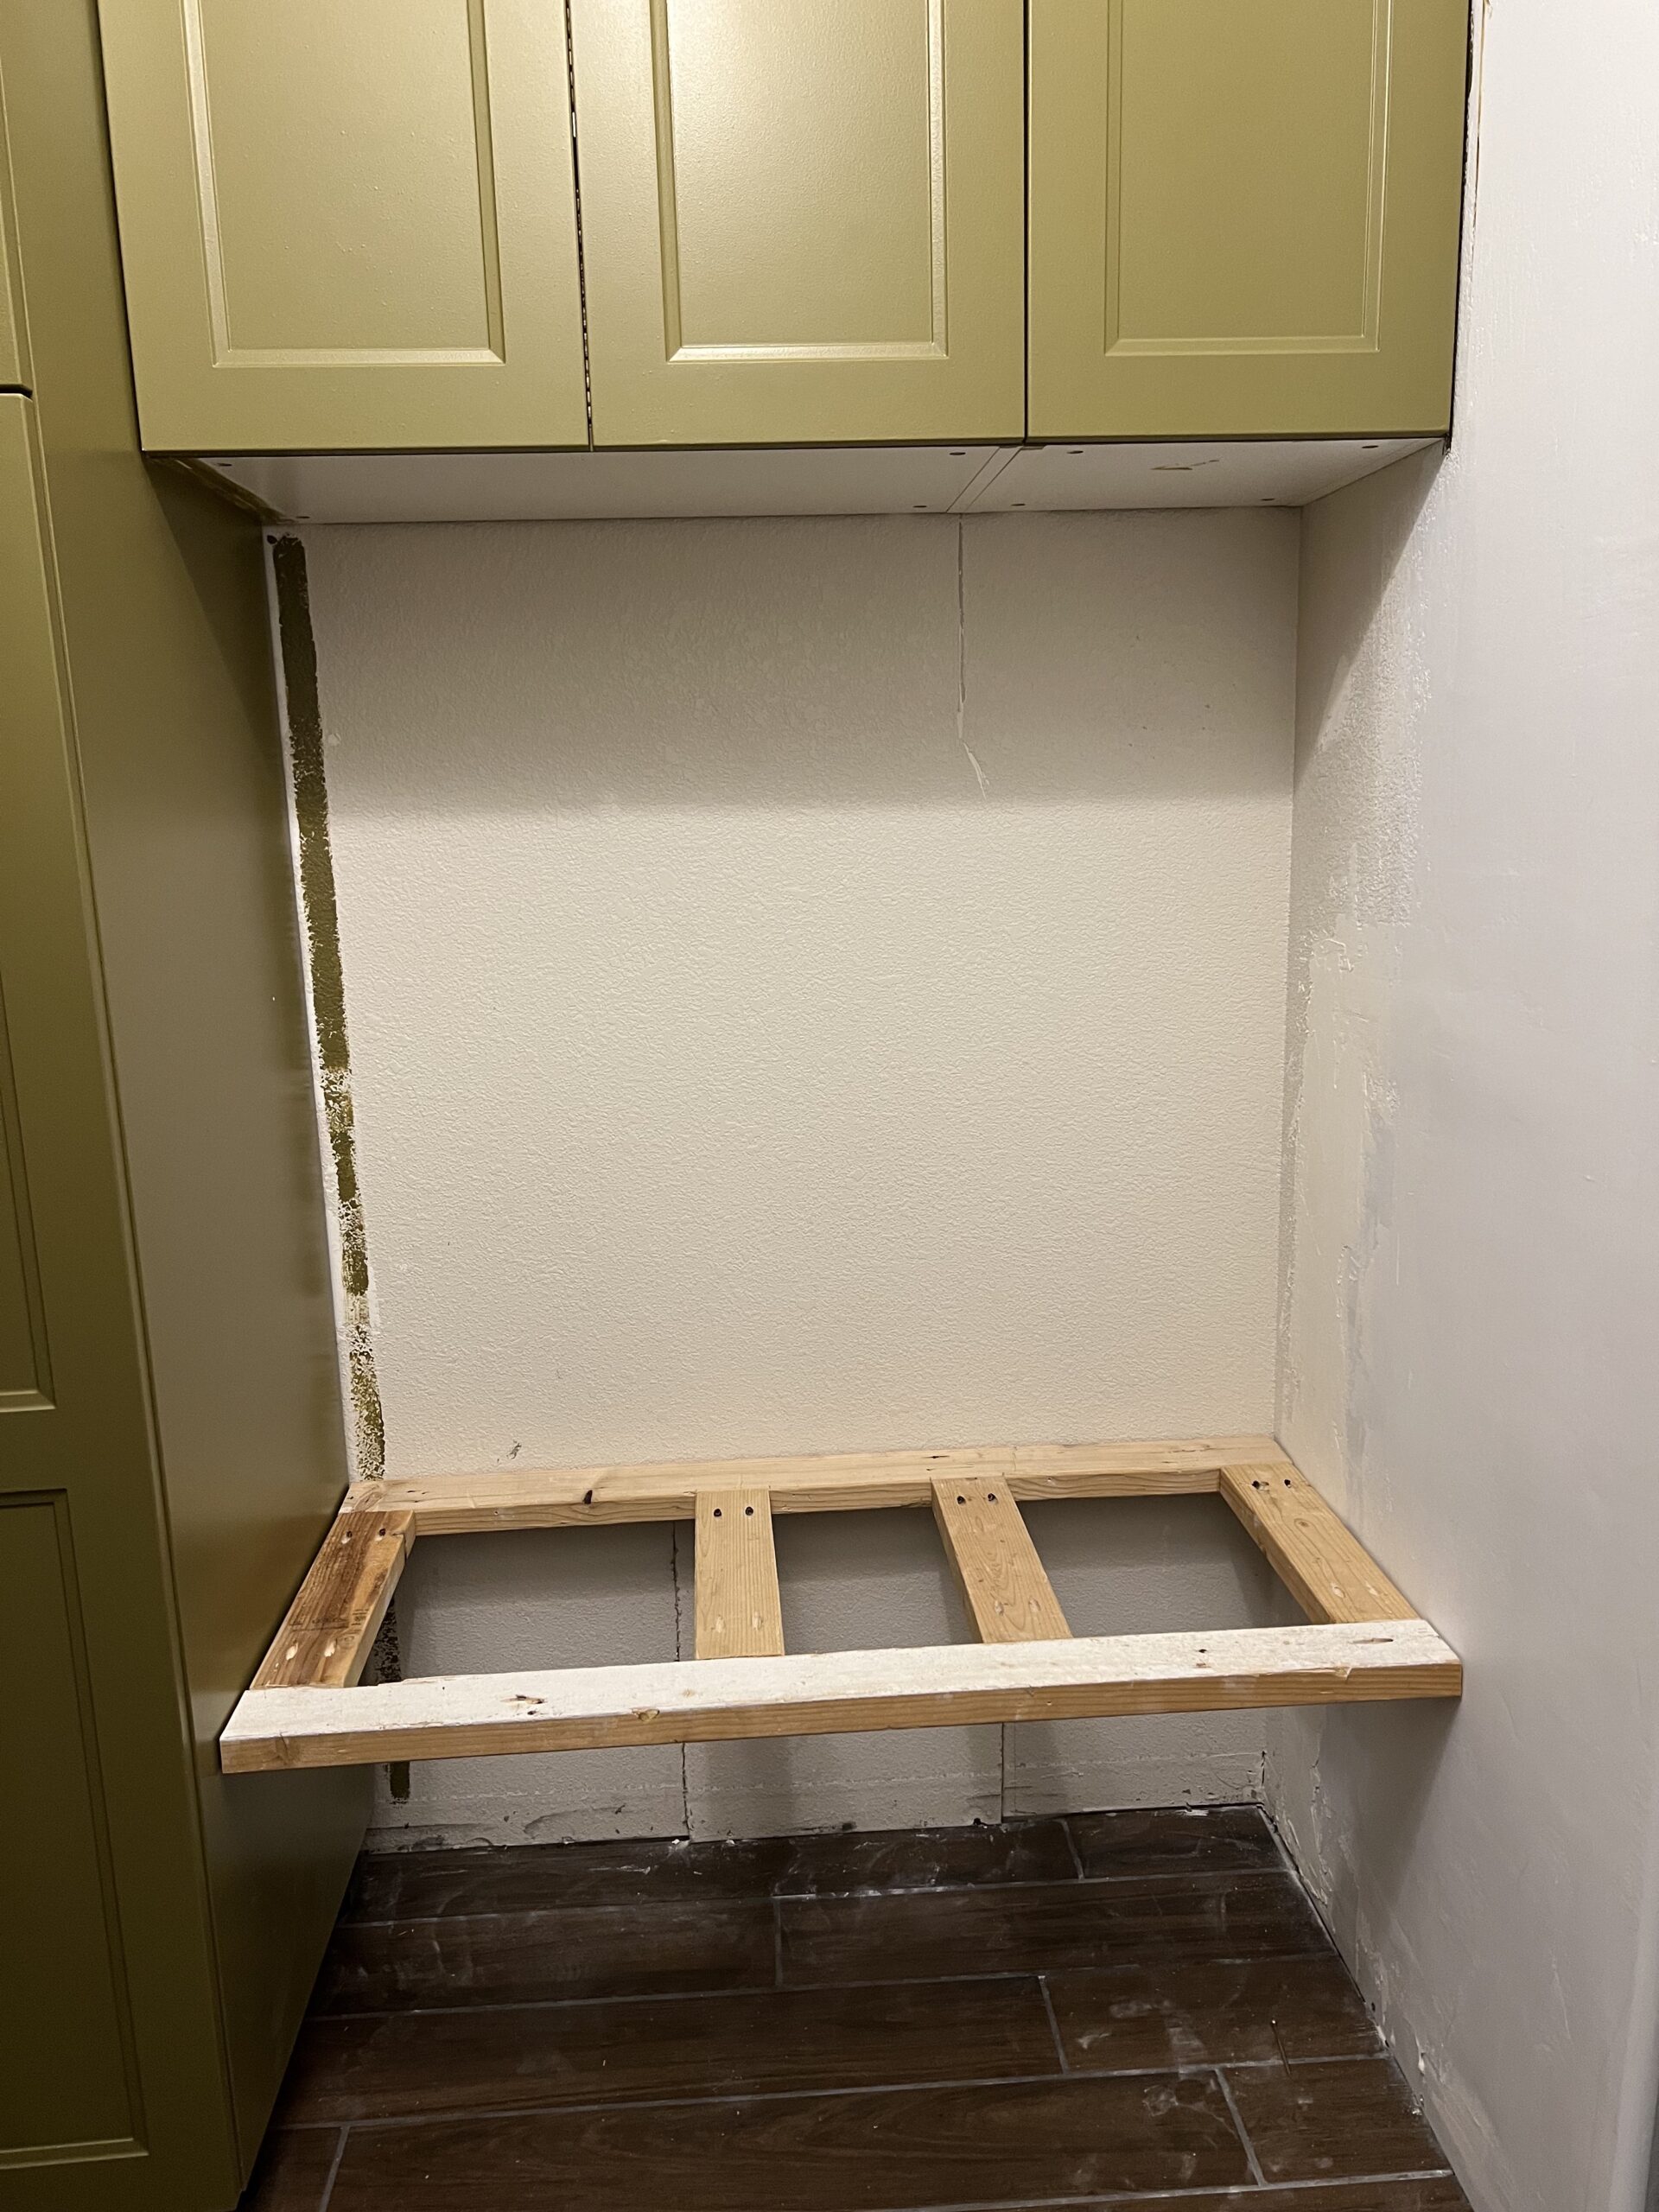
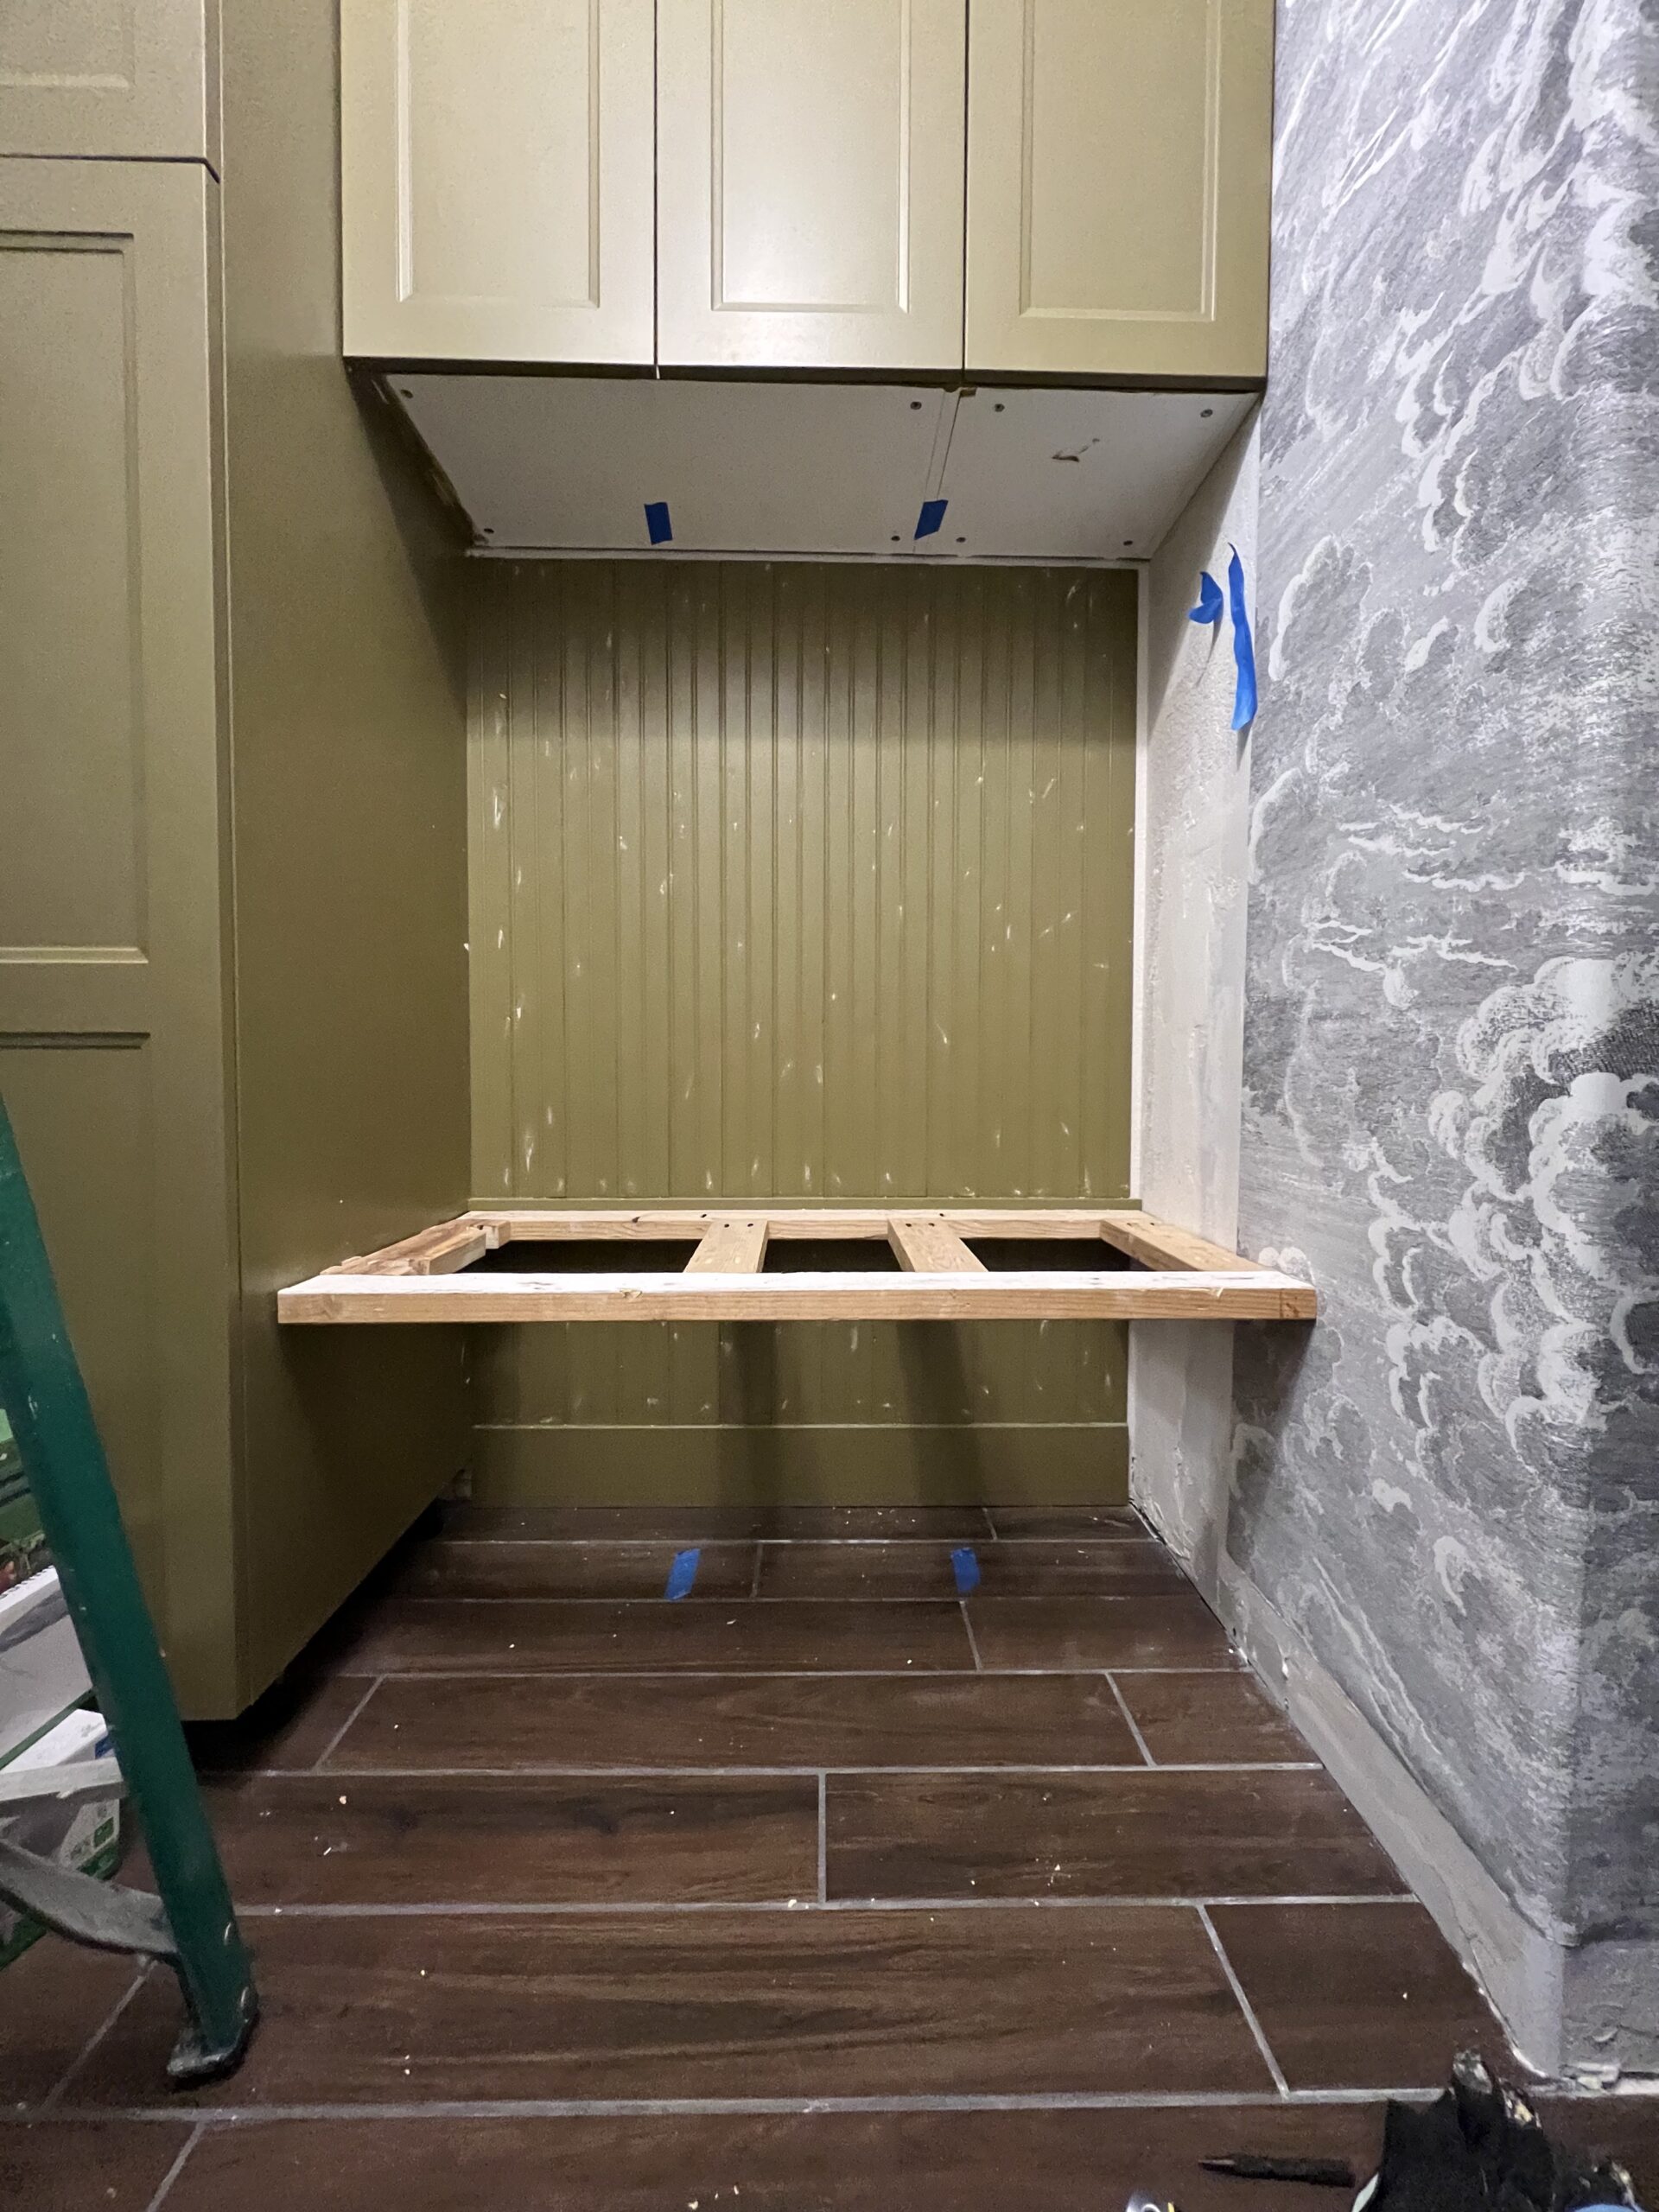
Once that quick and painless part installation was over, it was bench installation time. I used supports similar to the countertop supports (see below) under the two middle braces from Right On Bracket.
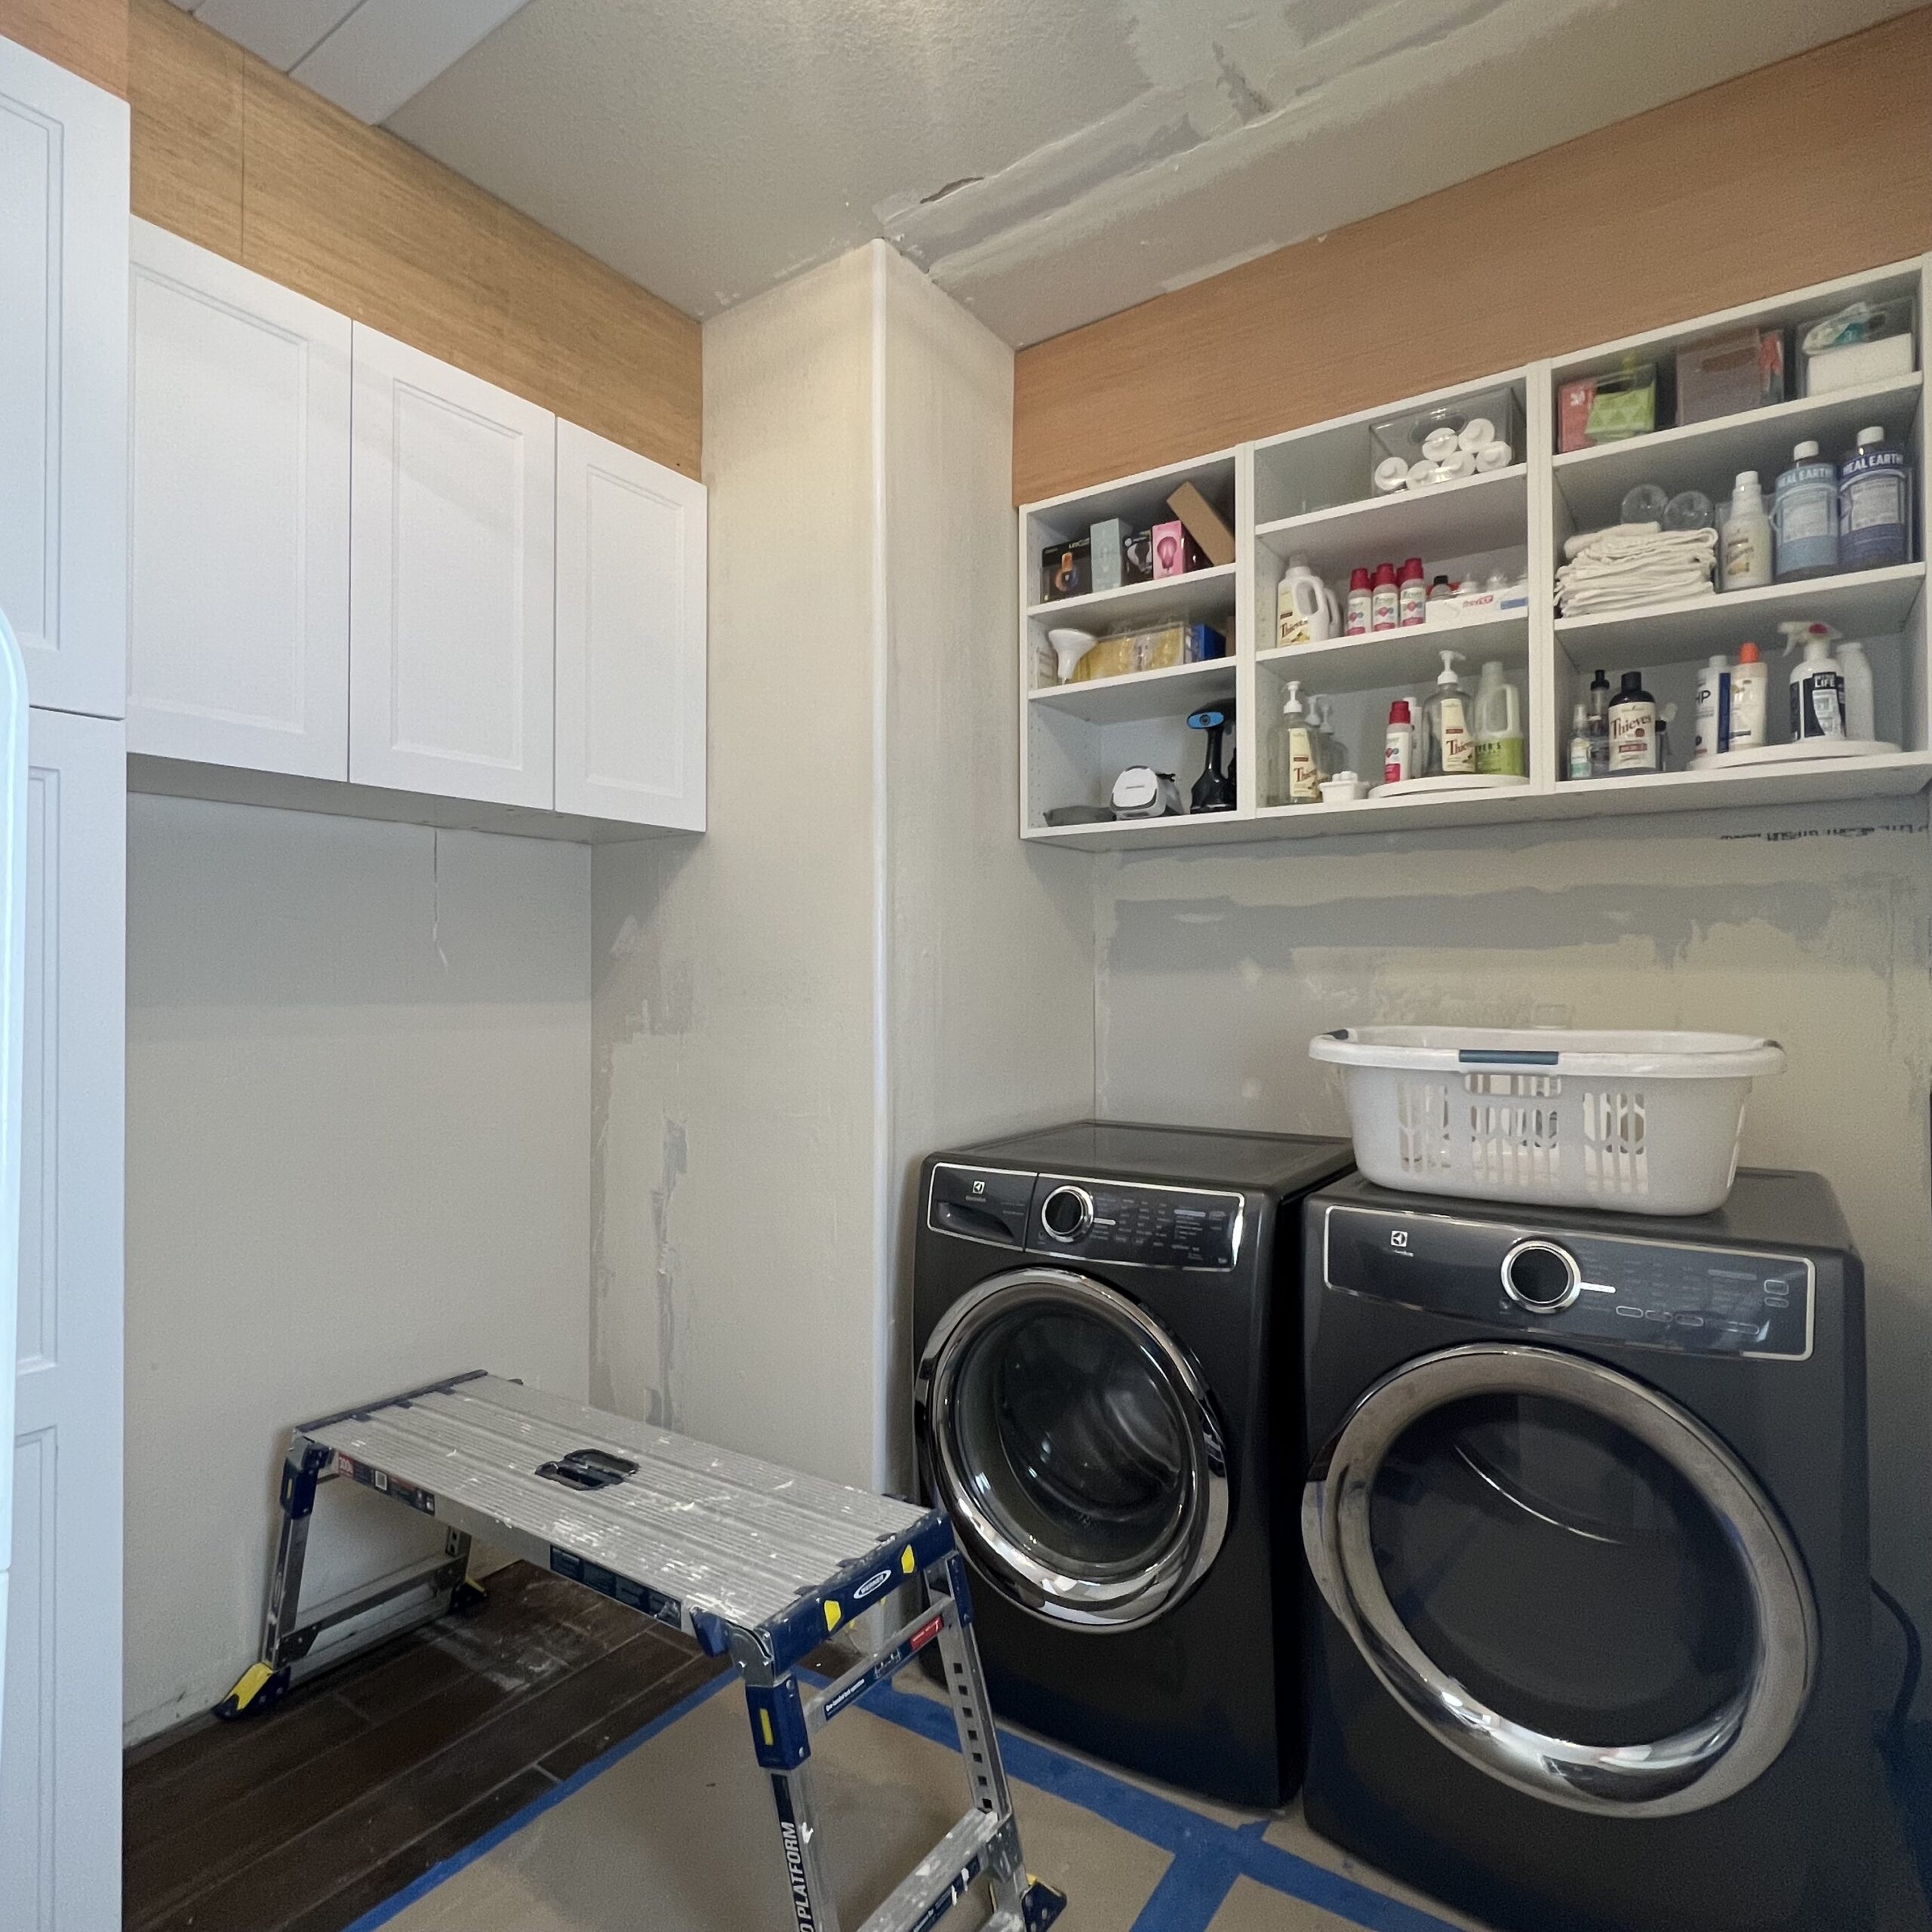
Ikea cabinets were on back order for what felt like an eternity. Like the theme of this remodel, instead of waiting for 100% of one task to be completed, we continued where we could: installing trim boards on the ceiling, installing crown moulding, installing hardware, installing a new chandelier.
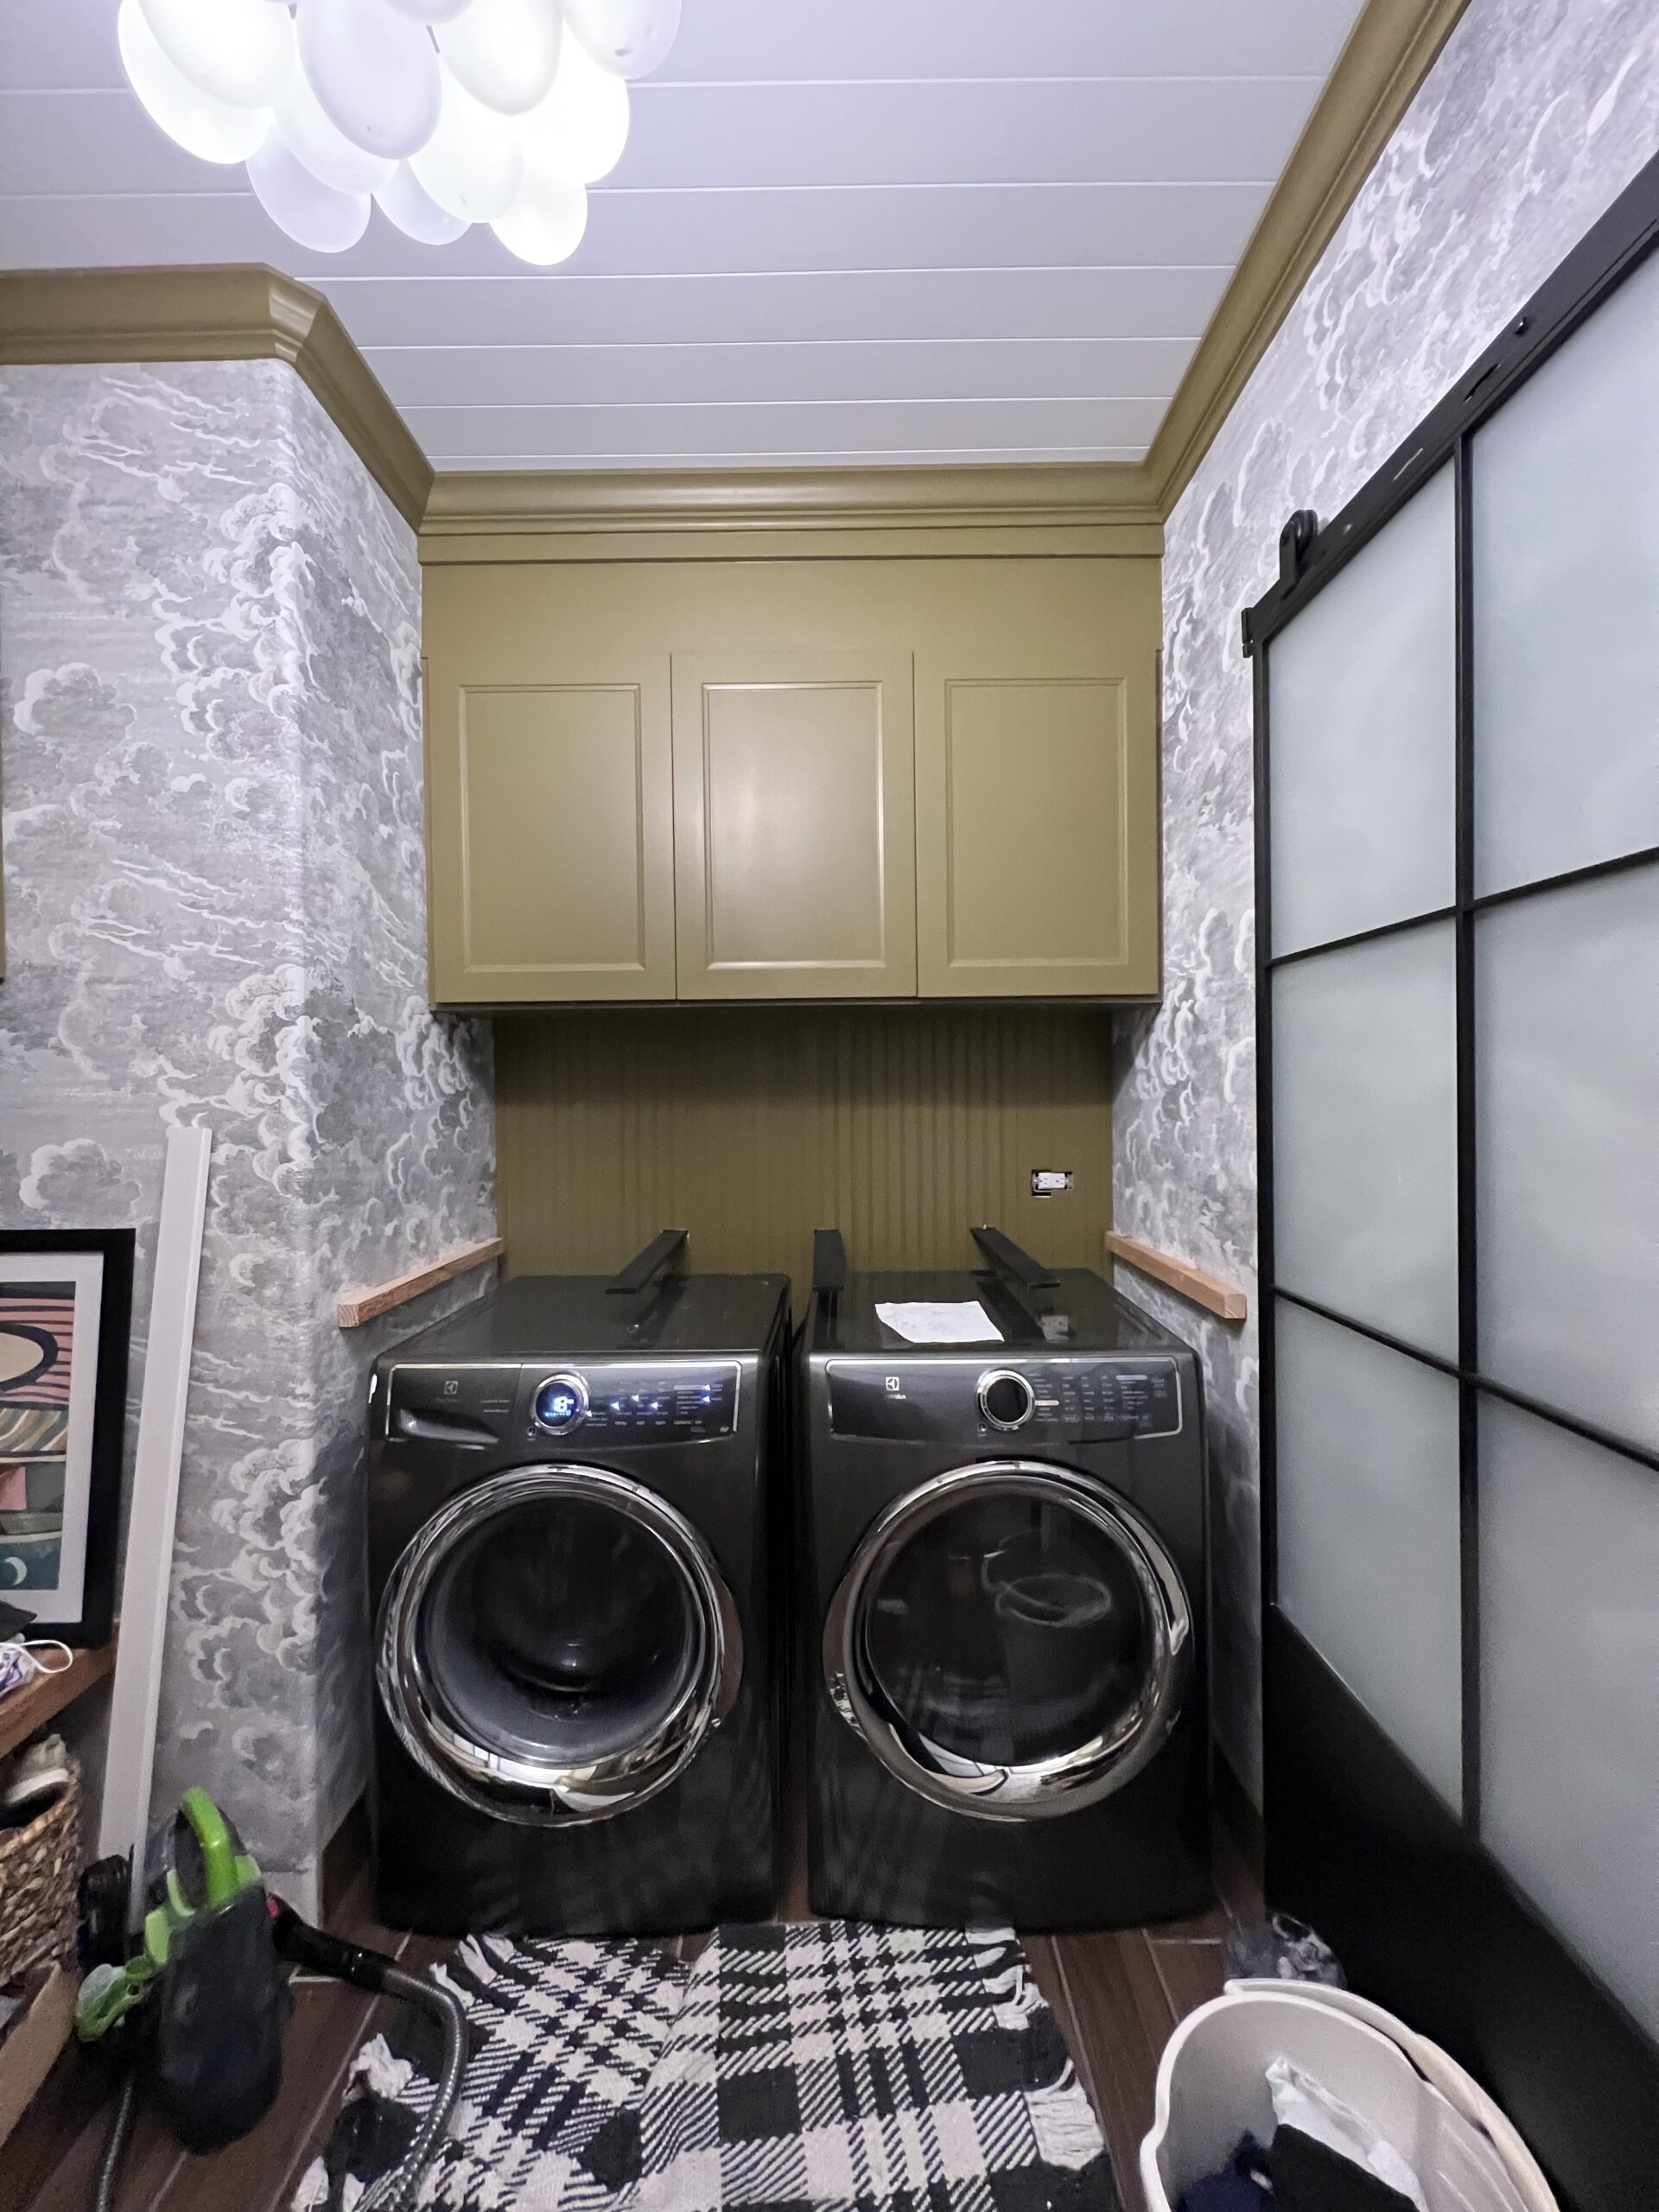
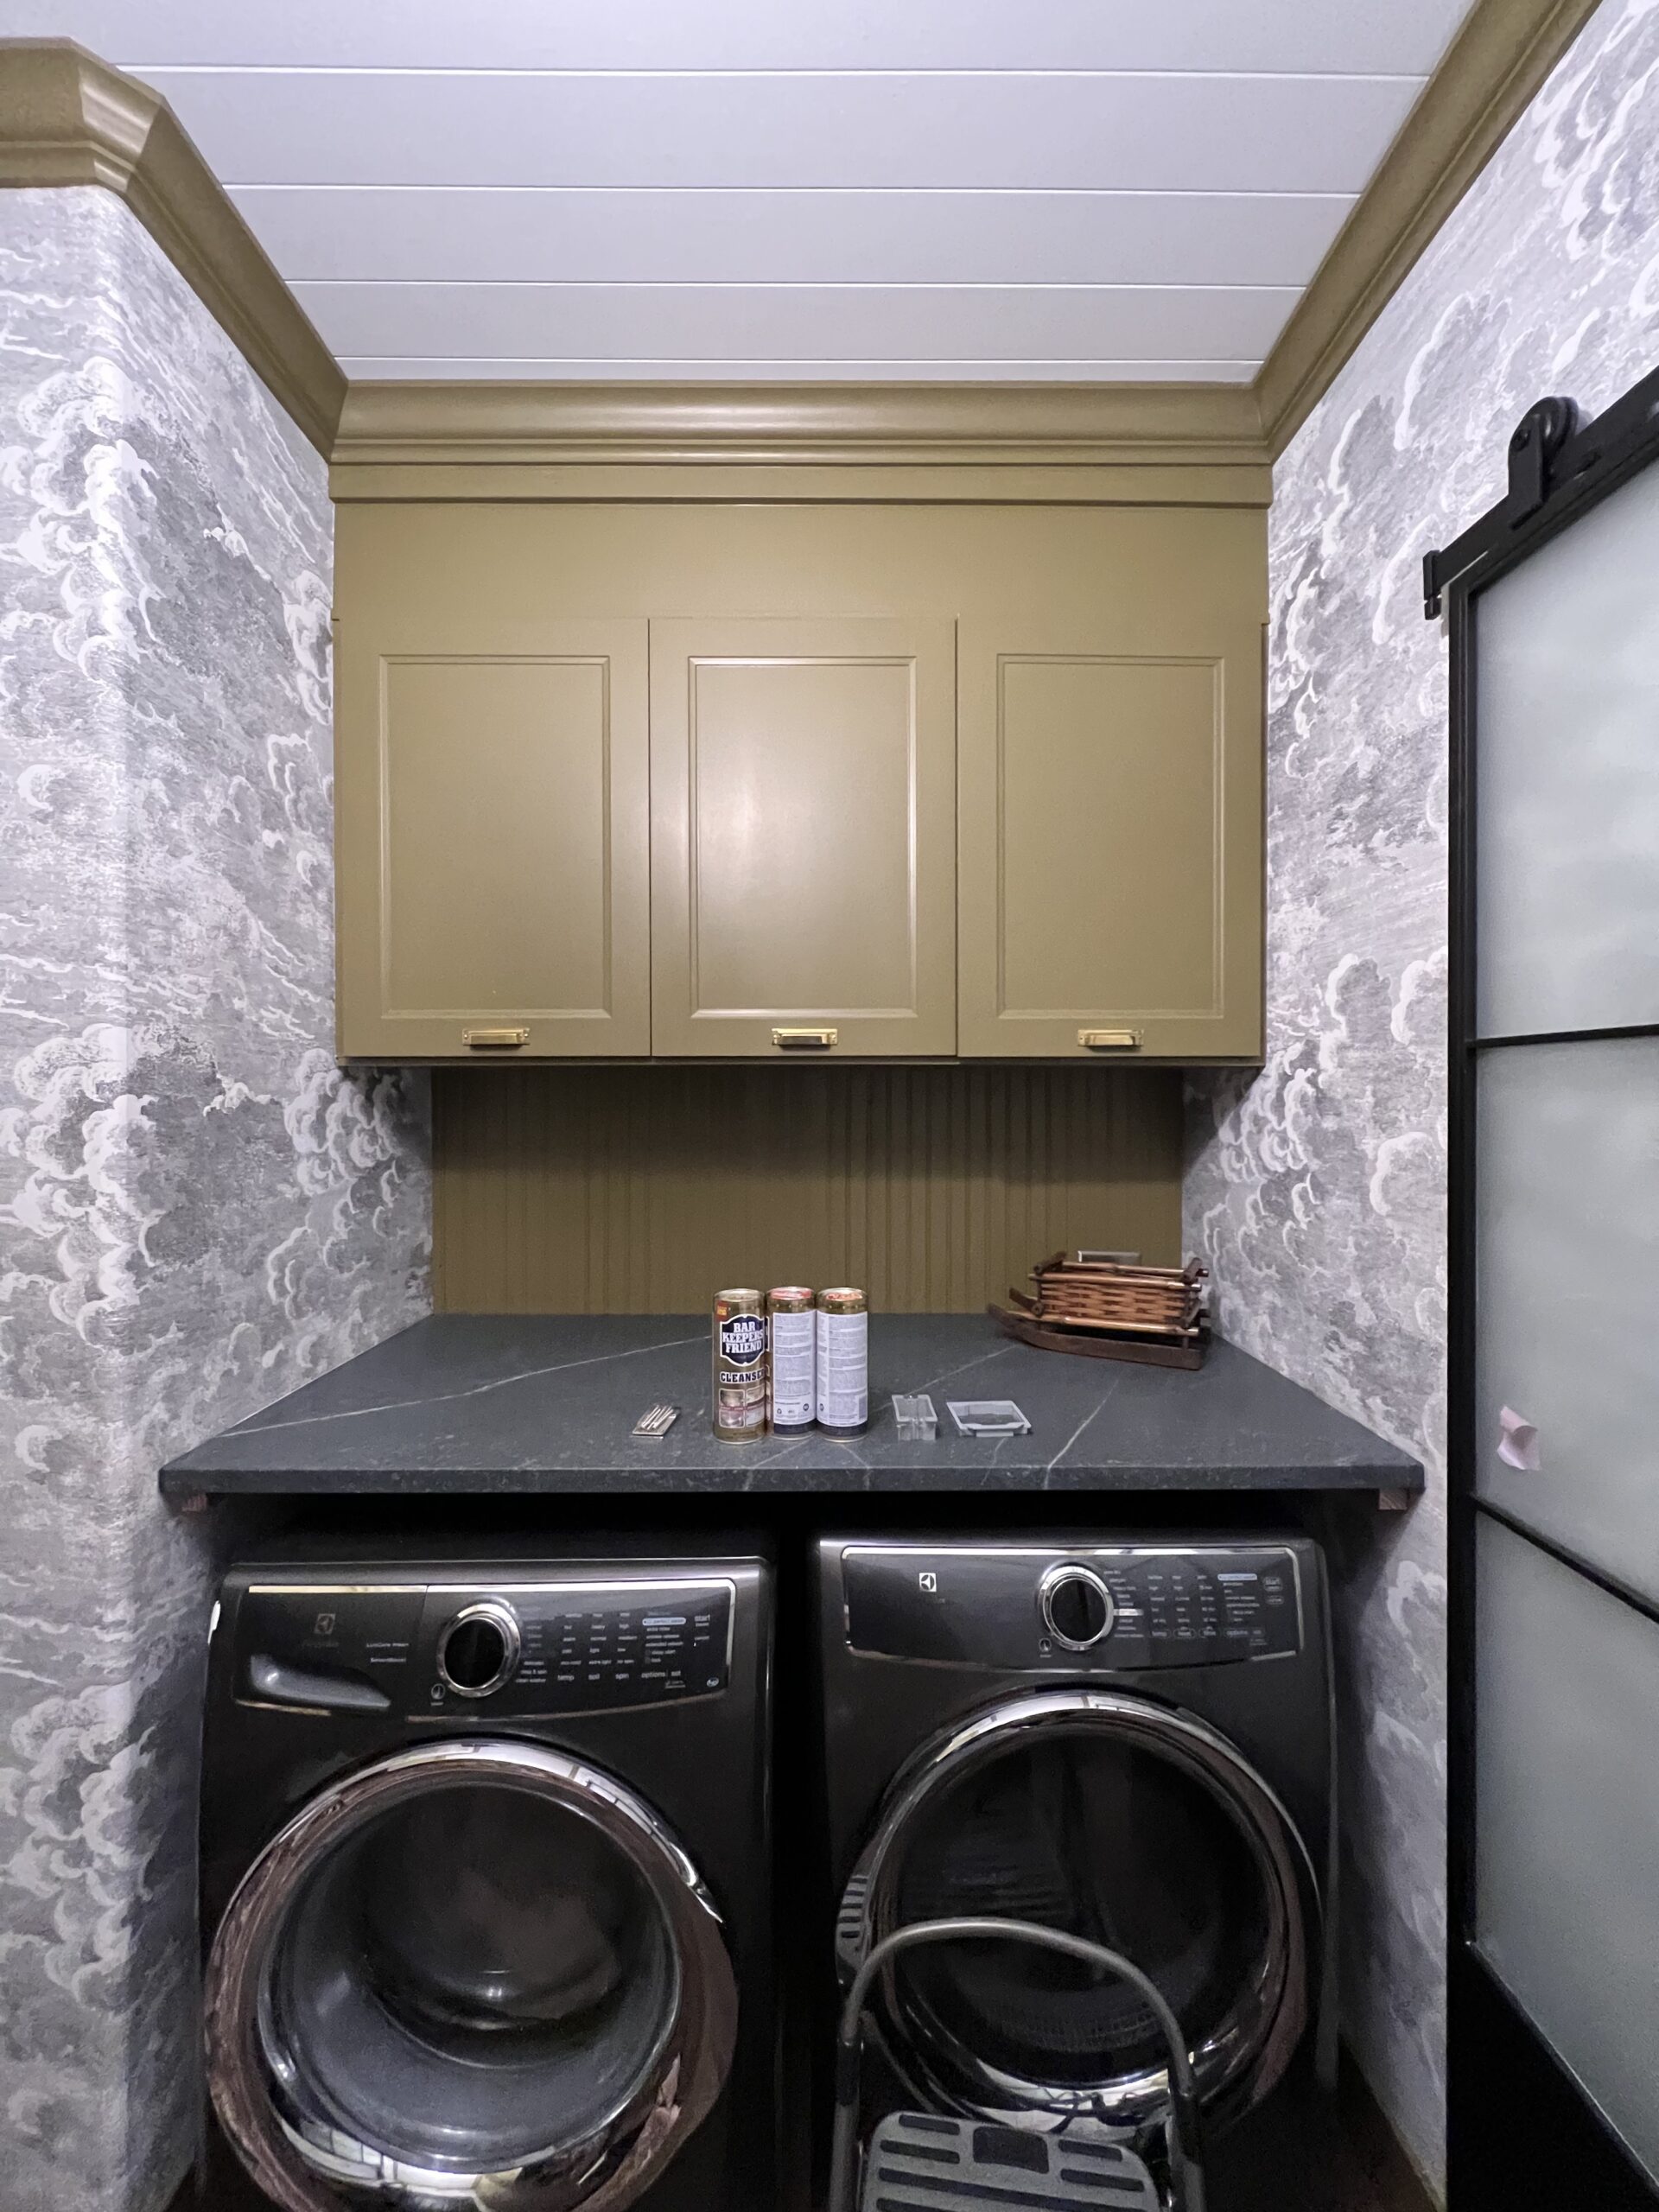
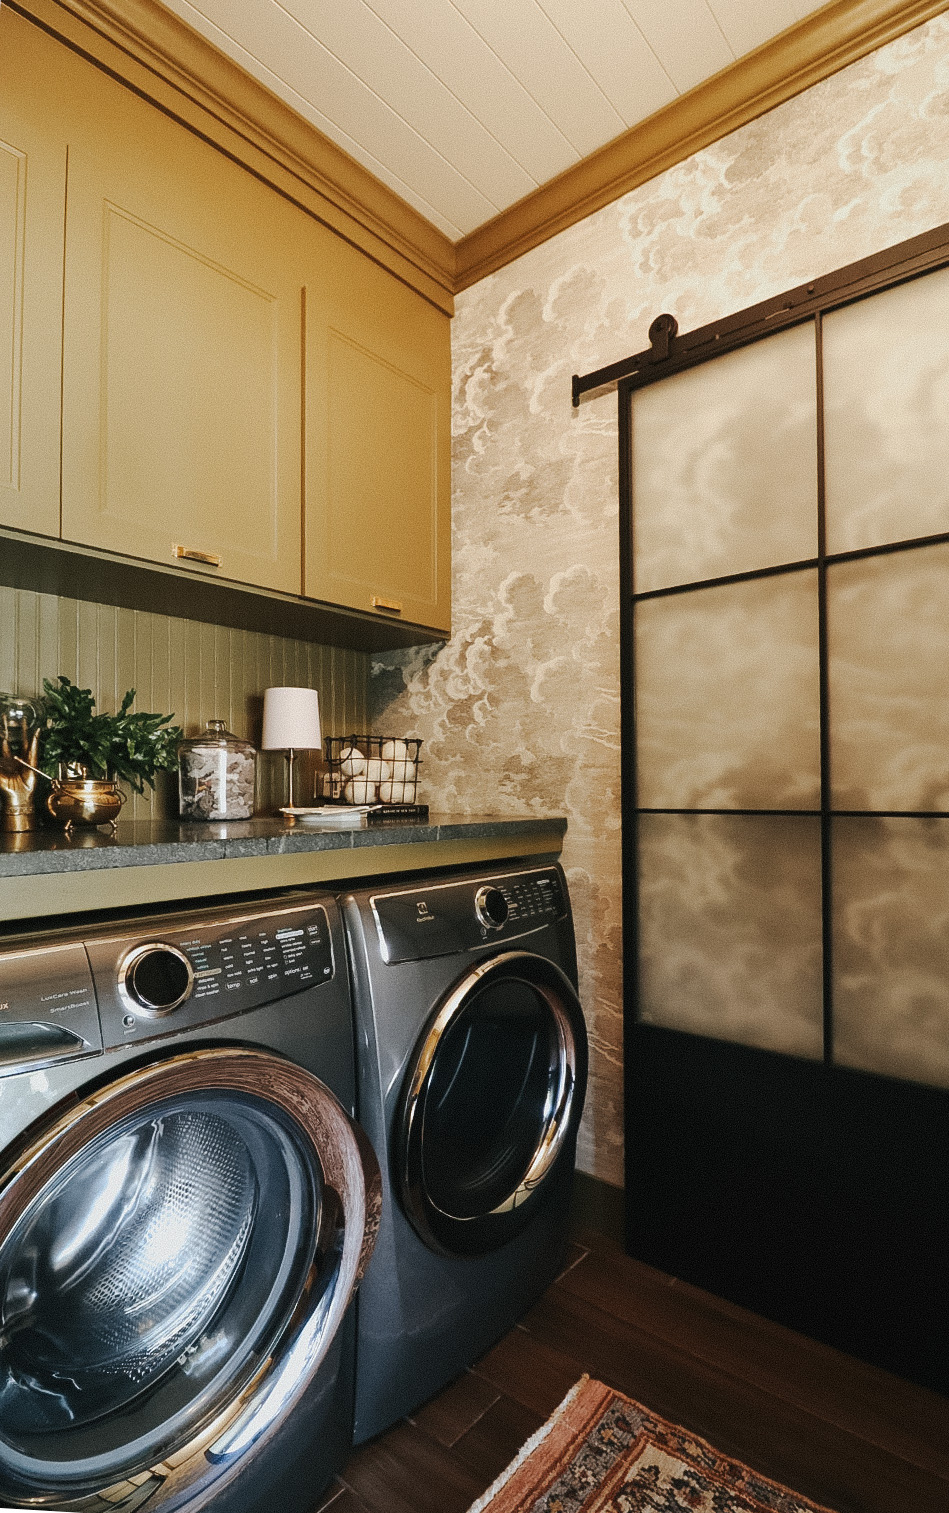
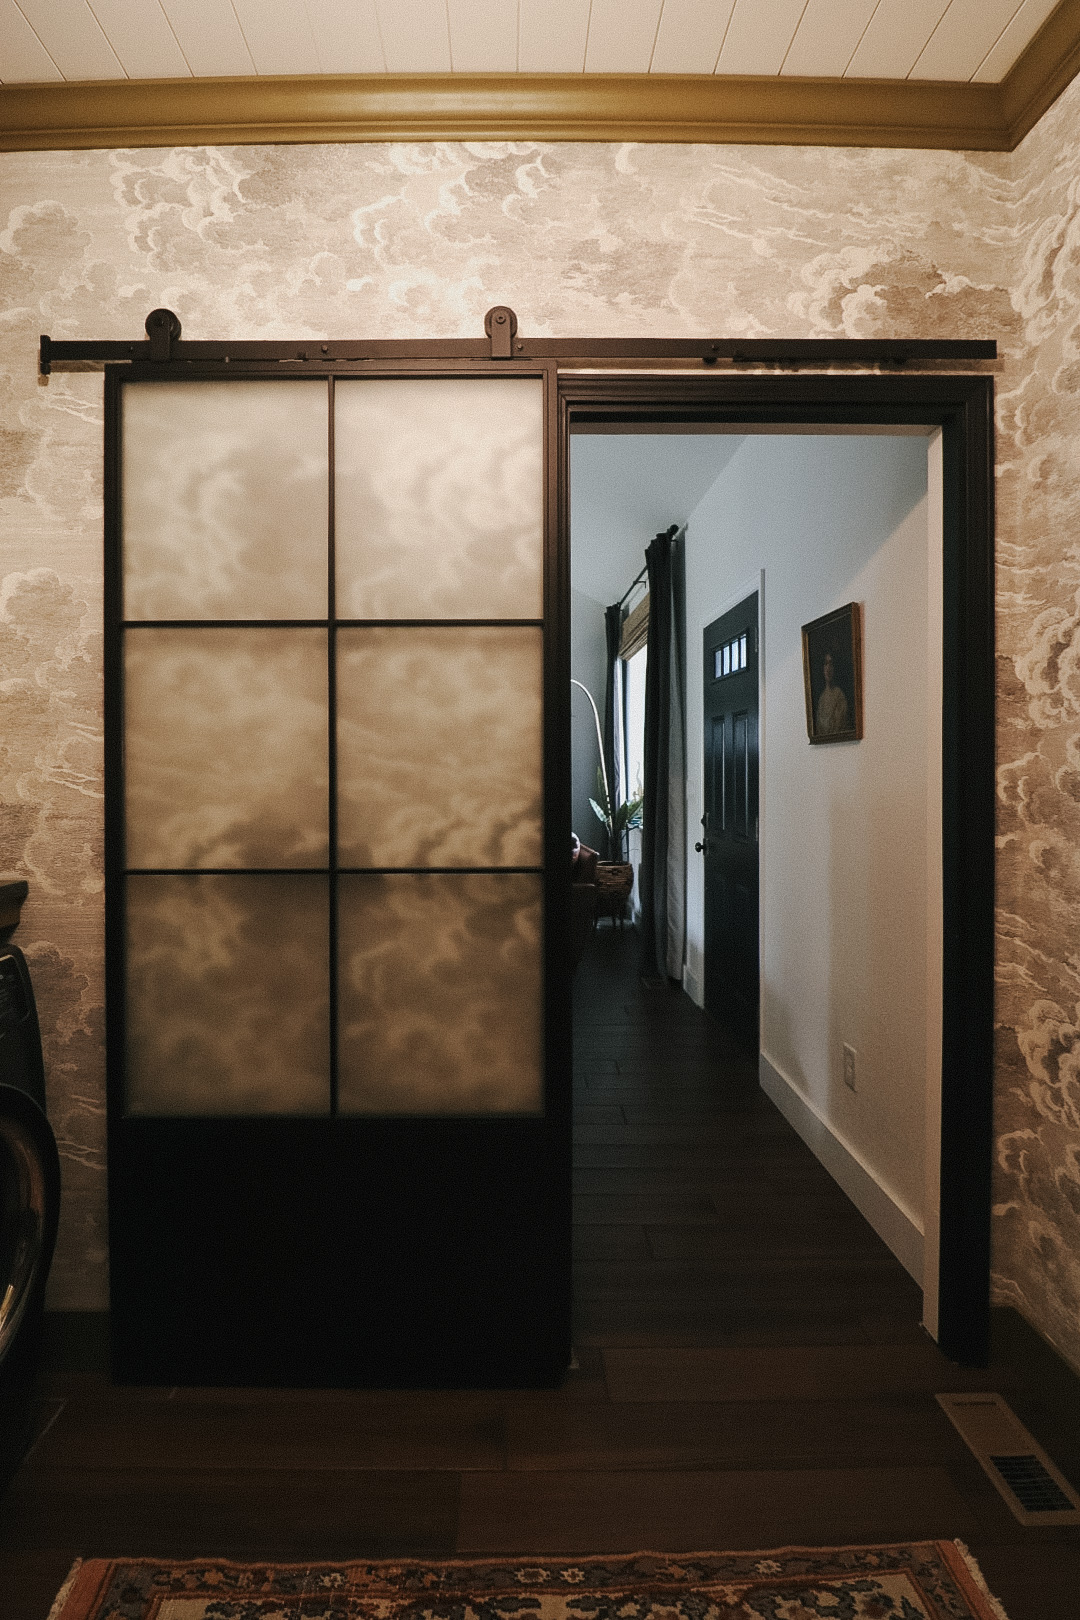
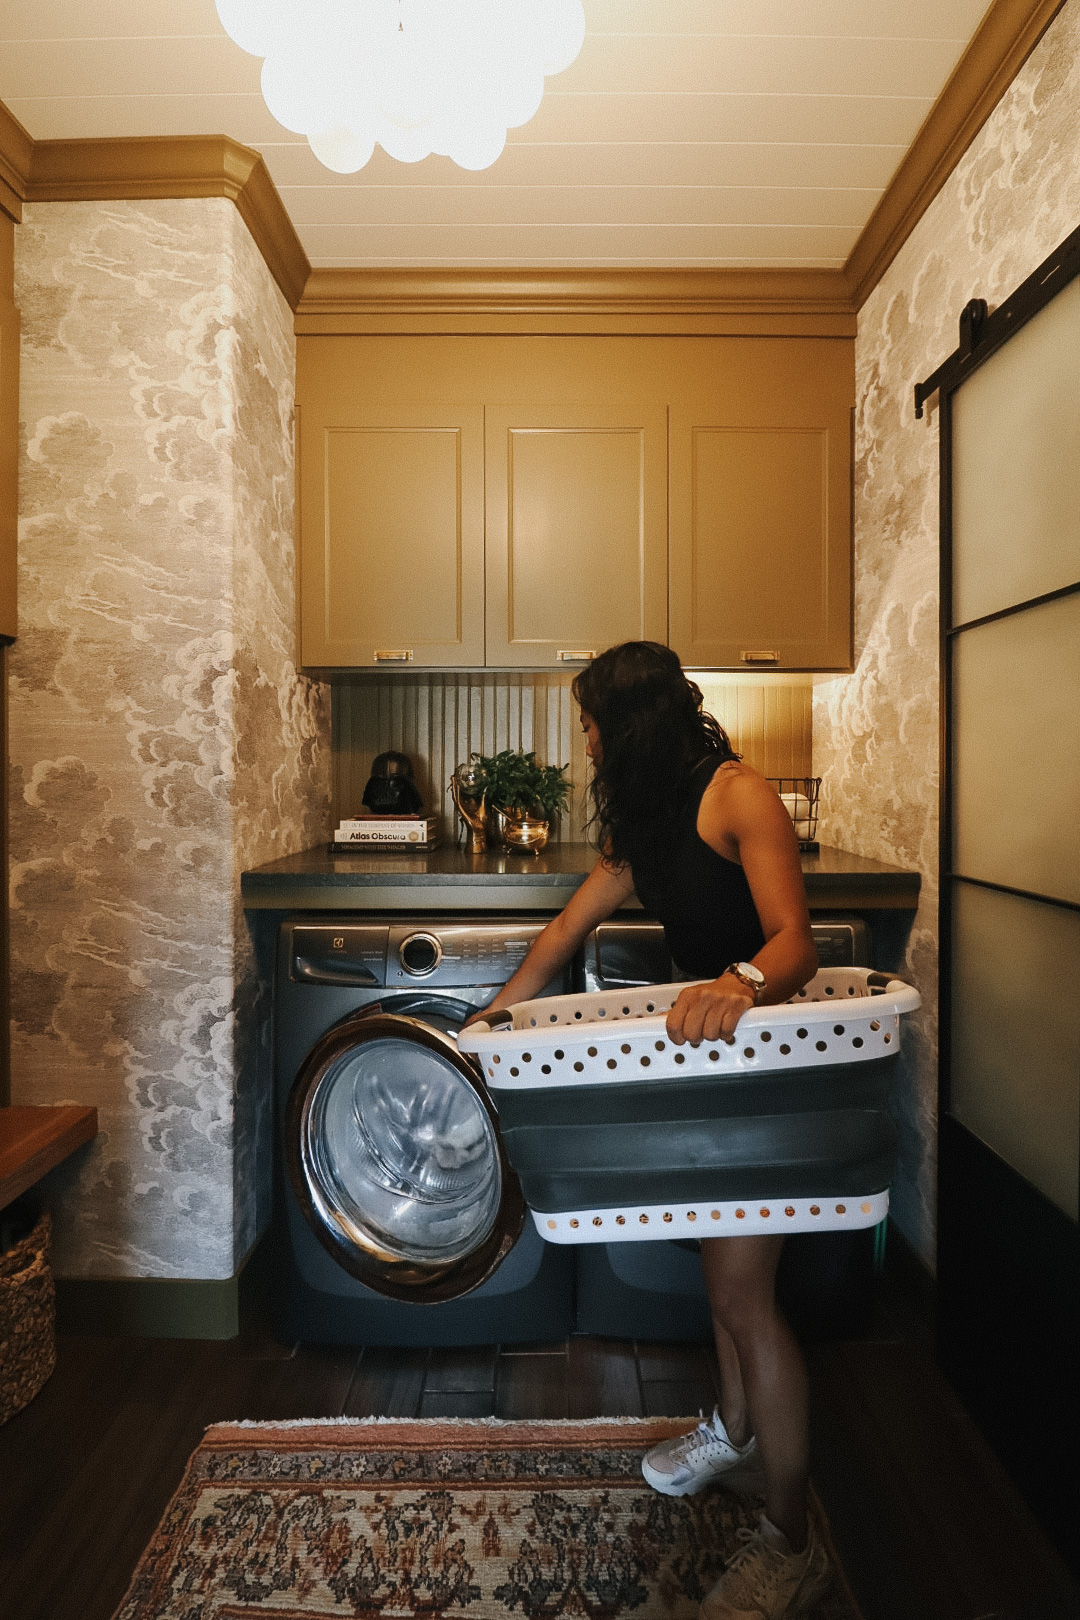
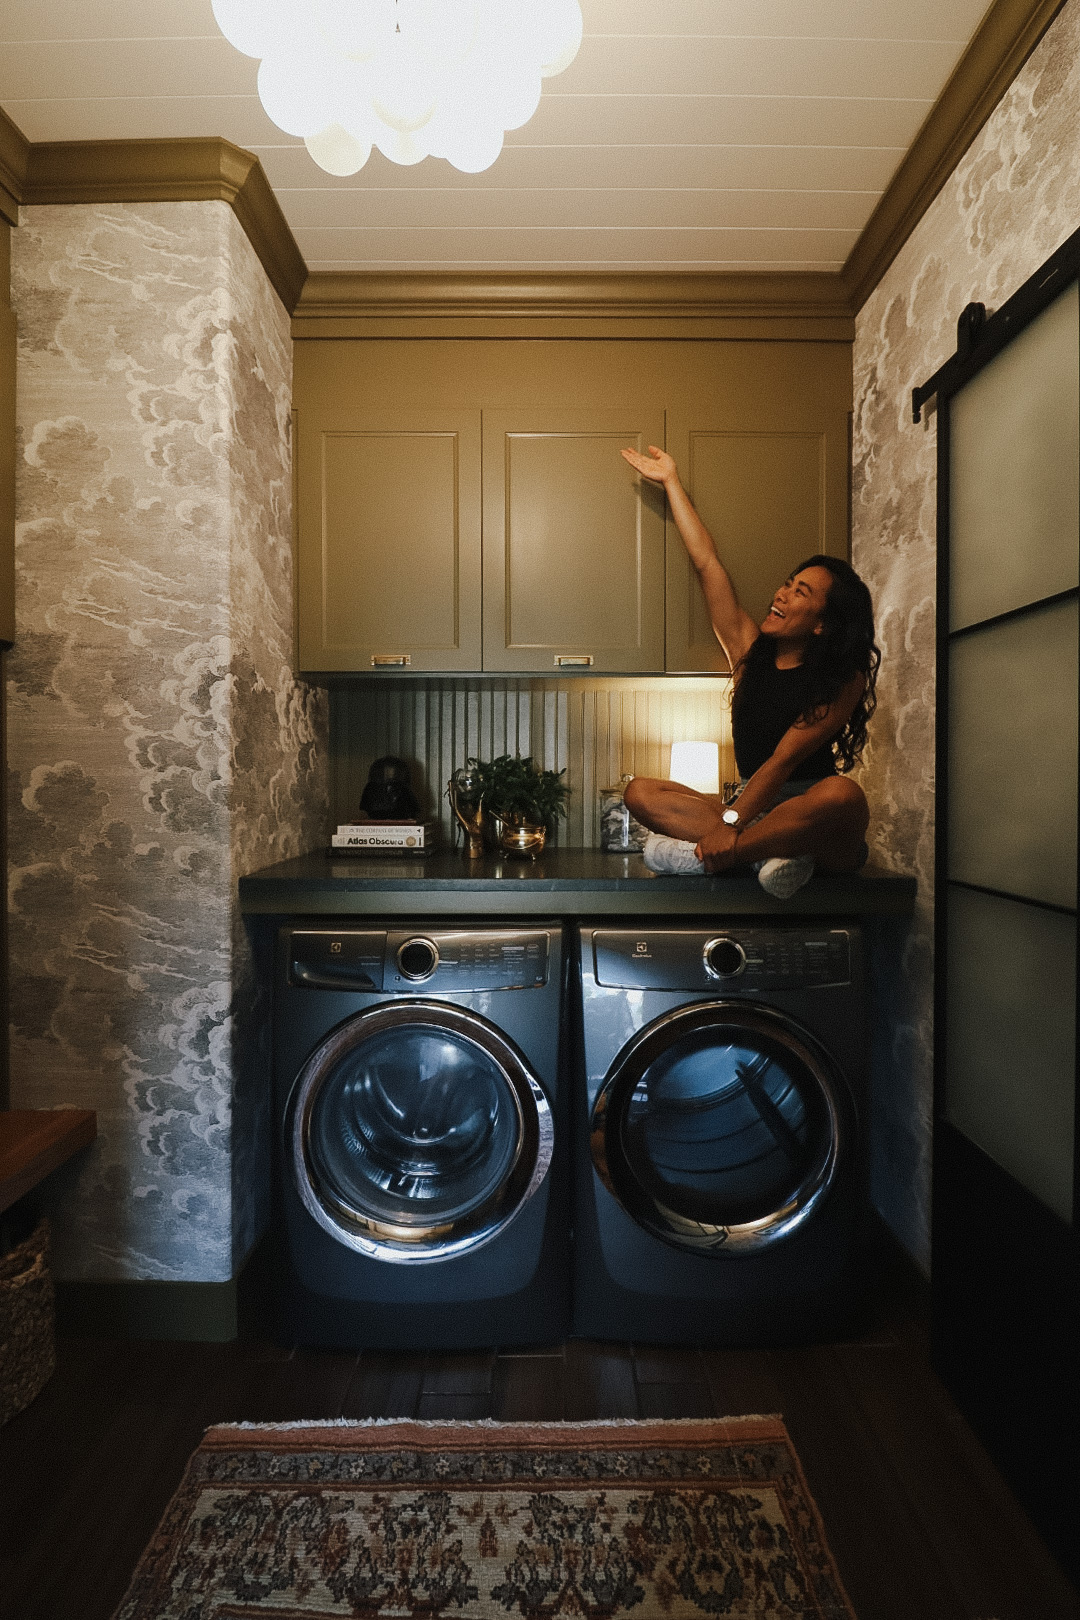
I painted bead board and added it behind the washer and dryer to match the bench area. We added the modern barn door. After some research, we went with a local stone company for the black soapstone countertop. Along with the benefit of supporting local, it was also more cost effective, a quicker date for installation, and I got to pick out the exact the slab. At the recommendation of the stone fabrication company, we installed supports from the Original Granite Bracket for the countertop.
A couple months after (again, it felt like an eternity!), the final Ikea cabinet came back into stock and it felt momentous.
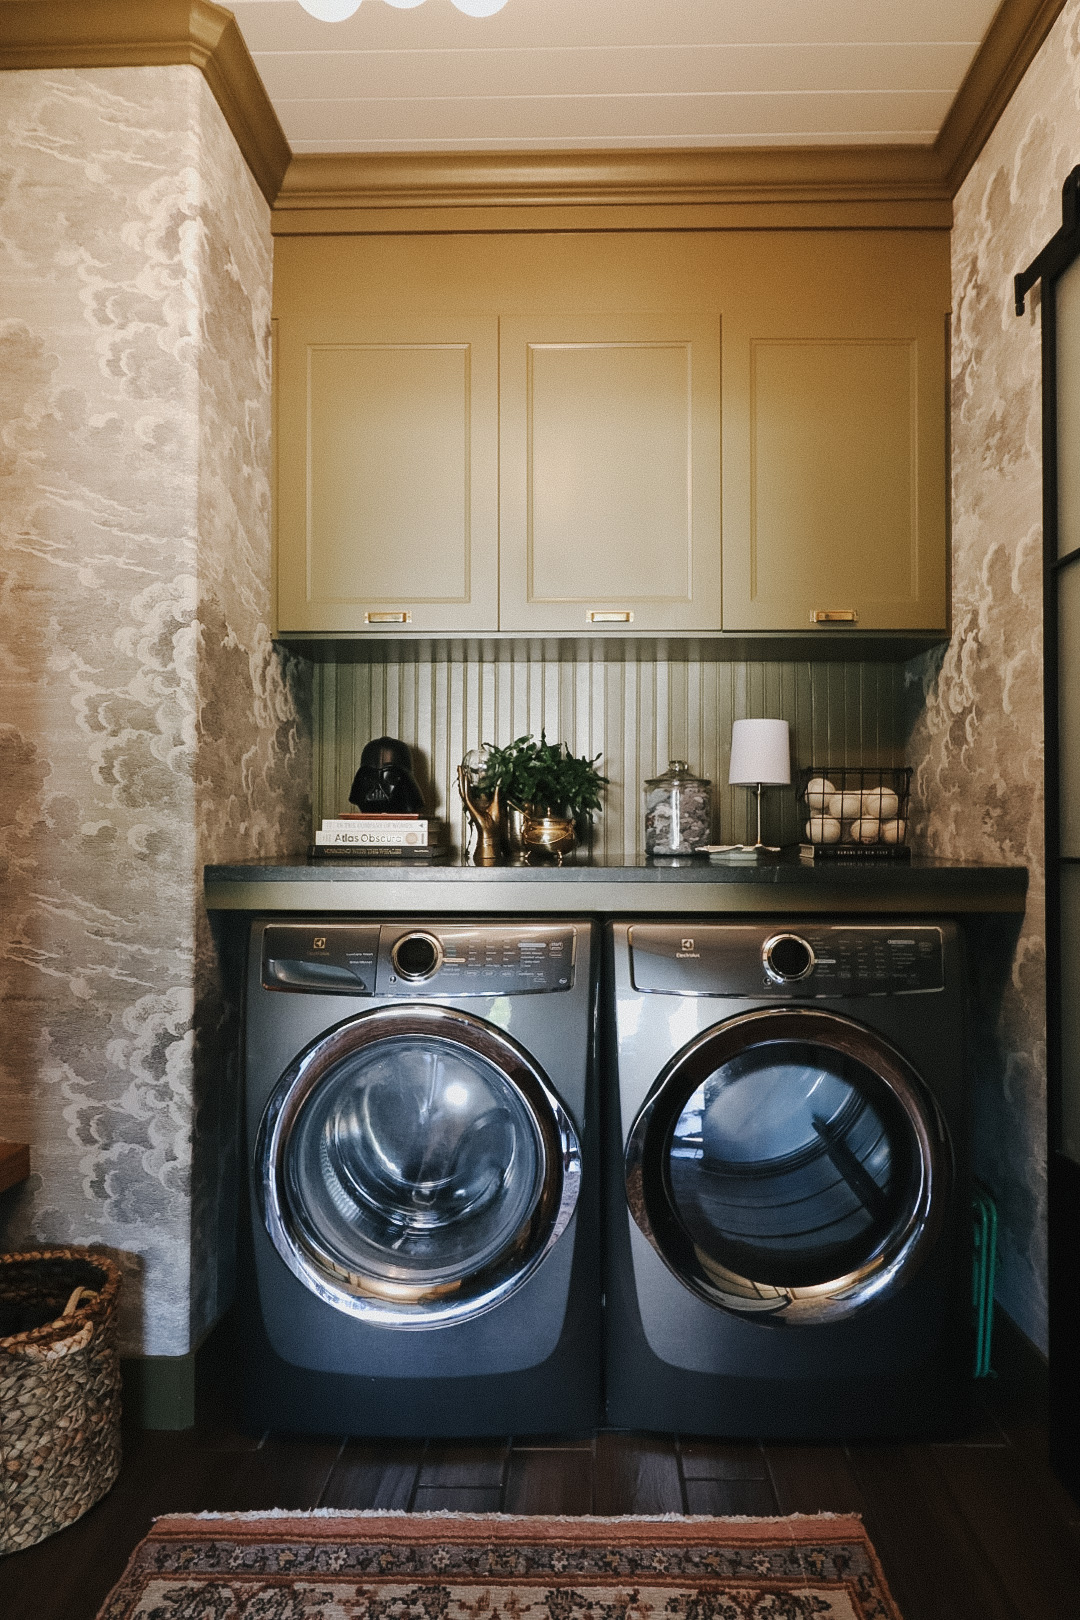
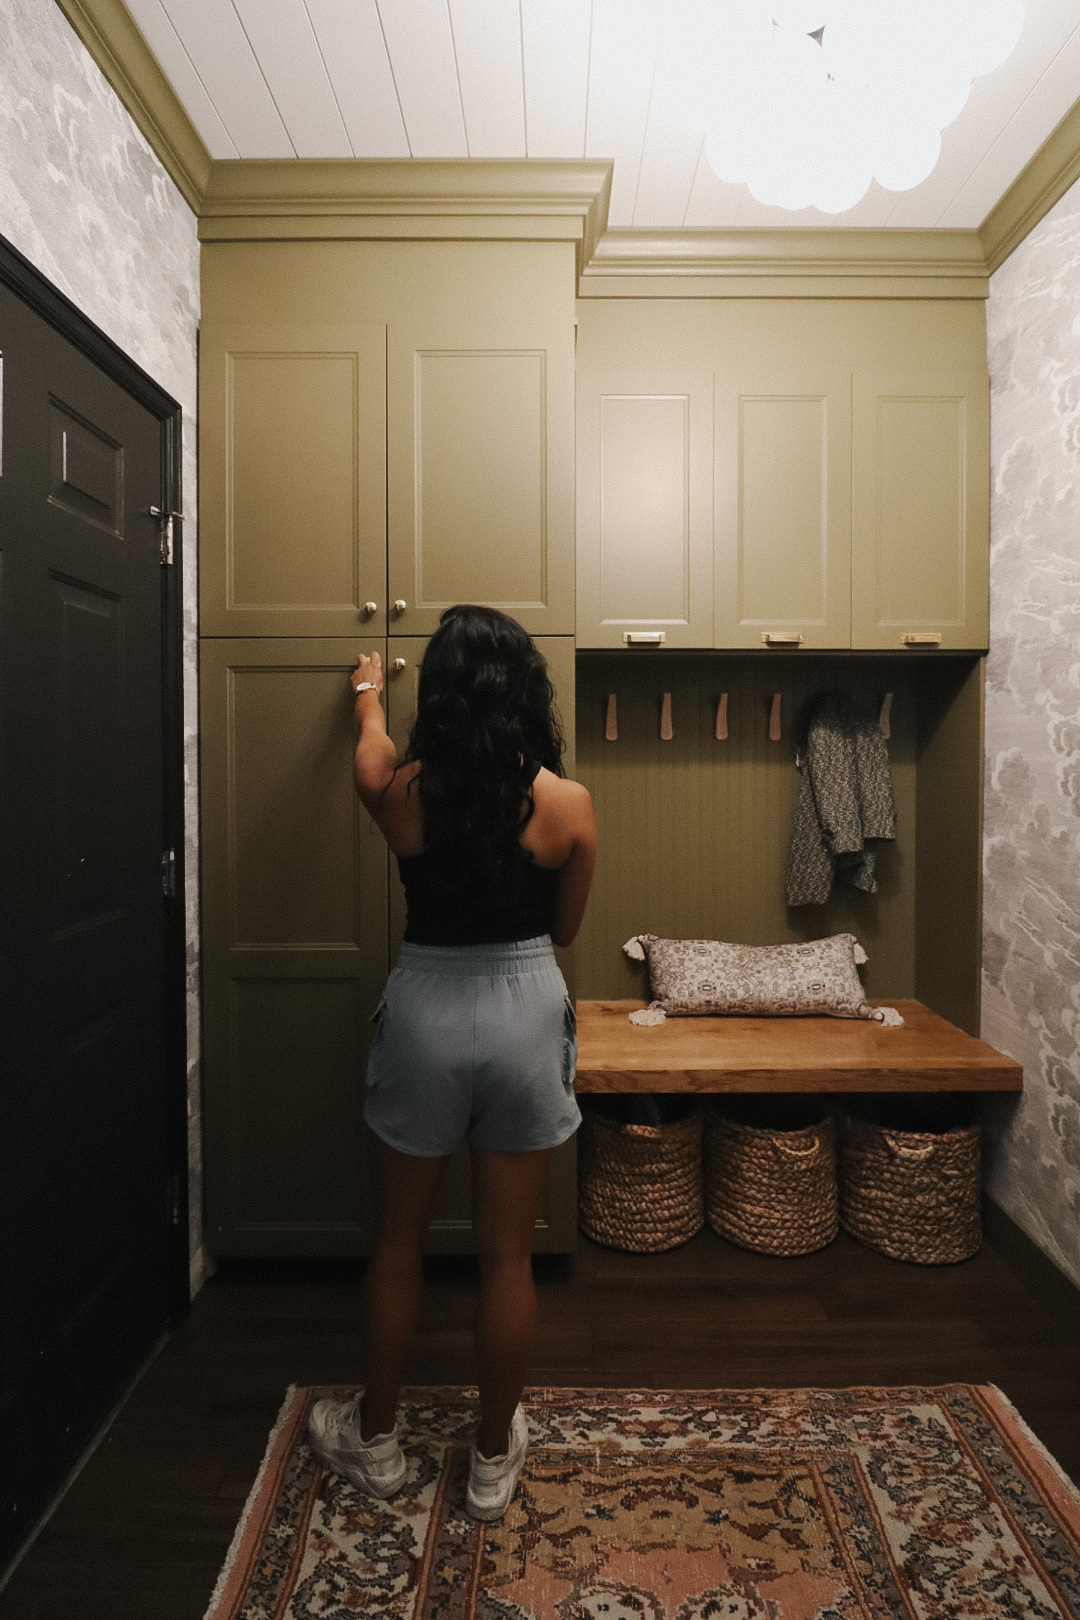
More Spacious and Functional Laundry/Mudroom Reveal
I don’t have the exact final total for this project. I do know that we came in at under $8000, even with opting for my first choice in finishes. It took us longer than a contractor may have, but we learned and practiced a lot of different skills along the way. And here’s what she looks like as a much more functional and spacious laundry/mudroom today:
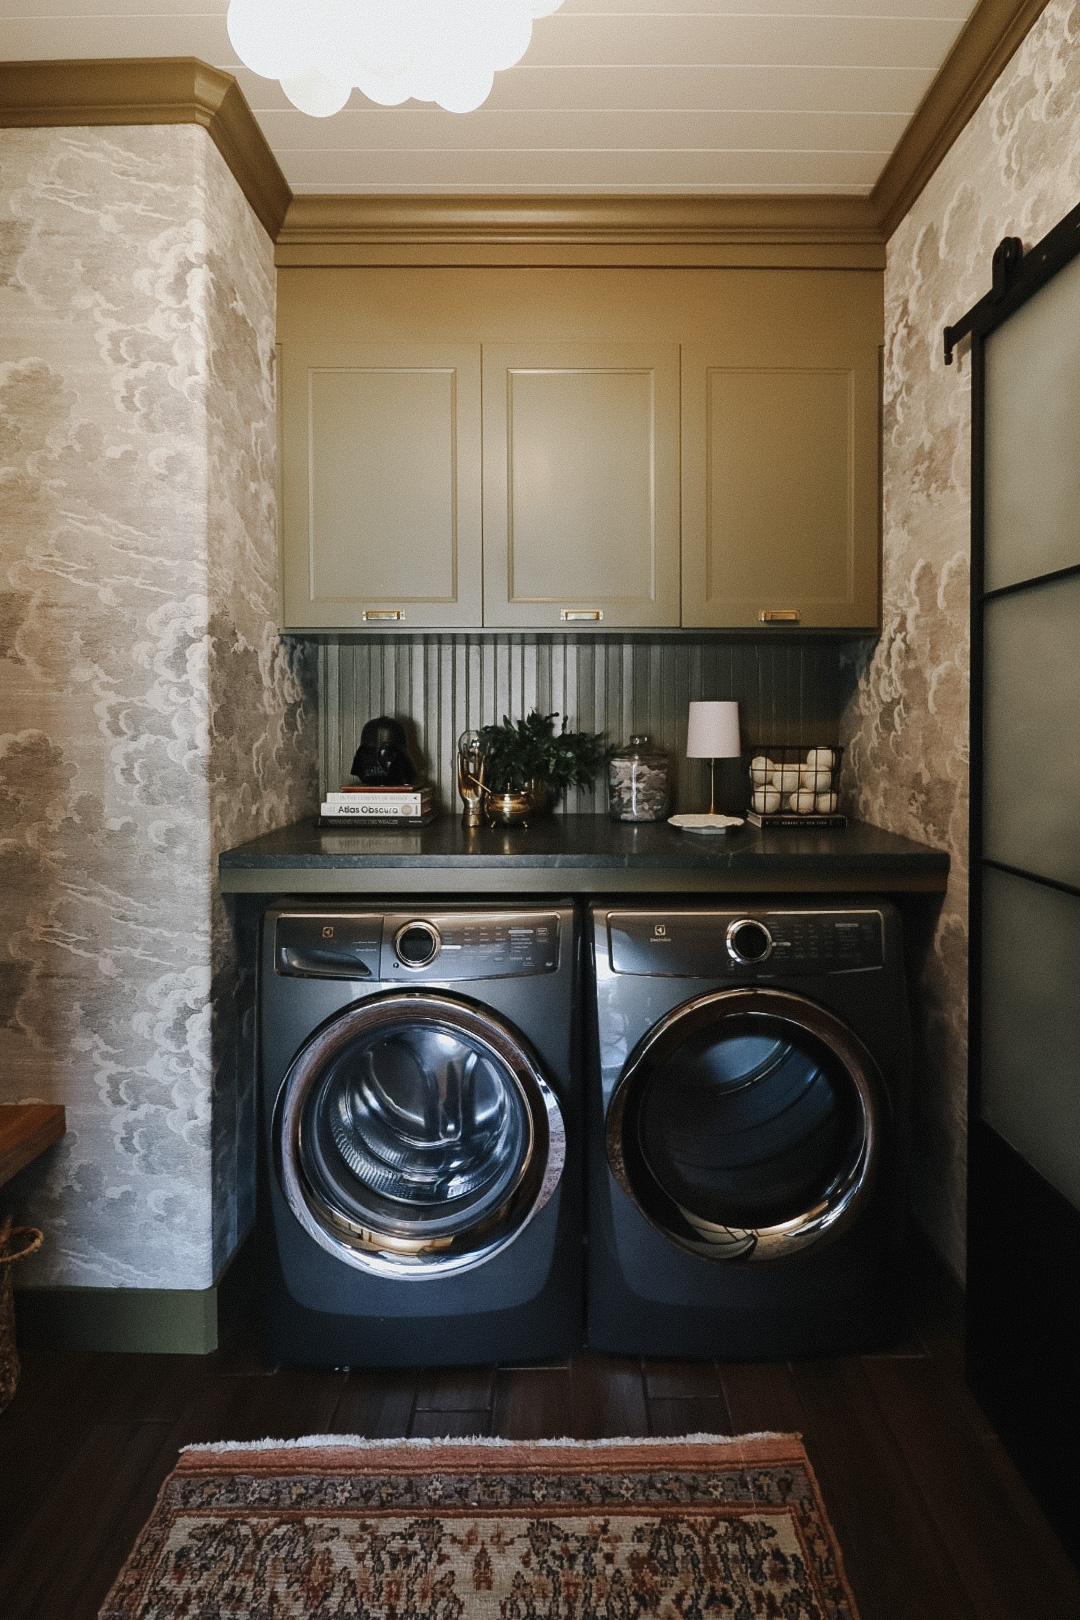
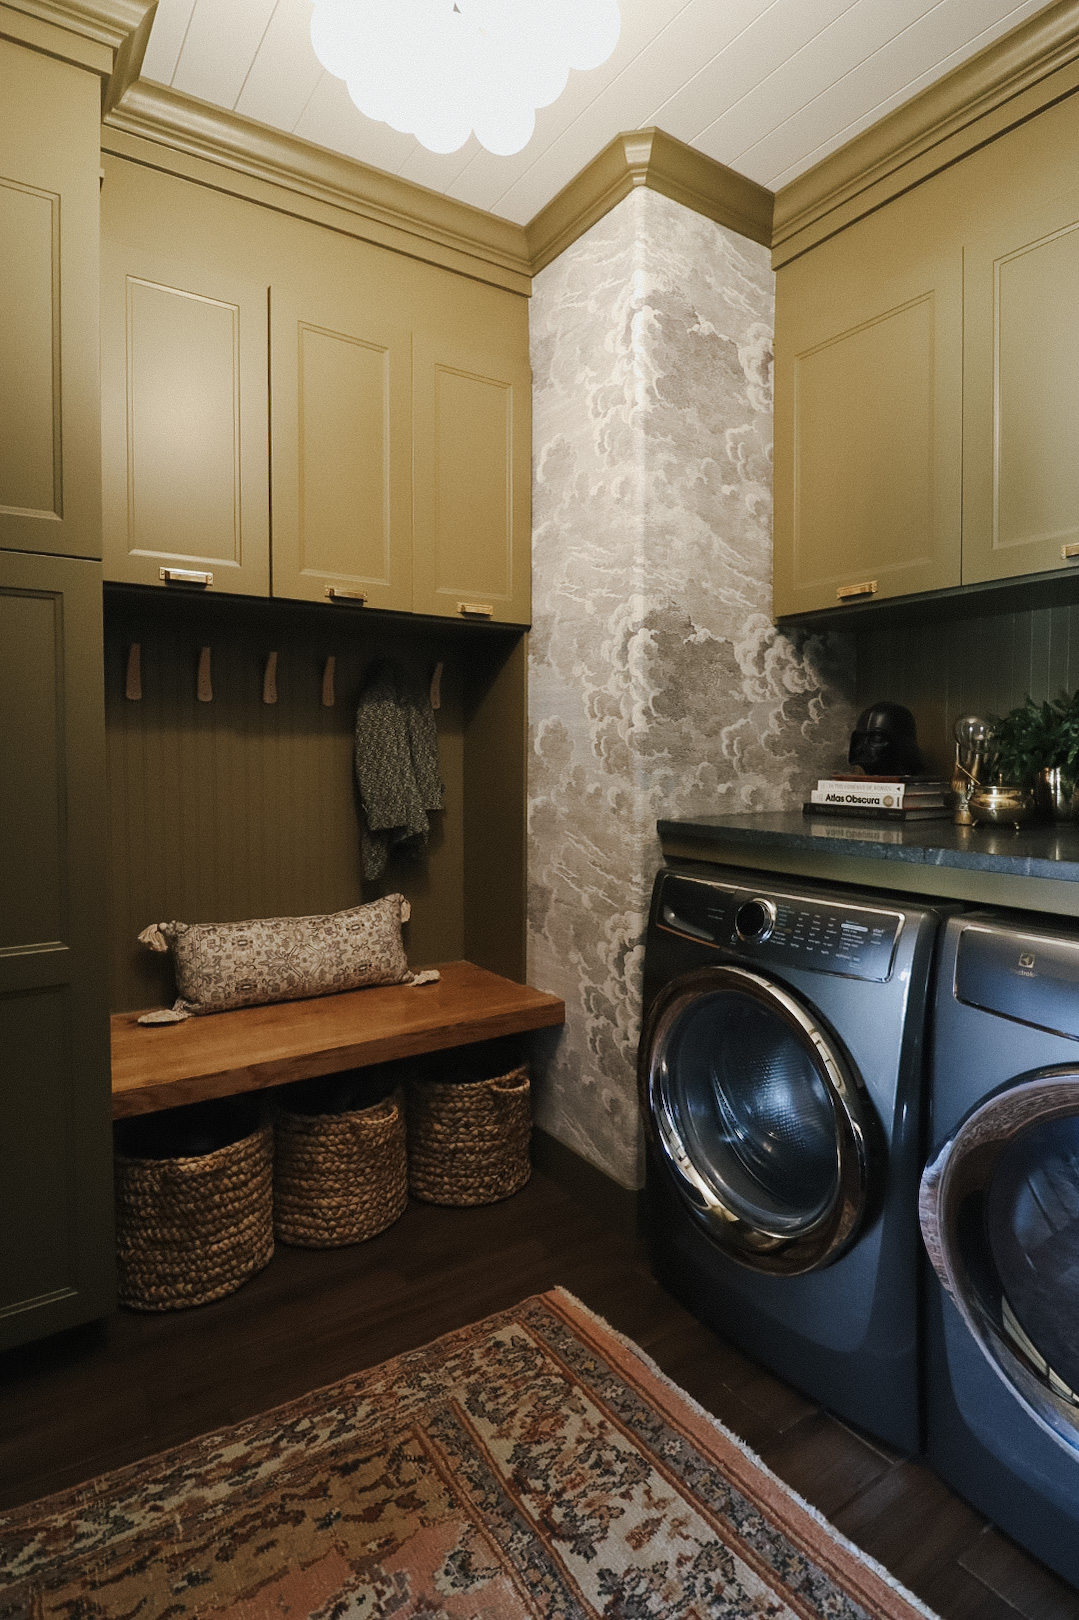
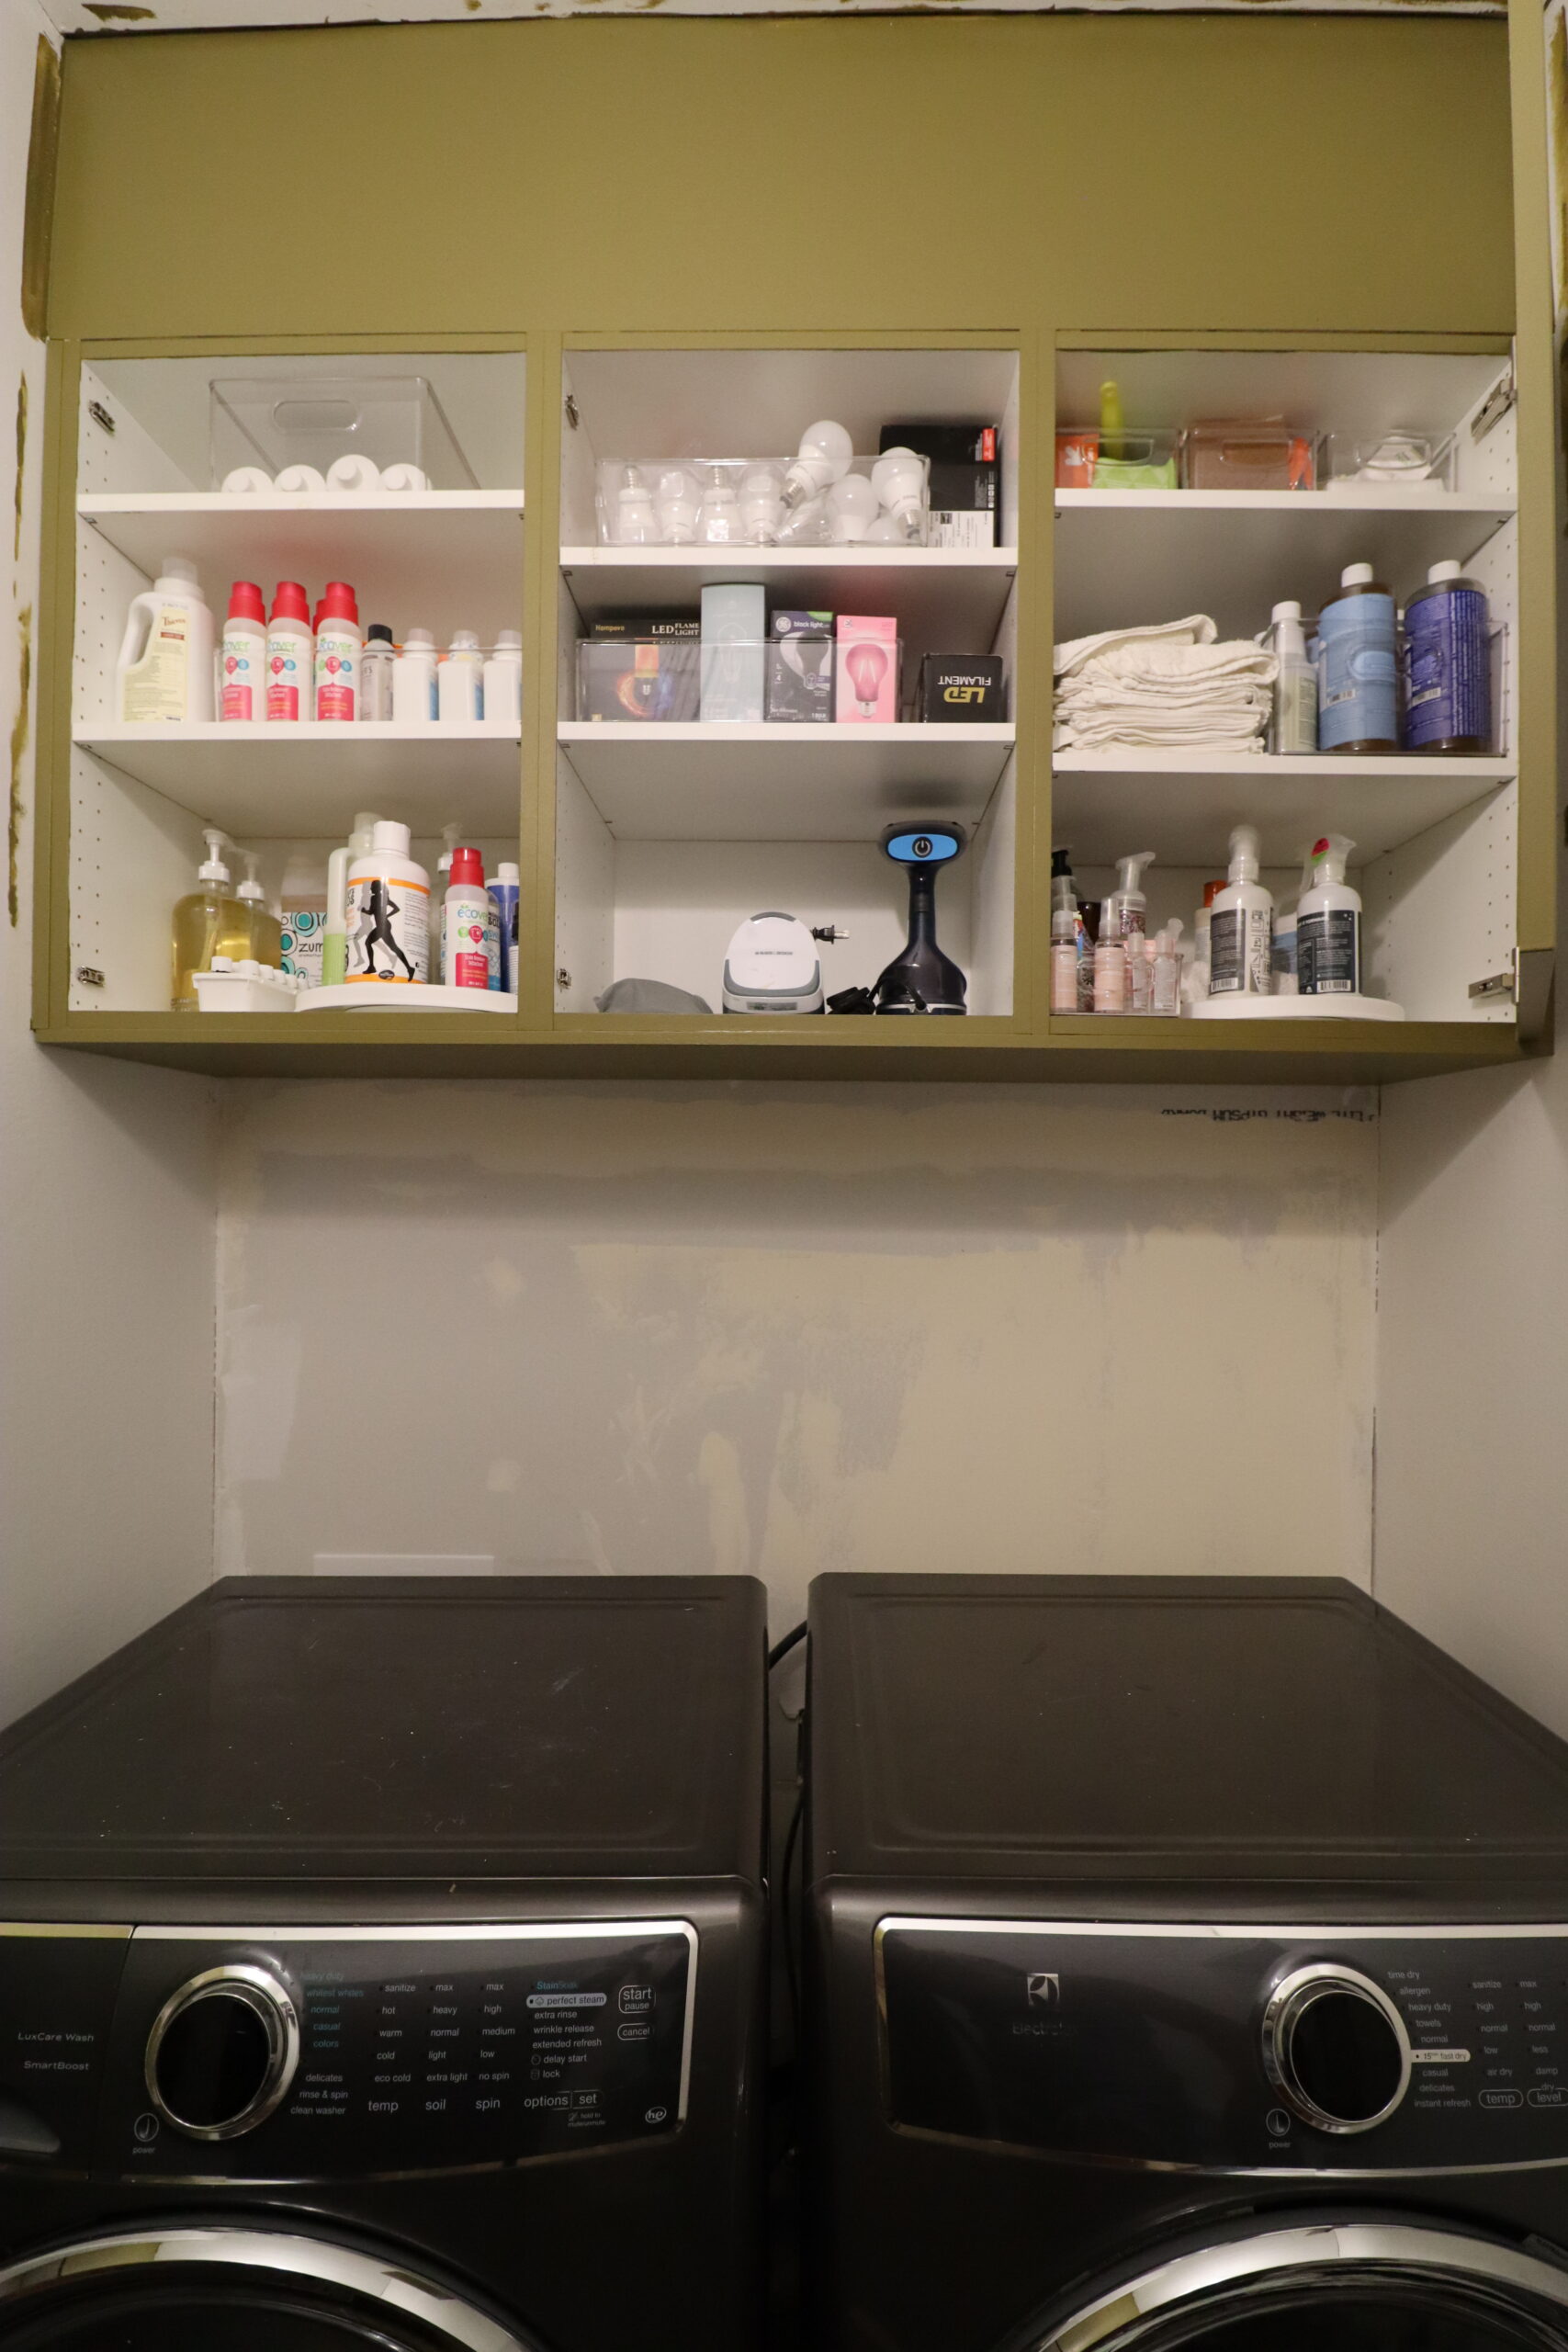
Hooks to hang coats! Baskets to catch shoes! Cabinets to store seasonal accessories and backstock of our household staples! The form and function parts of my brain are elated.
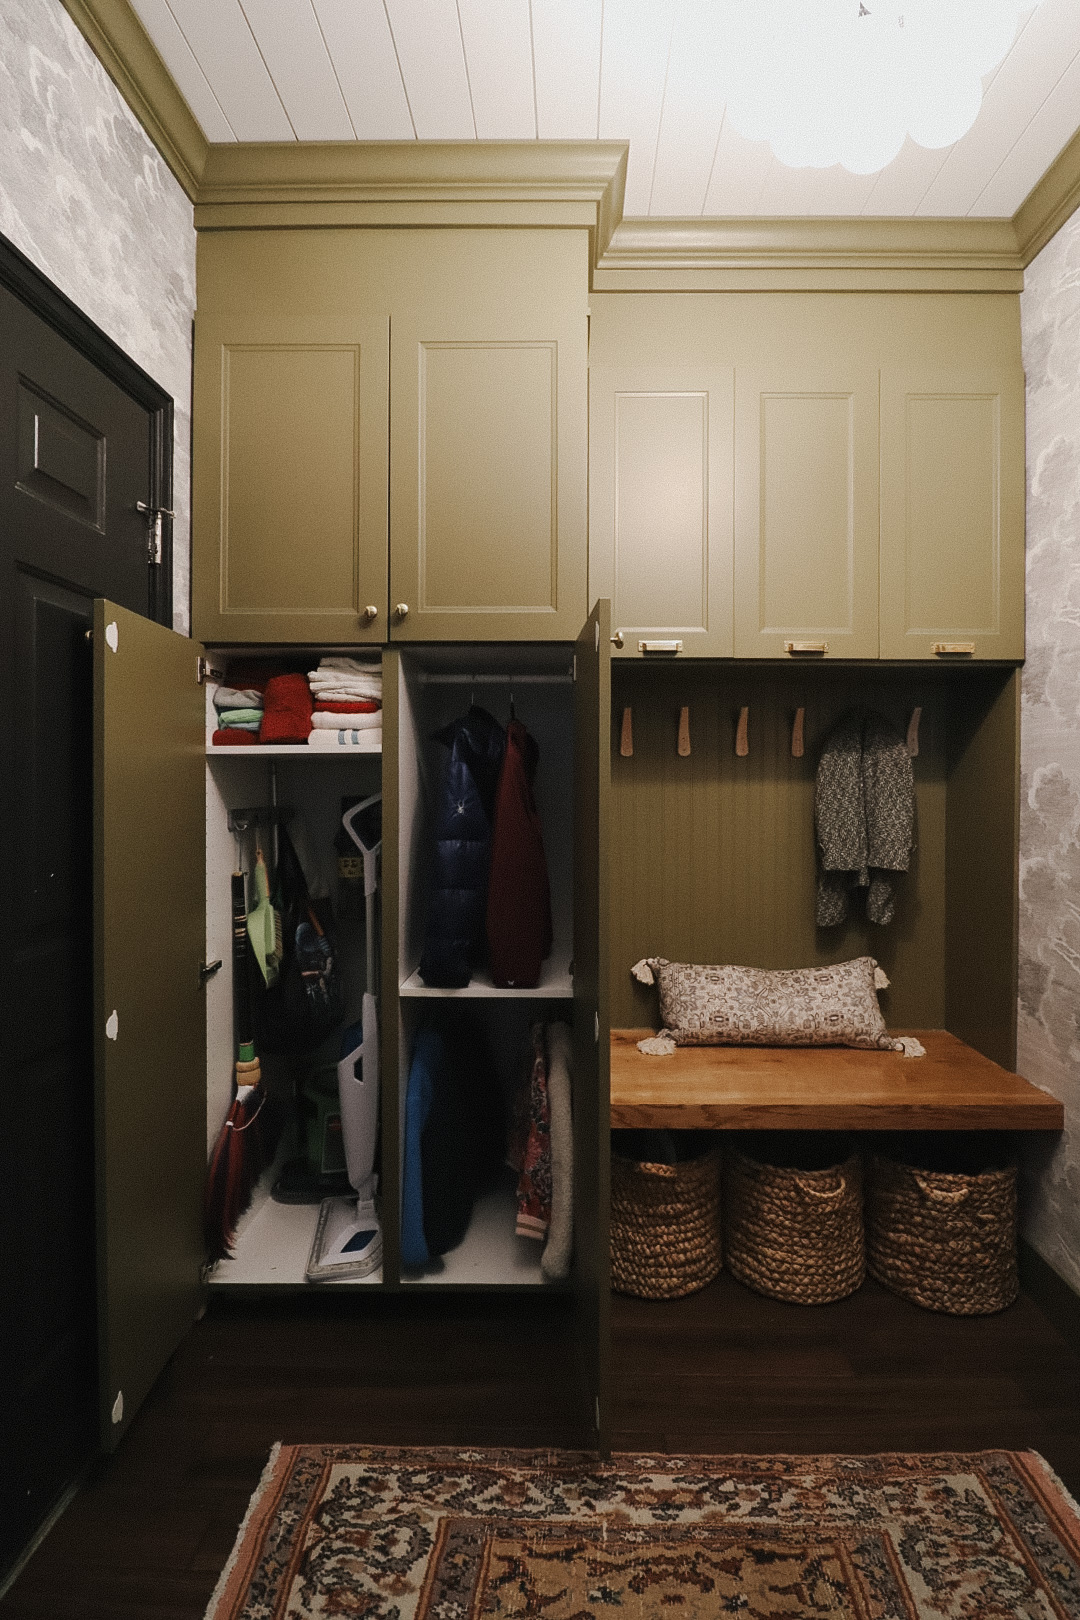
A peek inside the new storage. In the cabinets to the left is storage for all of our cleaning supplies. On the right side, we spaced the shelves to create lockers for our everyday items. Above the bench are baskets with seasonal wear (e.g.,hats, gloves).
Laundry/Mudroom Project Sources
MVP Moving straps
Cabinets – Ikea Sektion Cabinets
Modern barn door
Hardware – Rejuvenation Mission Bin Pulls & Massey Round Cabinet Knob
Wallpaper – Cole & Sons Wallpaper, Nuvolette in Dark Gray
Countertop – Dorado Noire soapstone
Countertop supports – from Original Granite Bracket
Bench supports – from Right On Bracket
Rug – vintage – I typically find here
Chandelier – I have the 19 globe option; I would buy the 38 glob option if I were to purchase again
Washer/dryer – Electrolux
Cabinet/trim color – Valspar Valencia Moss in Behr premium cabinet and trim paint (satin)
Door trim – SW Tricorn Black (matte to mimic sheen of barn door)
Coat Hooks
Rug pattern lumbar pillow – old Home Goods find
Baskets – these baskets are braided water hyacinth (I will not link the ones i bought because they shed a LOT with how often we use them. They are a great size however – 13.5″H X 14.5″ diameter)
Small lamp – old Target – similar here, I also really like this one
Wool dryer balls
Wire basket – thrifted – similar here
Humans of New York book
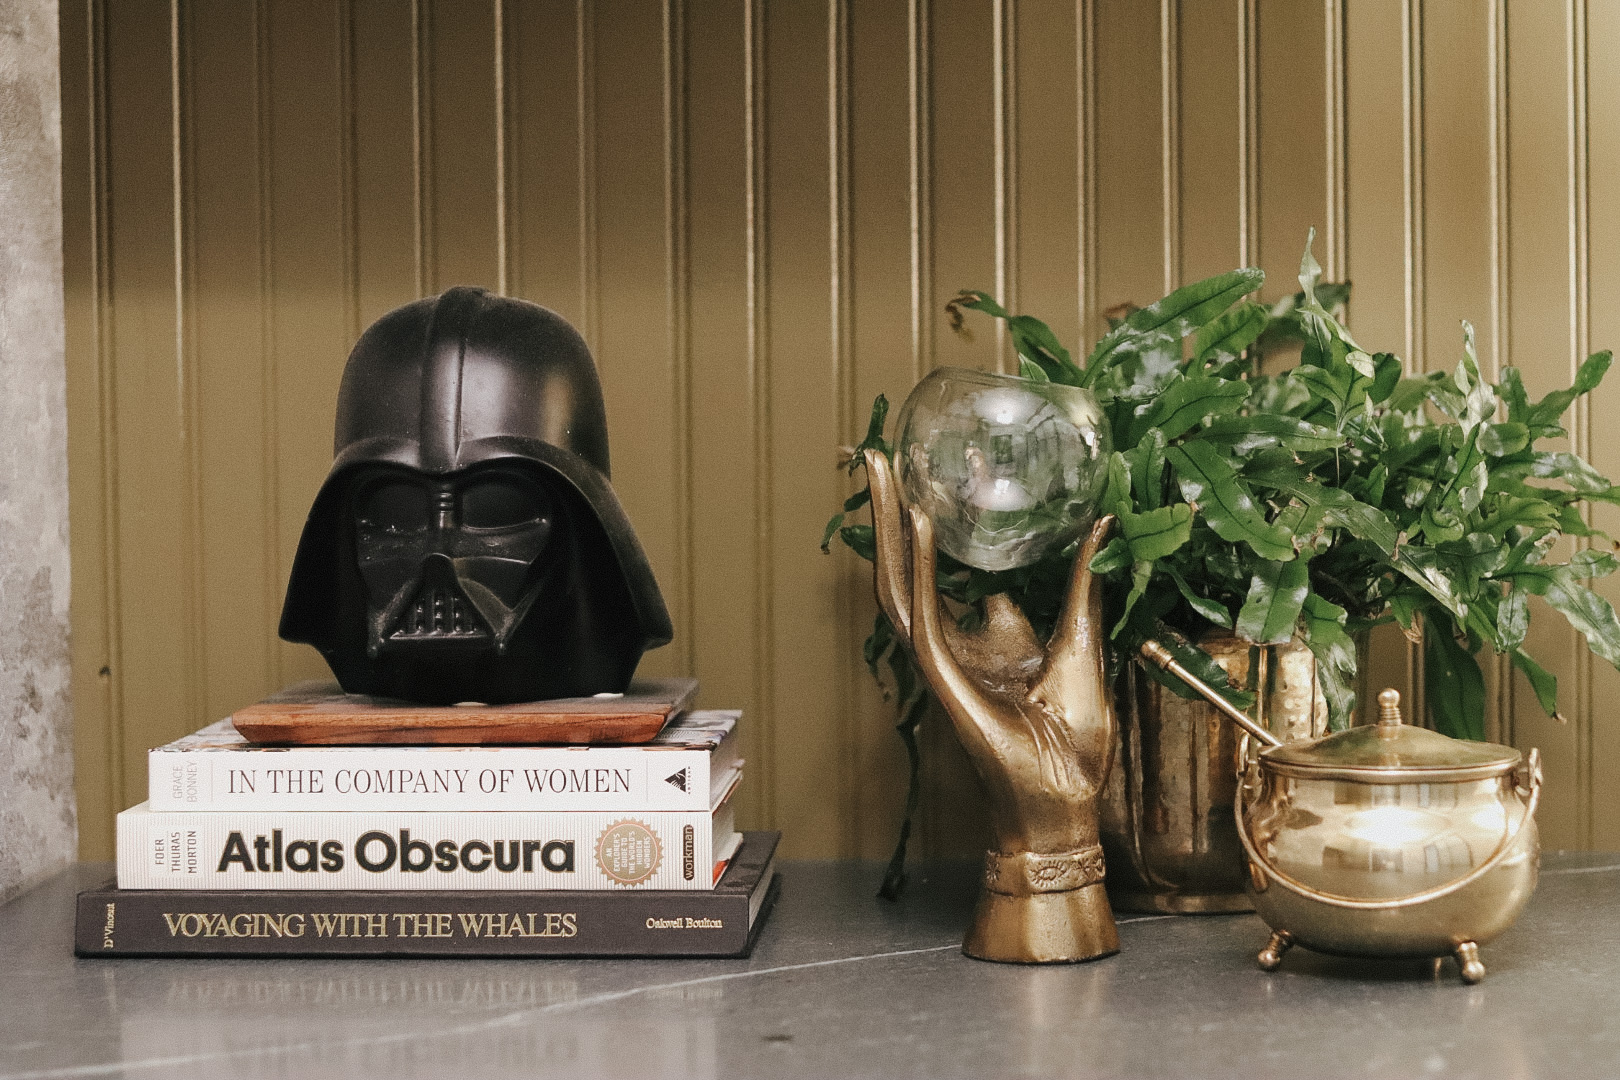
Millenium Falcon plate – old store find
Glass Jar
Metal Hand Planter – local nursery
Atlas Obscura book
In the Company of Women book
Voyaging with Whales book – thrifted
Darth Vader bank – old Target
Black marble and wood cheeseboard – old store find
Brass vase – thrifted
Brass pot – thrifted


