


This post contains affiliate links, which means I may earn a small commission on purchases made through the links provided, which enables me to provide more resources just like this; all at no extra cost to you. Thanks for your support!
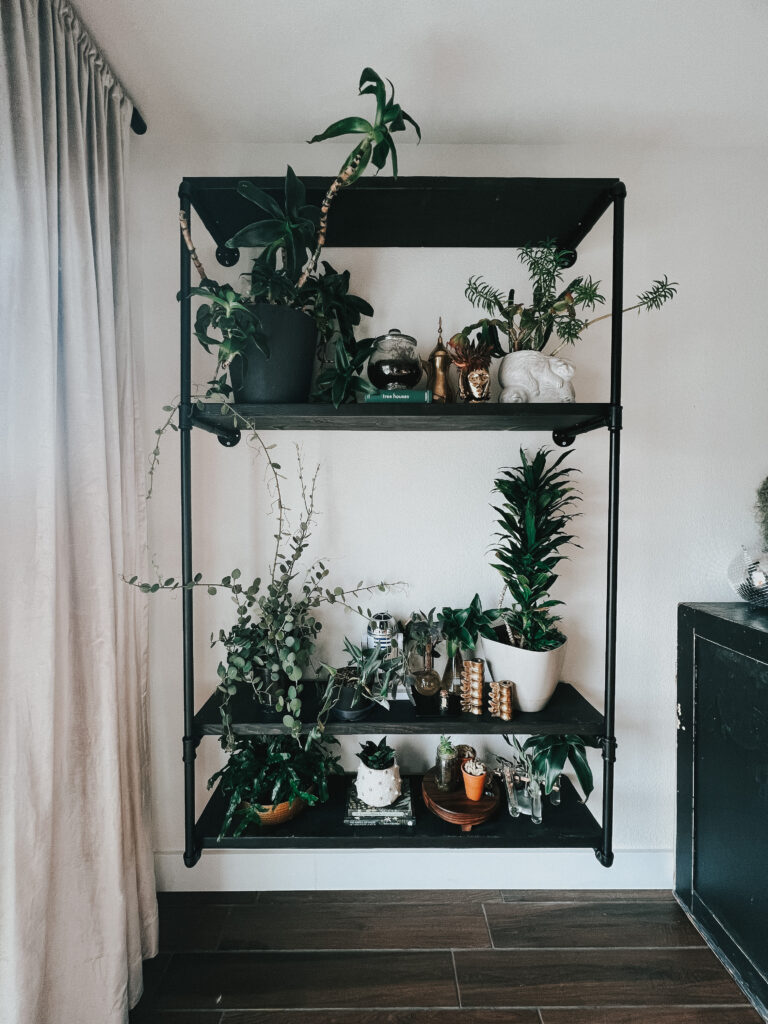
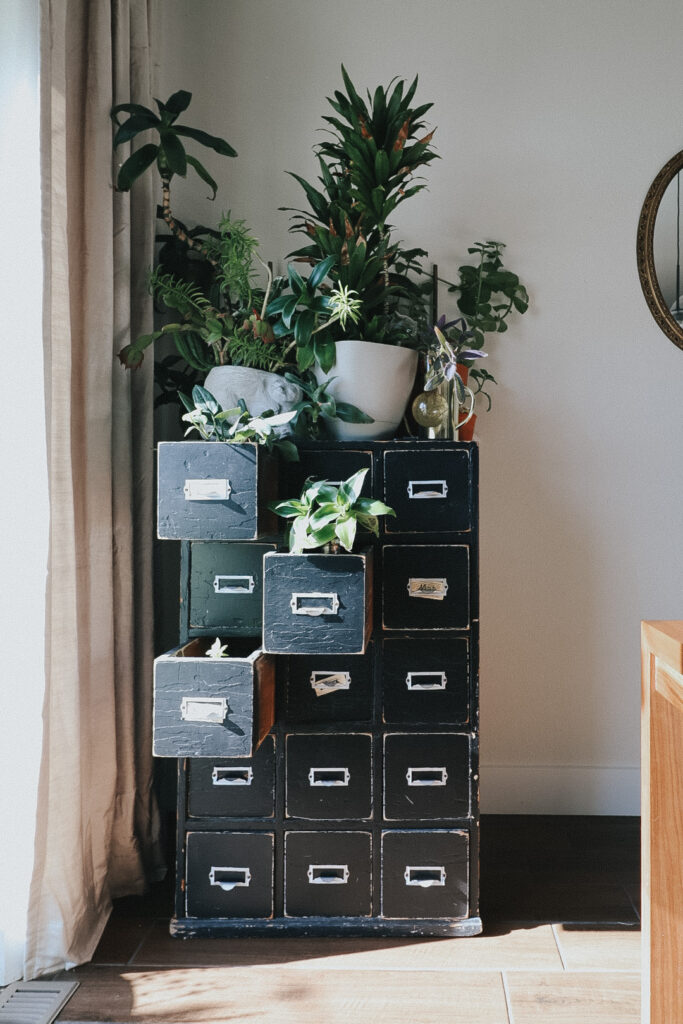
Introducing the new and expanded home for the plants that were becoming a tangled mess of wilted leaves. I still really love my thrifted cabinet but after three and a half months of living jumbled together, the plants were screaming for a change. Cue this simple, easy (read: no fancy tools required and relatively simple concepts) DIY industrial pipe shelf project to bring these houseplants back to thriving lives.
HOW I BUILT A DIY INDUSTRIAL PIPE SHELF
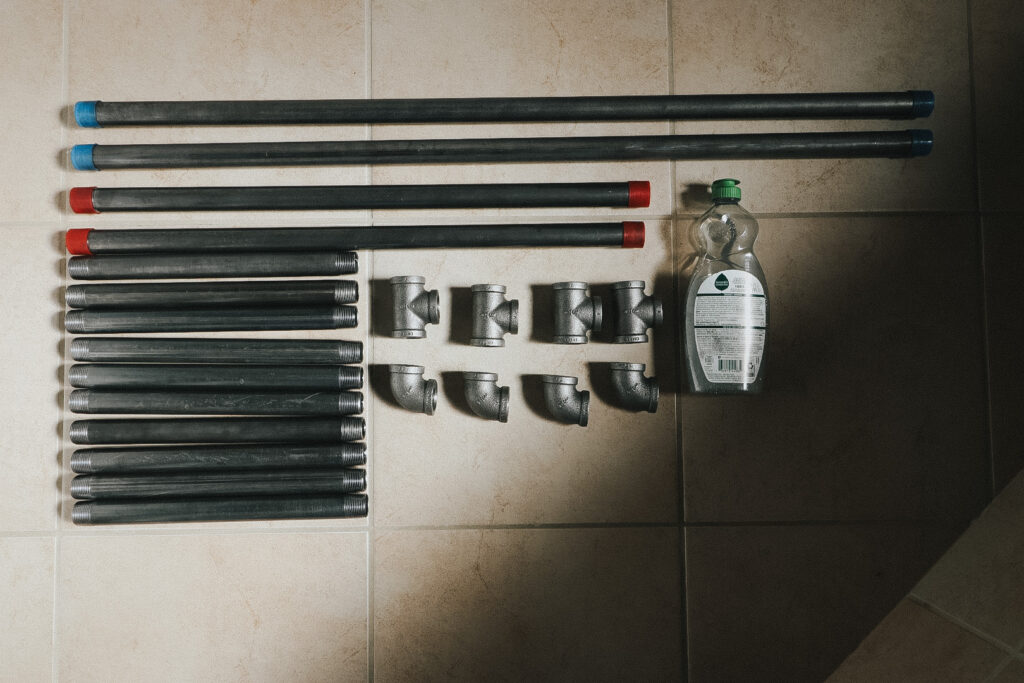
Materials:
- 4 – 3/4 in. 90 degree elbow fittings
- 4 – 3/4 in. Iron floor flange fittings
- 4 – 3/4 in. Iron tee fittings
- 2 – 3/4 in. x 2 ft. steel pipe
- 2 – 3/4 in. x 36 in. steel pipe
- 10 – 3/4 in. x 12 in. steel nipples
- 2 – 2 in. x 12 in. x 12 ft. Wood
- 8 – 3/4 in. 2 hole pipe strap
- Black stain (Valspar Wood Stain and Sealer; 1 qt.; semi-transparent; darkest night)
- Rag or paint brush for staining
- Black spray paint (Rust-oleum Stops Rust Spray Paint; flat; black)
- Dish soap
- Abrasive sponge
- Rag (for drying pipes)
- Tack cloth
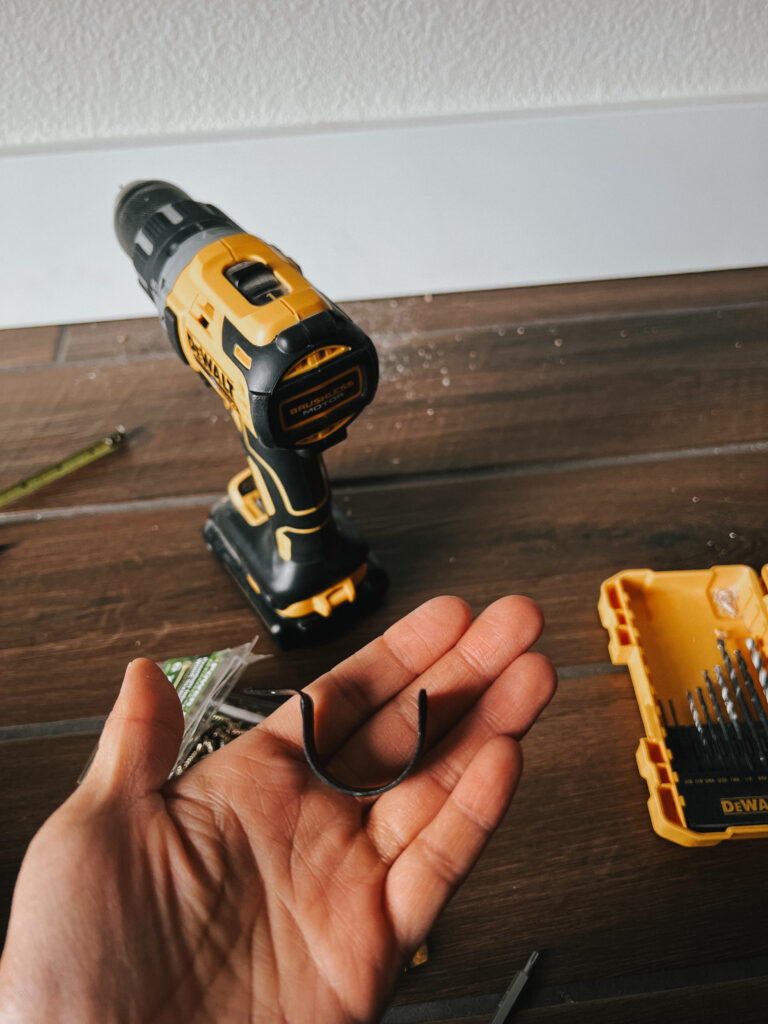
- Screws (to attach shelf to wall)
BUILDING THE INDUSTRIAL PIPE SHELF

1) I measured the main items that would be stored on the shelf.
Because I did it for the plants (…and love of home projects) I measured some of the taller plants that would be homed on the shelf.
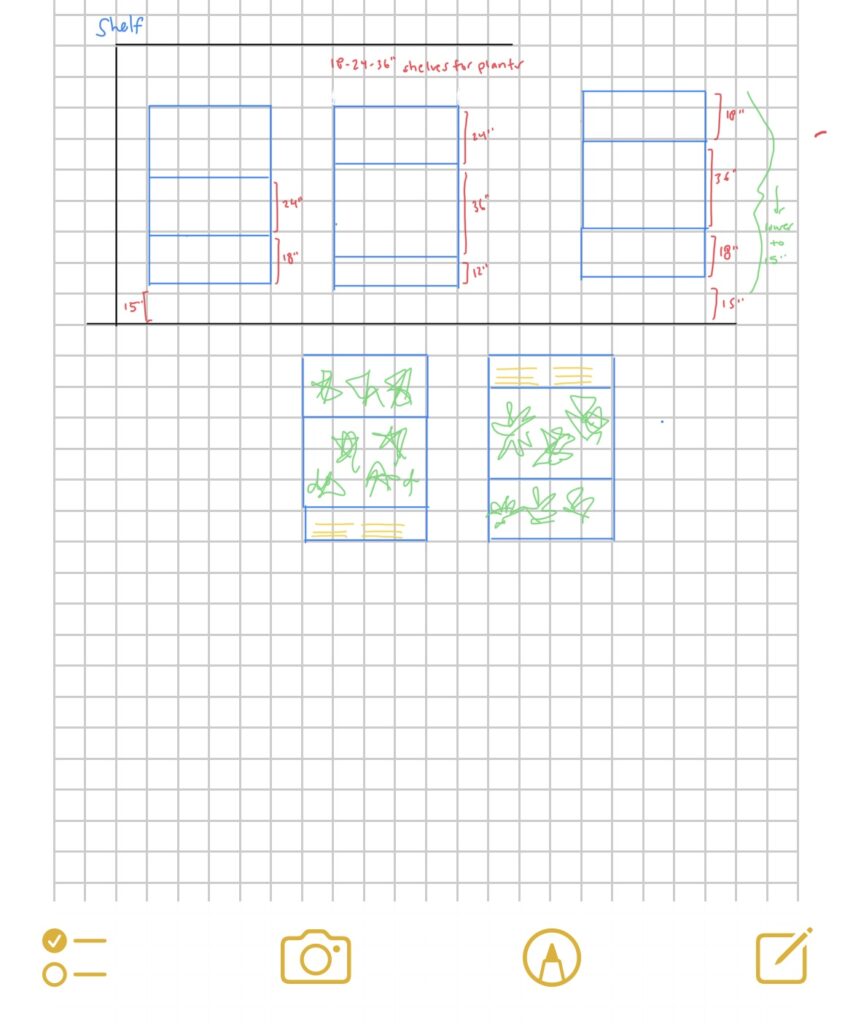
2) I played around with different configurations that fit my desired shelf heights in my phone’s notes app.
One of the trickiest parts of designing the shelf for me was wanting to use off-the-shelf items from my local hardware store. Pipes that I deemed shelf height for my project were generally only available in 12in, 18in, 24in, 36in, and 48in sizes. Once I settled on the heights of shelves, I figured I could always alter the order of the shelves or sizes since the pipes are a big plug-and-play set.
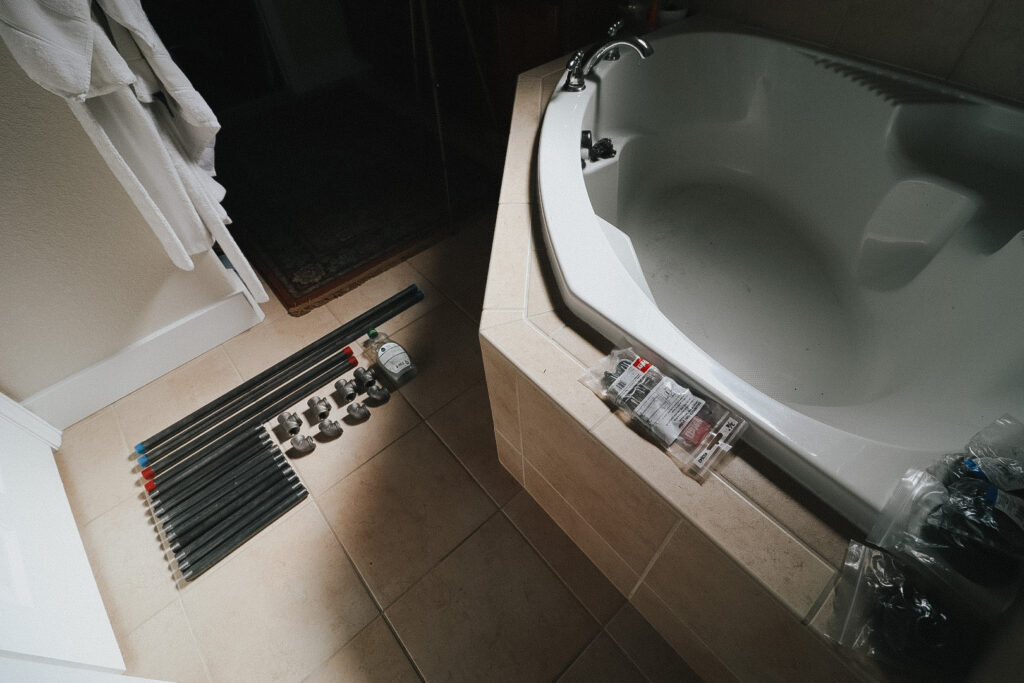
3) I scrubbed each pipe piece with hot, soapy water and dried with a rag towel.
I did this to help the spray paint to stick better. Results are in the details far before the fun building begins (cue me reminding myself of this constantly).
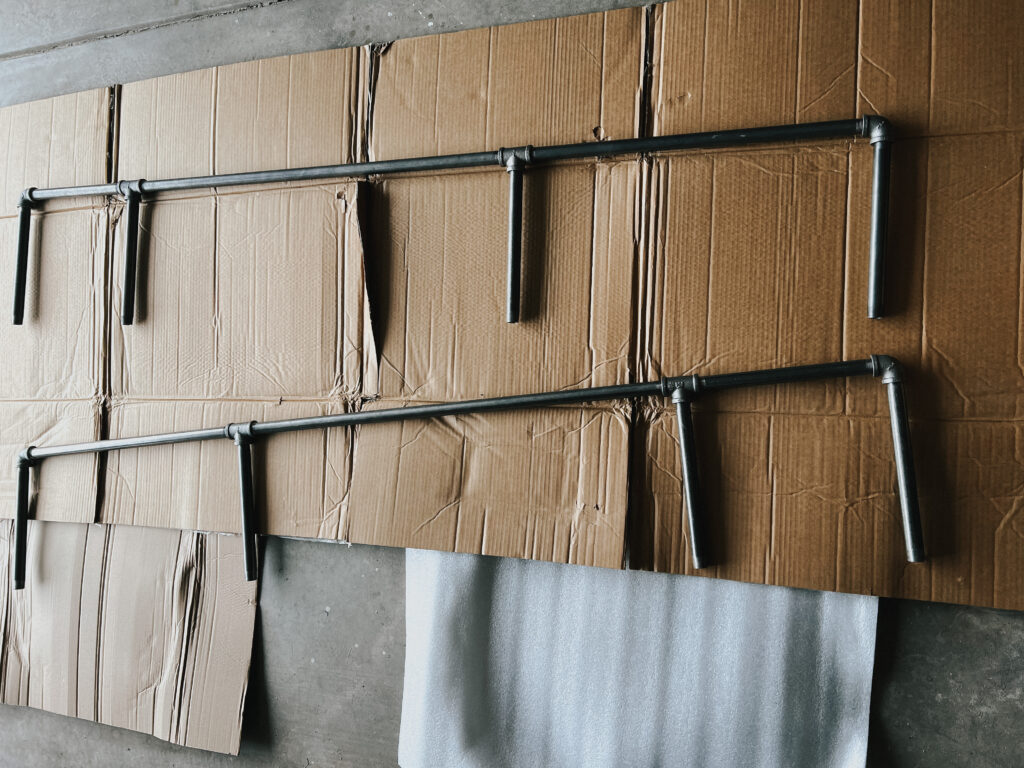
4) I assembled the pipe pieces into the shelf supports.
Tip: Unlike this picture, attach the flanges and stand up the structure in order to have an easier time spray painting.

5) I spray painted 2 coats of spray paint.
I followed the directions on the can and opted to paint the second coat within one hour since it was more efficient for me than the alternative of waiting 48 hours, per the spray paint directions.
6) I let the paint dry for 24 hours before handling to move inside and install.
7) I cut down 2 in x 12 in x 12 ft boards to my desired length (50 in).
I wanted a thicker look to my boards and working through some quick math, the 12 ft boards would be the most cost effective for the length and number of shelves I needed. I contemplated having the store cut them down (great option to keep this a minimal tool project if you don’t have a means to cut wood at home, if you don’t want to, or you don’t have a means to transport long material). Ultimately I decided to cut the boards at home with a miter saw to better decide what parts of the board I would use for this project.
8) I sanded each cut shelf starting with 80 grit, then used 120 grit, then 220 grit.
From my observation and reading, this is how I would achieve a smoother finish on the shelves. Creating smooth shelf would have been much more efficient with a planer but one: I don’t have one, two: I wasn’t quite ready to splurge on that tool ha… and three: I decided I would be okay with a natural, more organic character to the shelves. With sanding, my main goal became reducing risk of splinters.
9) I cleaned off all of the debris with a rag and tack cloth.
This was in preparation for staining them. Fresh canvas!
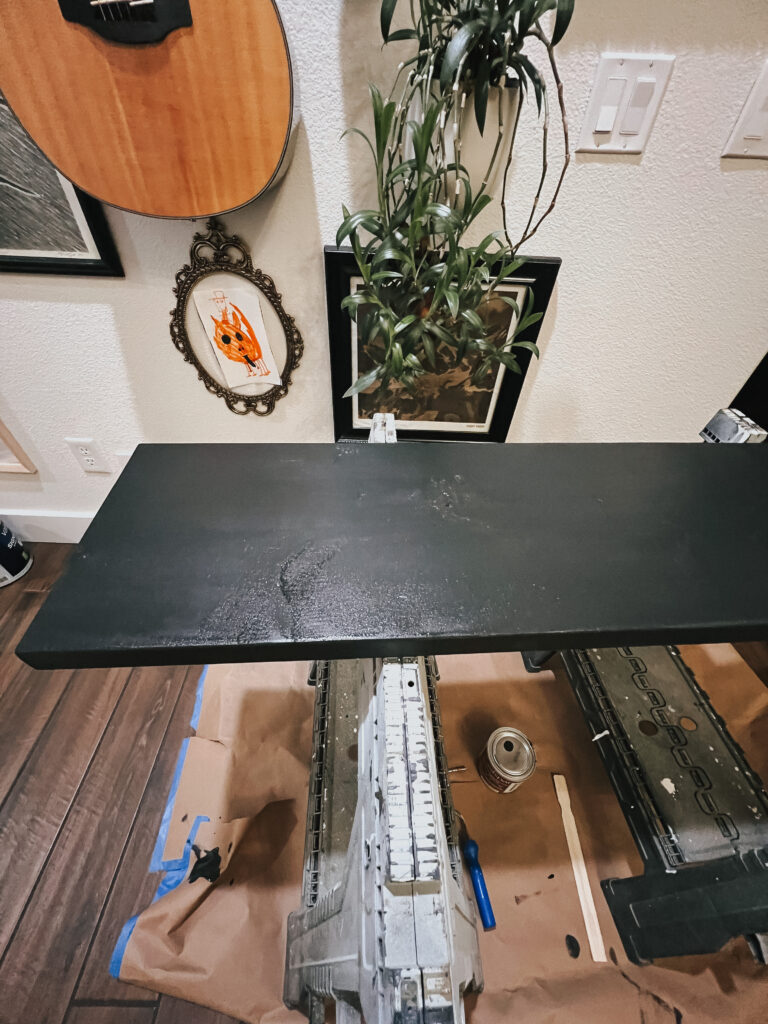
10) I applied two coats of stain and sealer.
The product I used is a stain and sealer in one. When deciding what product I would use, I had concern about durability, especially since plants would sit on top of them. I had previously used Valspar Wood Stain and Sealer in ‘solid’ (with no additional topcoat) on posts in my backyard to string patio cafe lights. They’ve held up well given the extreme elements they have been exposed to over the past 2 and a half years outside, so I decided to go this product route again.
INSTALLING THE DIY INDUSTRIAL PIPE SHELF
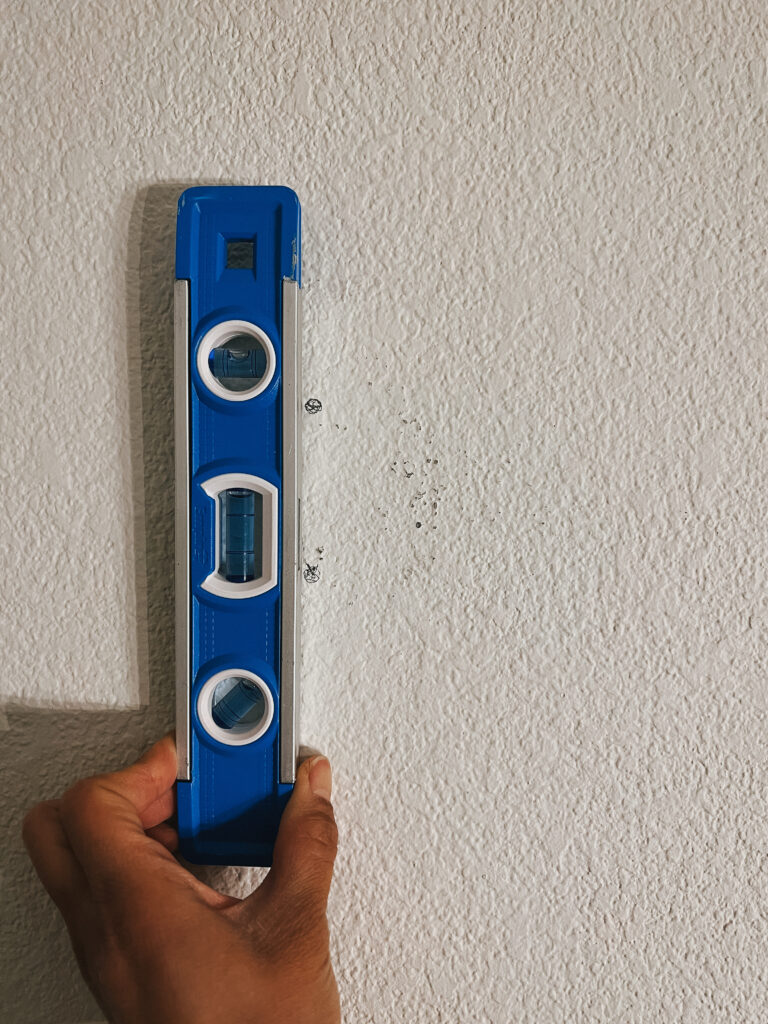
11) I found the studs that the pipe flanges would be attached to.
The width I chose to make the shelves was based on stud placement. I wanted to ensure the security of my plant babies. I used a stud finder and marked the studs. Then, I found the placement I wanted for the shelf and marked the holes where screws would be installed. And finally, for my visual preference, I used a level to ensure my marked studs were plumb.
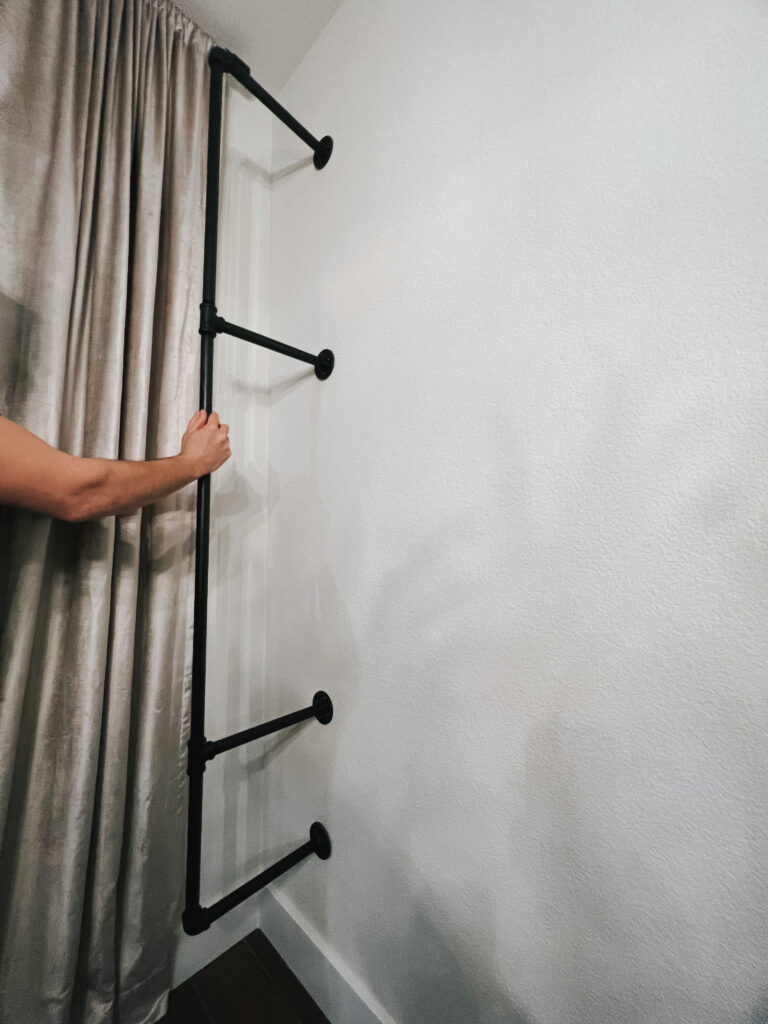
12) I enlisted a second set of hands to help install the pipes.
The installation of these shelves was made easier easier with 2 sets of hands. While one person marked holes/pre-drilled/screwed in supports, the other person was able to hold the structure plumb and steady, while also minimizing the amount of scuffs on the wall. Based on my wall set up and weight of shelves and approximate decor weight, I used wood screws to attach the shelves to the wall.
13) I attached pipe straps to the bottom of the shelves.
To minimize the shelves shifting, I attached pipe straps to the bottom of my shelves. I modified them to fit my shelf dimensions. I wanted to prevent the shelves from sliding (off) the pipes and/or becoming a seesaw launching my plants around. While I do intend to shift plants and decor around on the shelves, they don’t currently hold items that will constantly be grabbed.
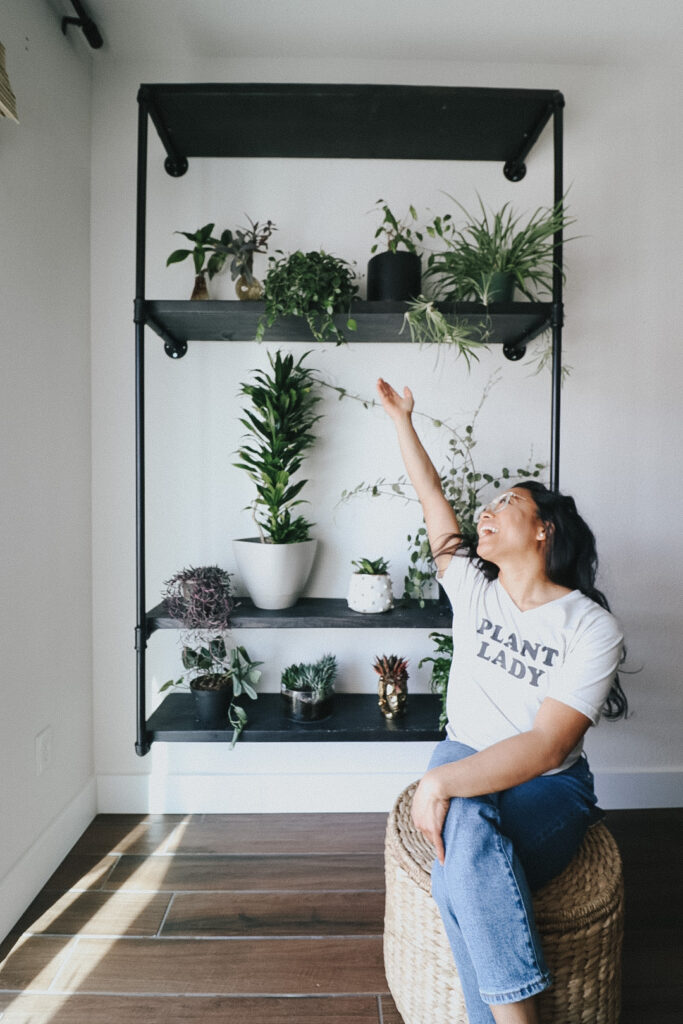
14) I sent my plant babies to their new home.
Finally it was time for the fun part: moving the plants in!
COST
Curious about the cost for these *custom* shelves (minus labor)?
- $8 – 4 – 3/4 in. 90 degree elbow fittings
- $40 – 4 – 3/4 in. Iron floor flange fittings
- $12 – 4 – 3/4 in. Iron tee fittings
- $30 – 2 – 3/4 in. x 2 ft. steel pipe
- $30 – 2 – 3/4 in. x 36 in. steel pipe
- $50 – 10 – 3/4 in. x 12 in. steel nipples
- $70 – 2 – 2 in. x 12 in. x 12 ft. Wood
- $5 – 8 – 3/4 in. 2 hole pipe strap
- $21 – Black stain ( Valspar Wood Stain and Sealer; 1 qt.; semi-transparent; darkest night)
- $7 – Black spray paint (Rust-oleum Stops Rust Spray Paint; flat; black)
- Total: $273
Want a similar look but less DIY?


