This post contains affiliate links, which means I may earn a small commission on purchases made through the links provided, which enables me to provide more resources just like this; all at no extra cost to you. Thanks for your support!
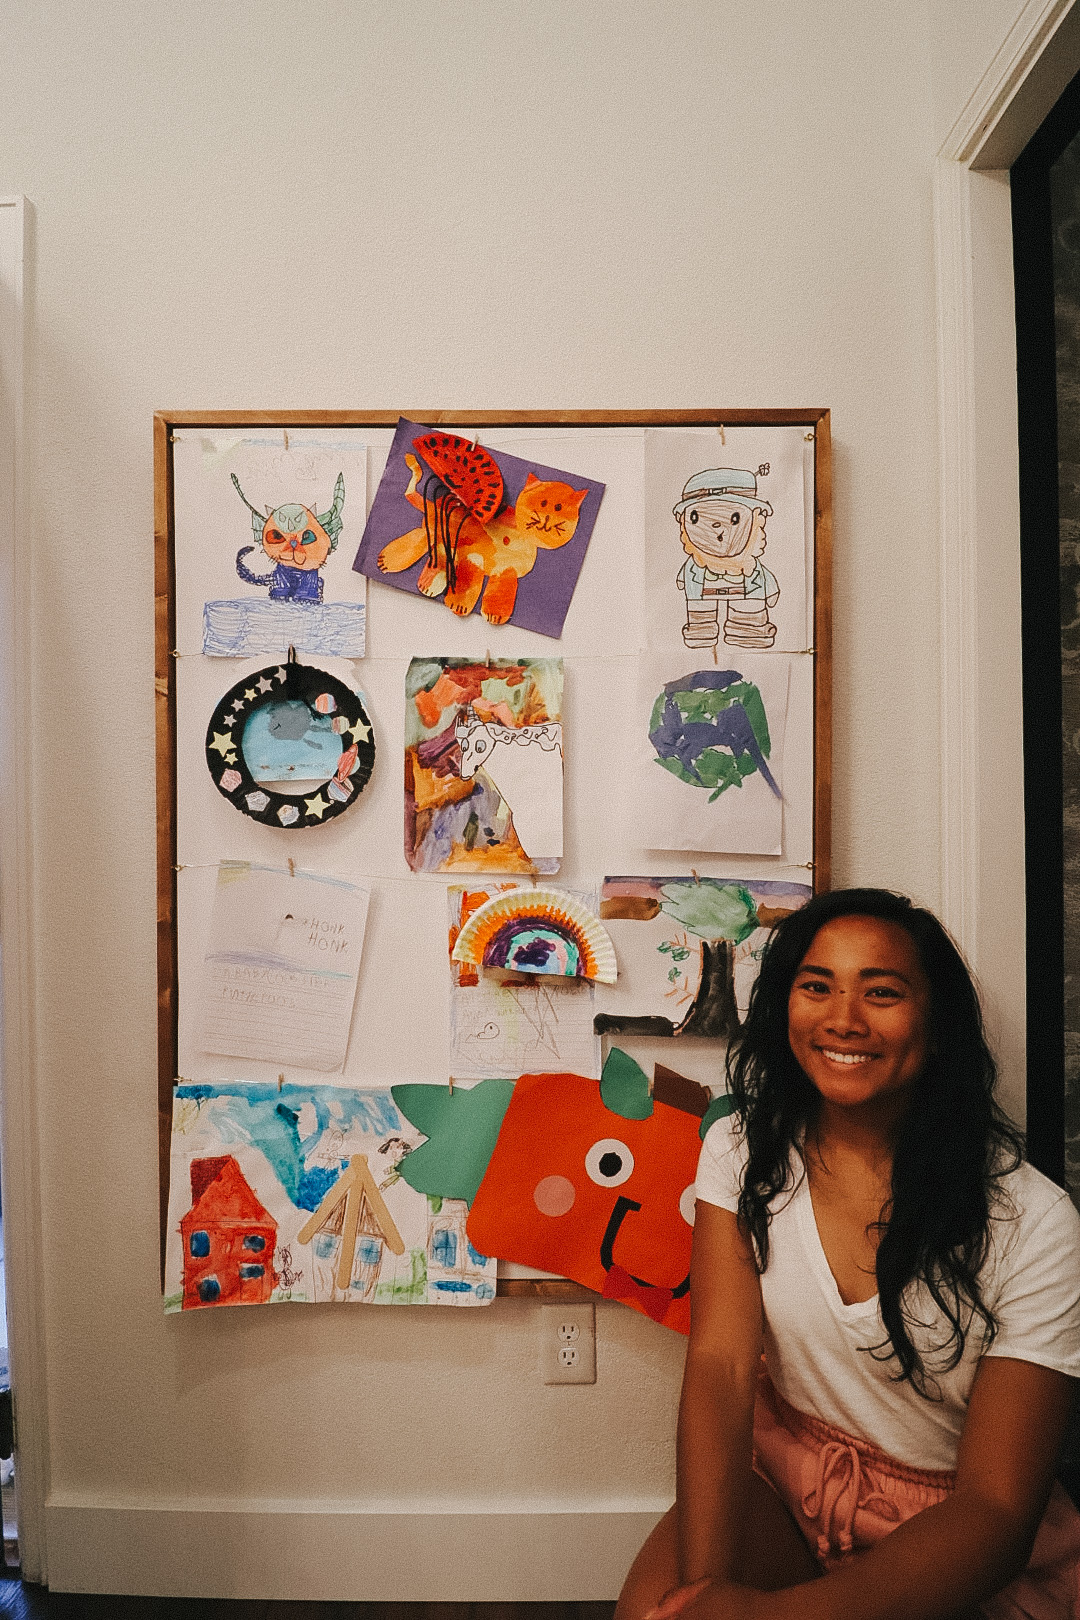
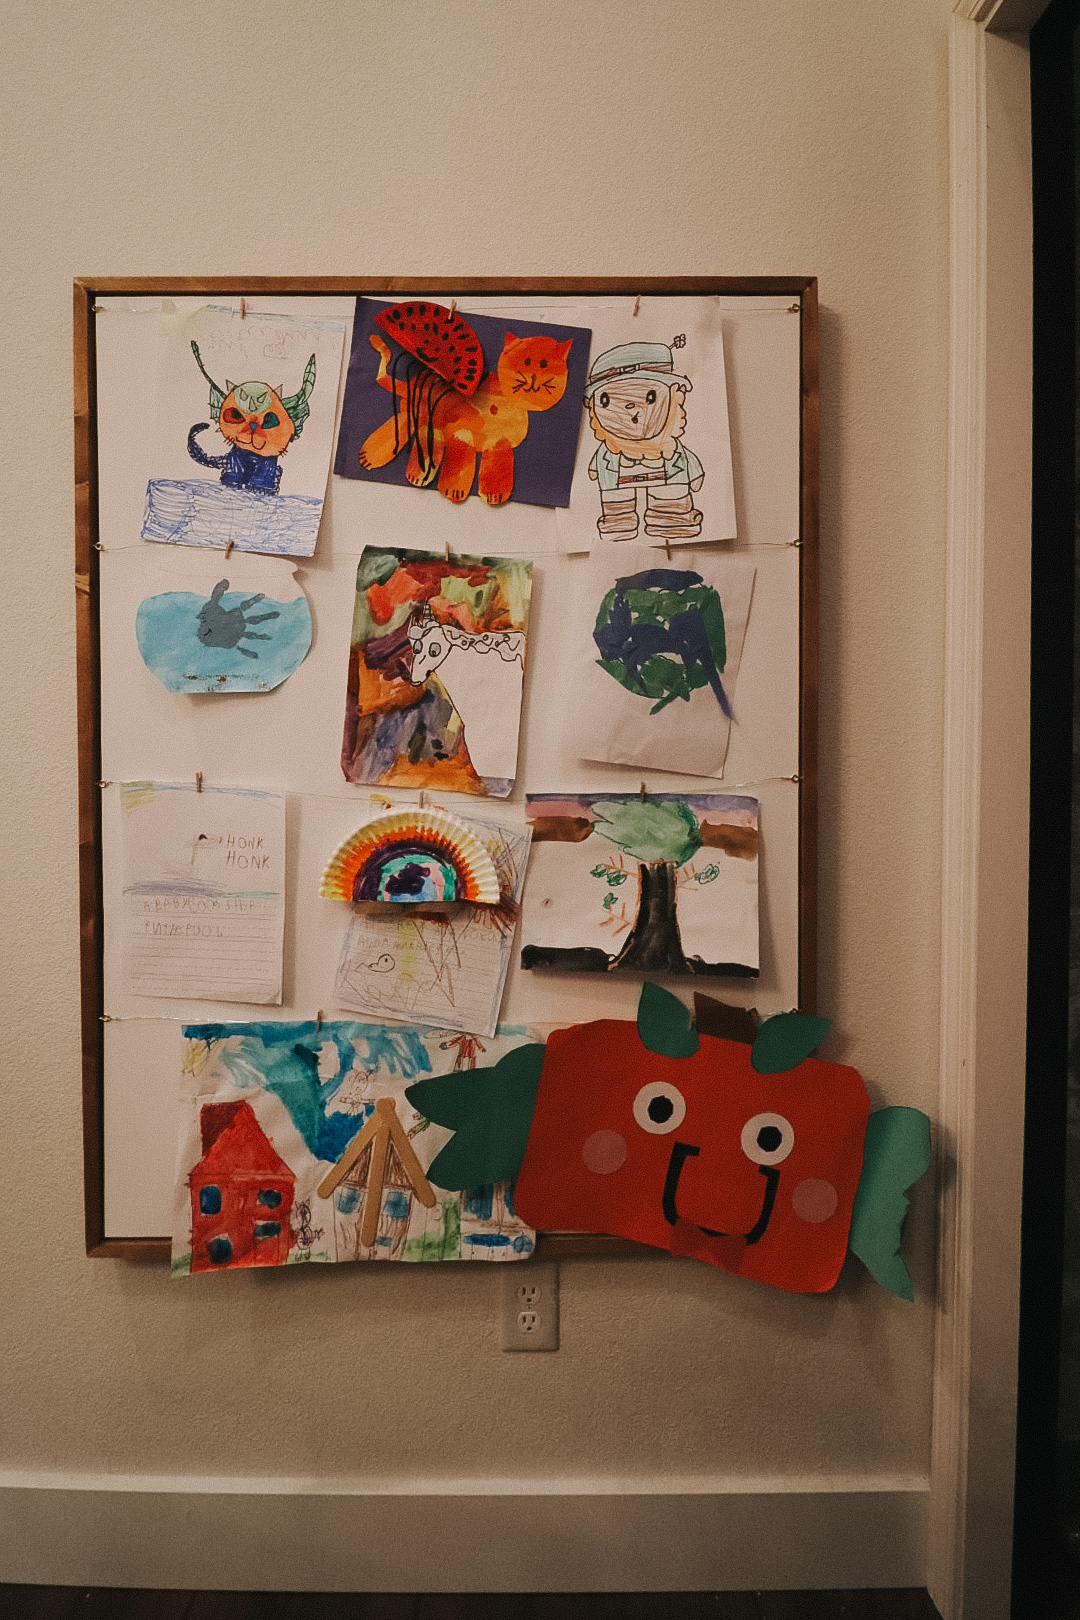
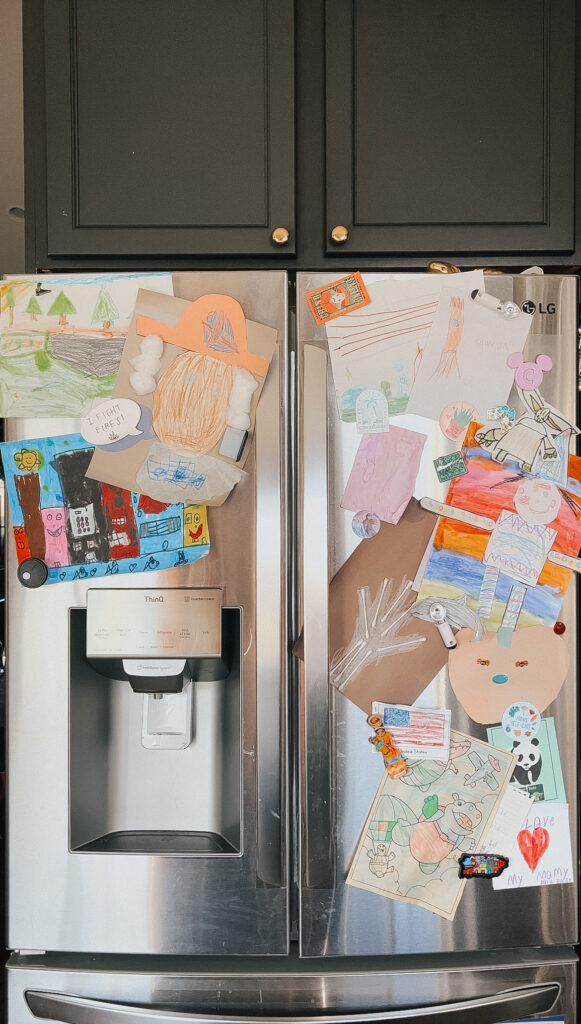
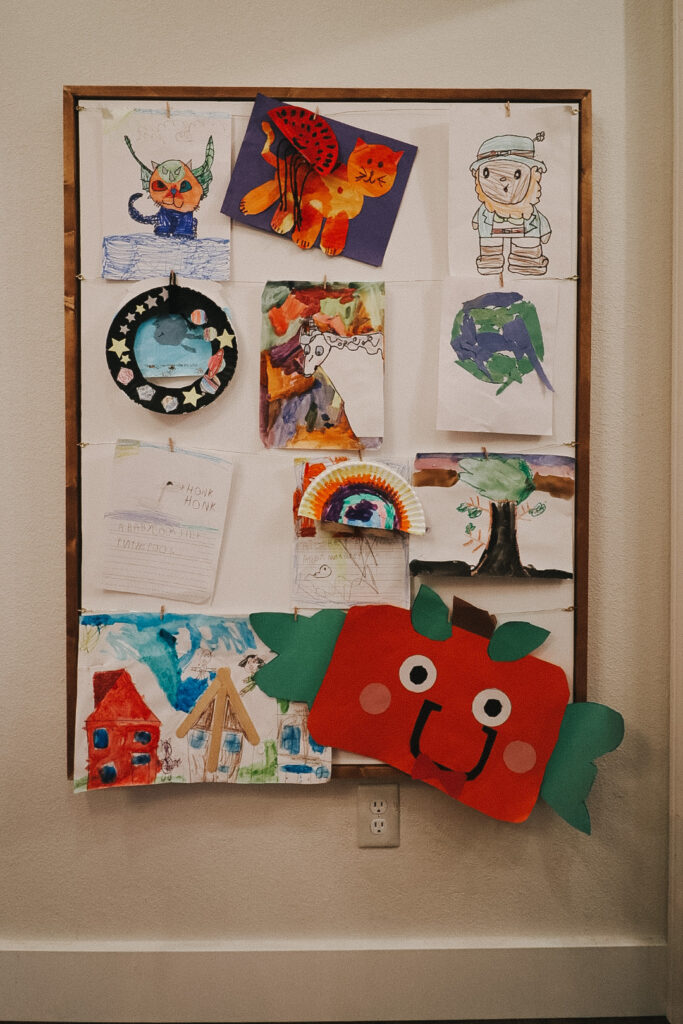
Do you love art? Is there a little artist in your house who realllly knows how to bring their ideas to life? Do you need more space than your fridge has to offer? Are you looking for an alternate way to display your budding art’s work? Behold: a DIY Framed Canvas for containing all of those masterpieces.
I built these frames as a kid enabler to proudly display art. It means that kids get to choose what THEY love and want displayed. Regardless of whether I love it, it’s a kid practice in curating their own taste, opinion, and proud moments, on their own terms! AND, when the canvas gets full and new art is created, THEY have the opportunity to decide what will stay and what will go. Because learning to love the parts of yourself that no one gives applause is a life lesson that can never start too early. There’s a lesson in everything, if you’re open to it.
HOW I BUILT A DIY FRAMED CANVAS FOR CONTAINING KID ART
Materials:
- 2 – 48-in. x 36-in. Canvas
- 2 – 1-in x 4-in x 10-ft select whitewood board Ripped down (table saw cut) to
- 8 – 4 in. mending brace
- 8 – 2.5-in x 0.625-in Corner Brace
- 90 degree corner clamps
- 1 – quick dry glue
- 18-gauge X 1-in. Finishing nails
- 220-grit sanding sponge
- Wood conditioner
- Wood stain (weathered oak + early American, leftover from old projects)
- Multiple rags (for staining)
- 4 – hanging D-Rings
- 1 – #4 x 25 ft 40 lb Picture Wire
- 8 – brass screw eye hook (total of 3 packages)
- 1 – 20 gauge x 8 yd brass wire
- 1 – pack of mini clothespins
BUILDING THE DIY FRAMED CANVAS FOR KID ART
1) I cut the 1-in x 4-in x 10-ft select whitewood board in half lengthwise to get 2 approximately 1-in x 1 3/4-in x 10-ft pieces.
The actual dimensions of 1-in x 4-in x 10-ft are 0.75-in x 3.5-in x 10-ft. I wanted my canvas to sit below the threshold of frame. The canvas I used was 1.5-inch deep.
2) I cut down each resized piece of wood into my desired lengths.
Don’t forget to measure the width and height of the canvas PLUS the thickness of the corner braces in each corner!
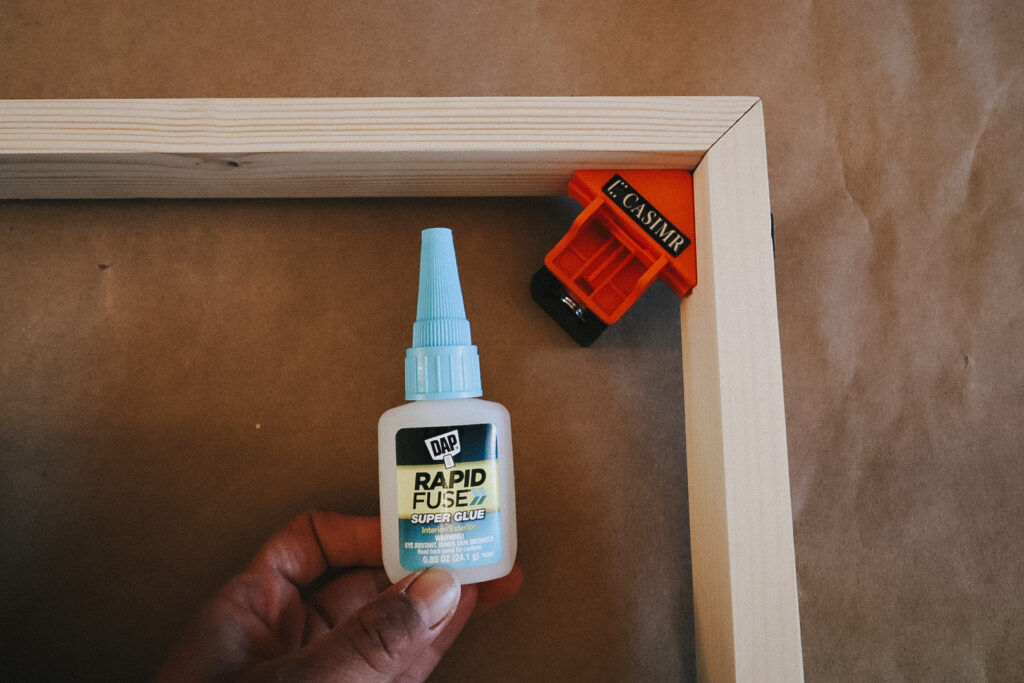
3) I glued the corners with a quick-dry glue.
Working with only my two hands, I wanted something with holding power.
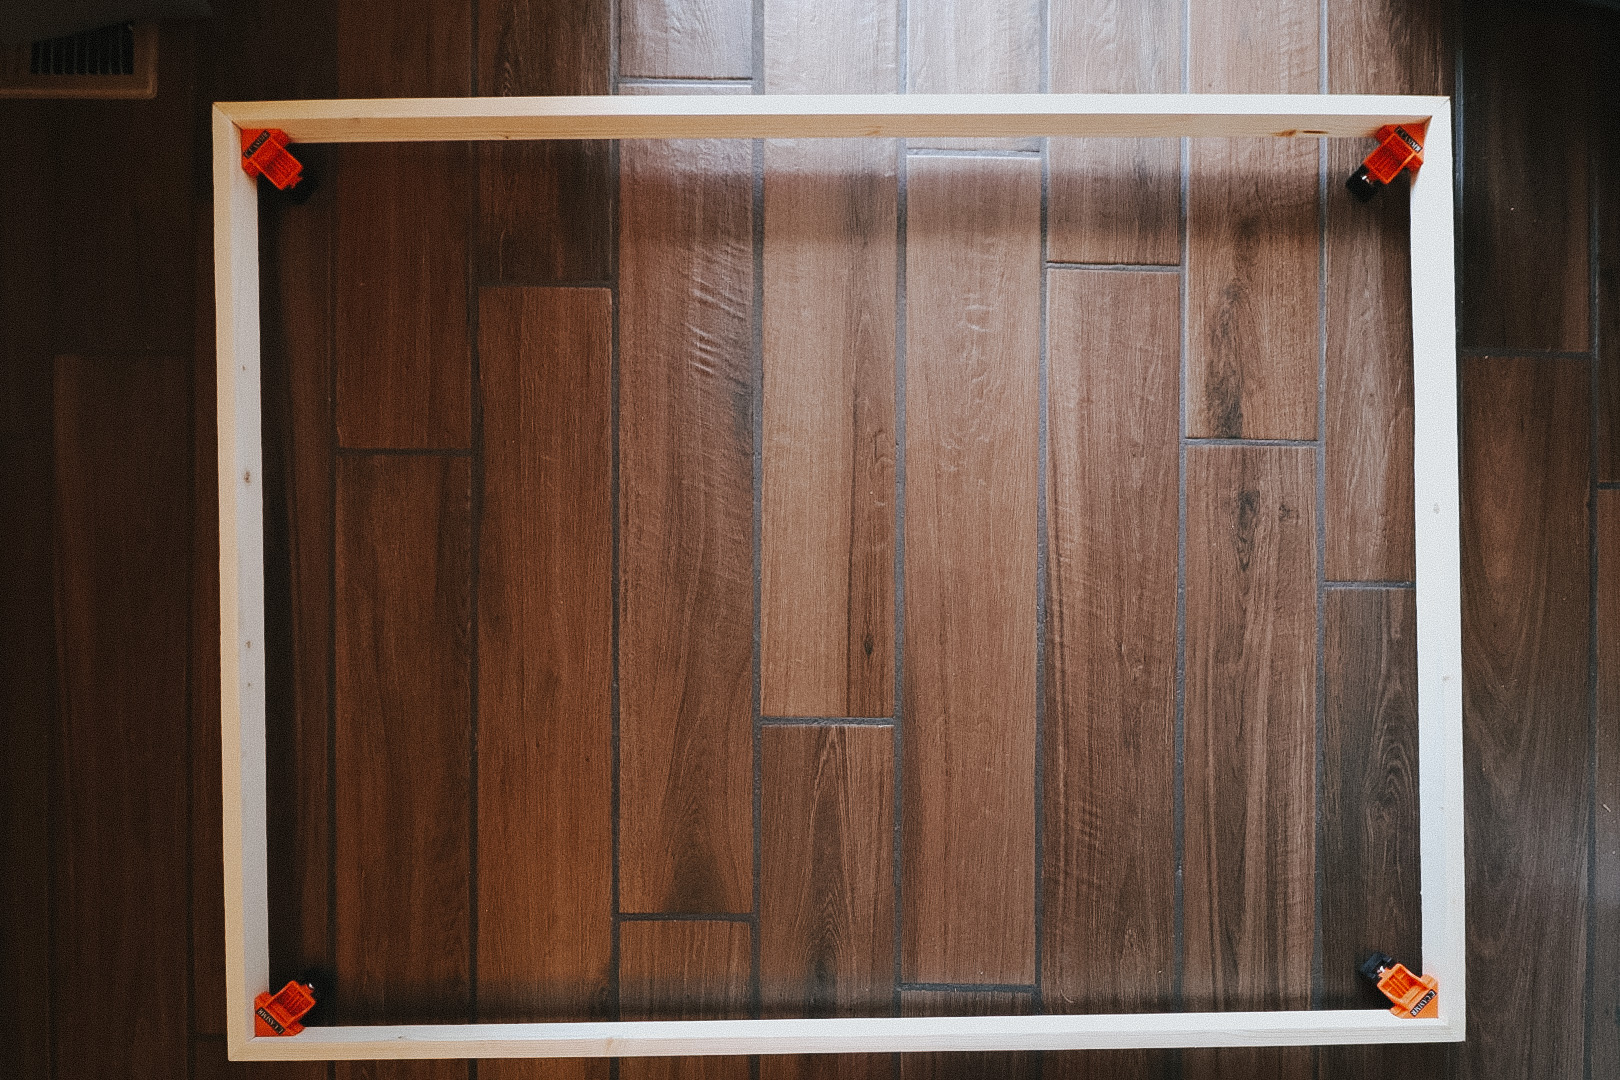
4) I clamped each corner.
Using a clamp allowed me an extra hand to hold the corners square and taut while the glue dried.
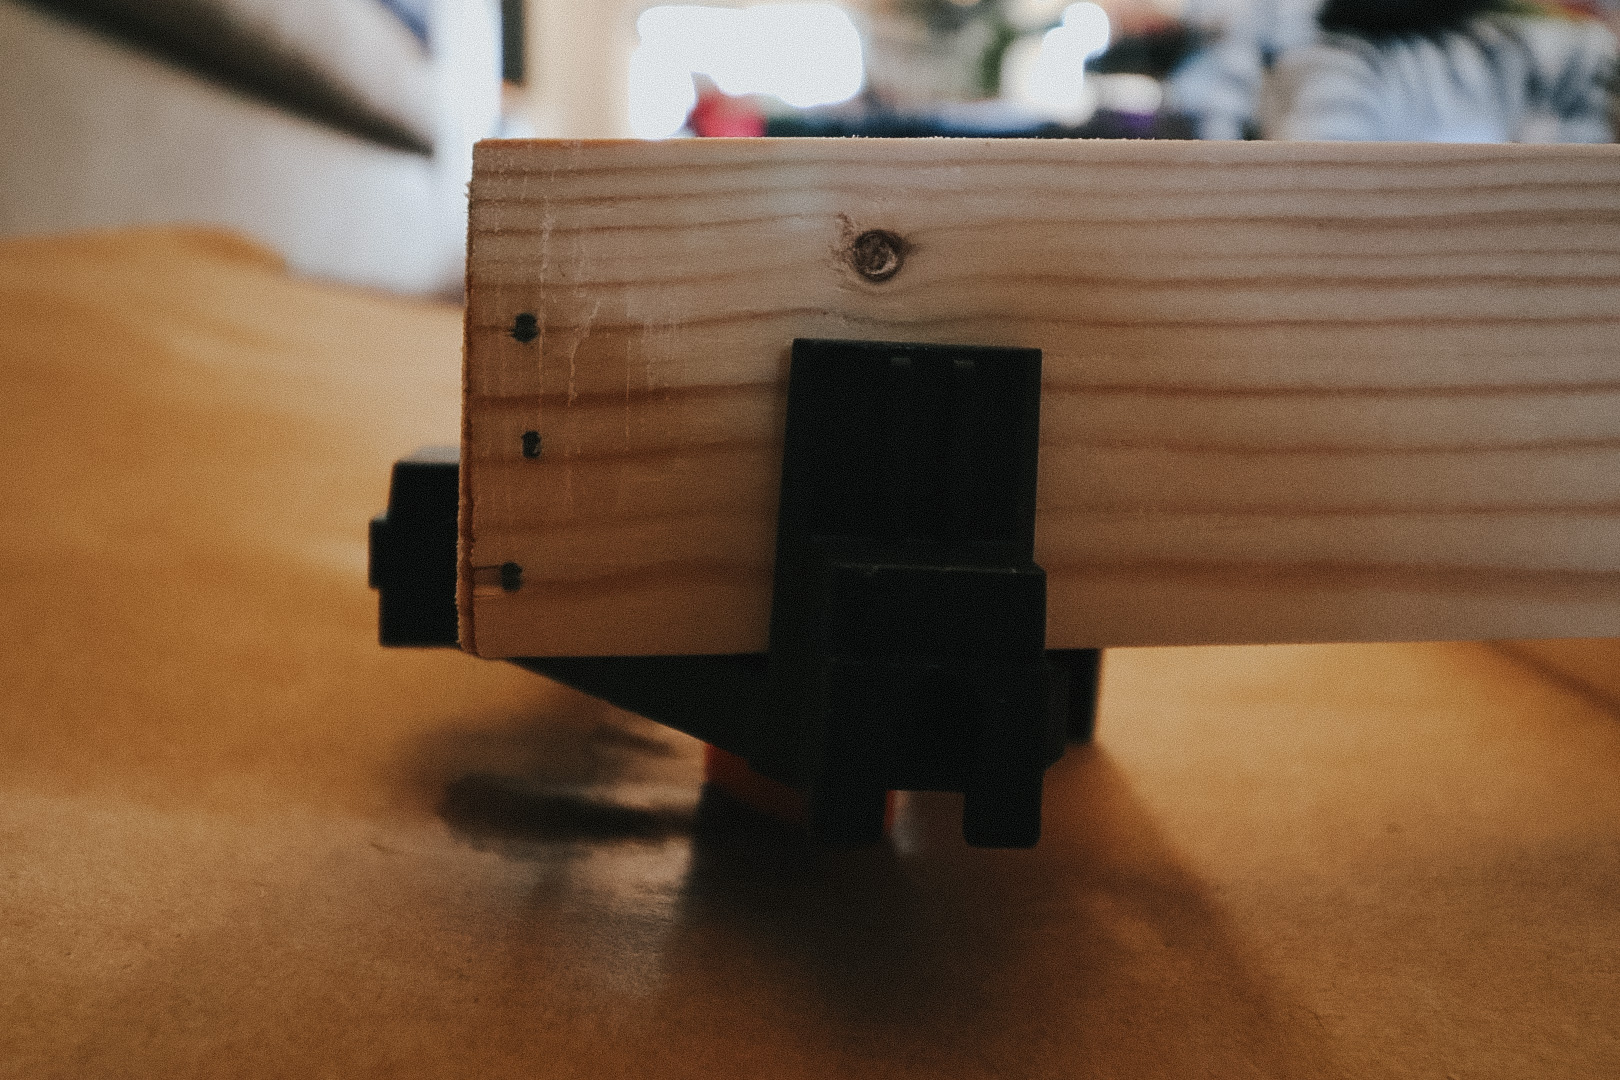
5) I nailed the corners to hold the corners extra snug while the glue dried.
I wanted to be extra sure the corners were intact.
6) I sanded corners to remove spilled over glue.
I sanded the corners to allow for better stain penetration later. Note: I could have spent longer on this; but given my time crunch and timely need for hanging papers on the final product, I am satisfied with my result.
7) I screwed corner braces on the inner corners of the frame.
This absolutely could be overkill depending on how you will use your framed canvas. I, however, intend to let this be an independent kid hanging fixture and kids. are. rough. I wanted to give this frame the best chance of withstanding frequent changing of art.
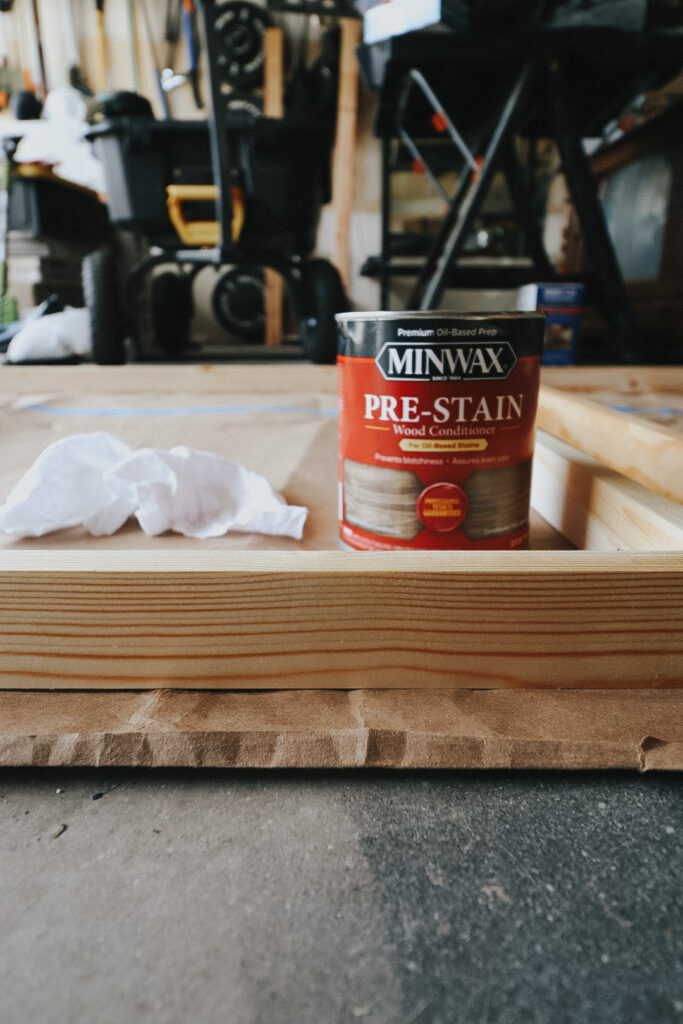
8) I applied wood conditioner to the frame.
I had wood conditioner on hand from old projects so I applied some better stain adhesion.
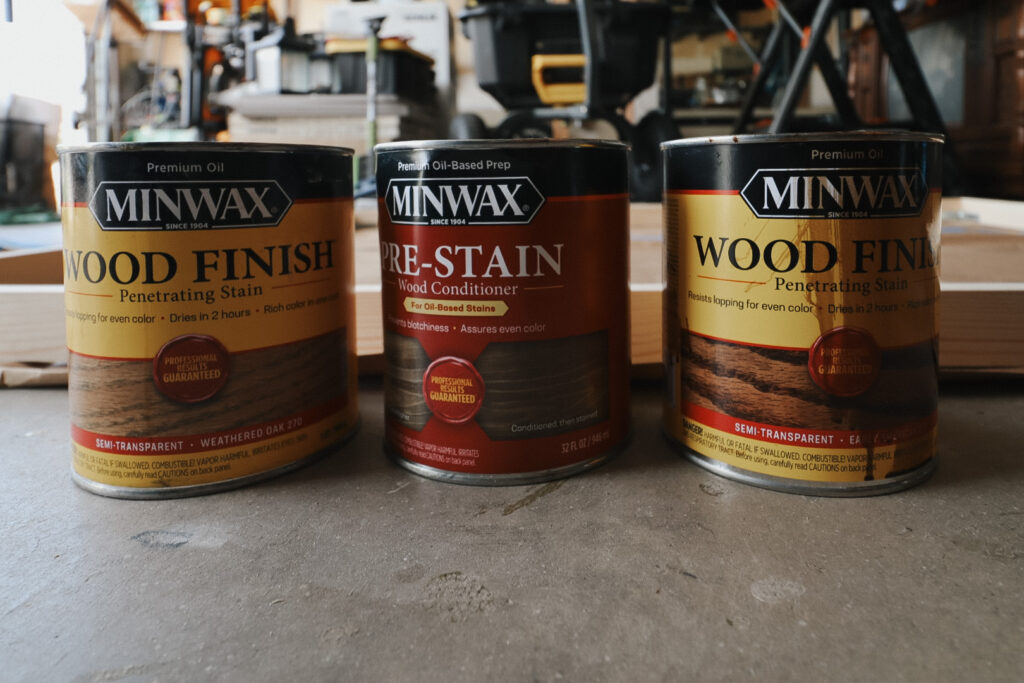
9) I stained the frame.
I applied one coat of each stain using several cotton rags. Each time I applied a coat of stain I waited about 5 minutes before wiping off the excess. The stain I used recommended 2 hours to dry before recoating.
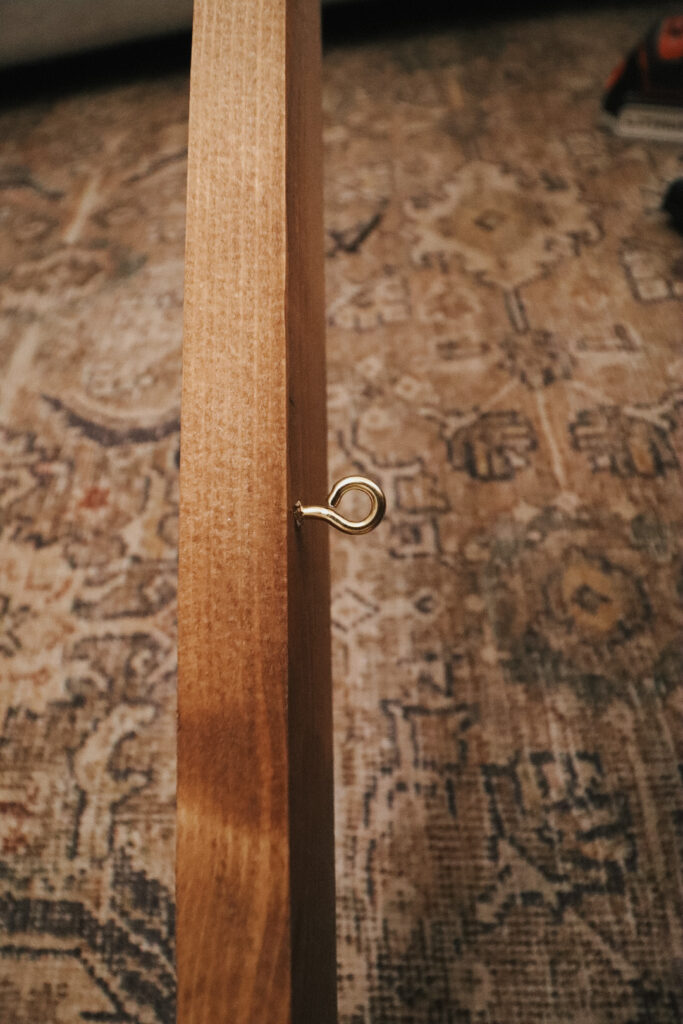
10) I installed screw eye hooks.
I used construction paper (what I assessed would be the average size of art that would be hung) to measure how many rows of art the canvas could fit. Based on the paper and size of my canvas, I spaced the hooks approximately every 12 inches down the sides. I used a drill bit to pre-drill the holes before screwing the hooks in by hand.
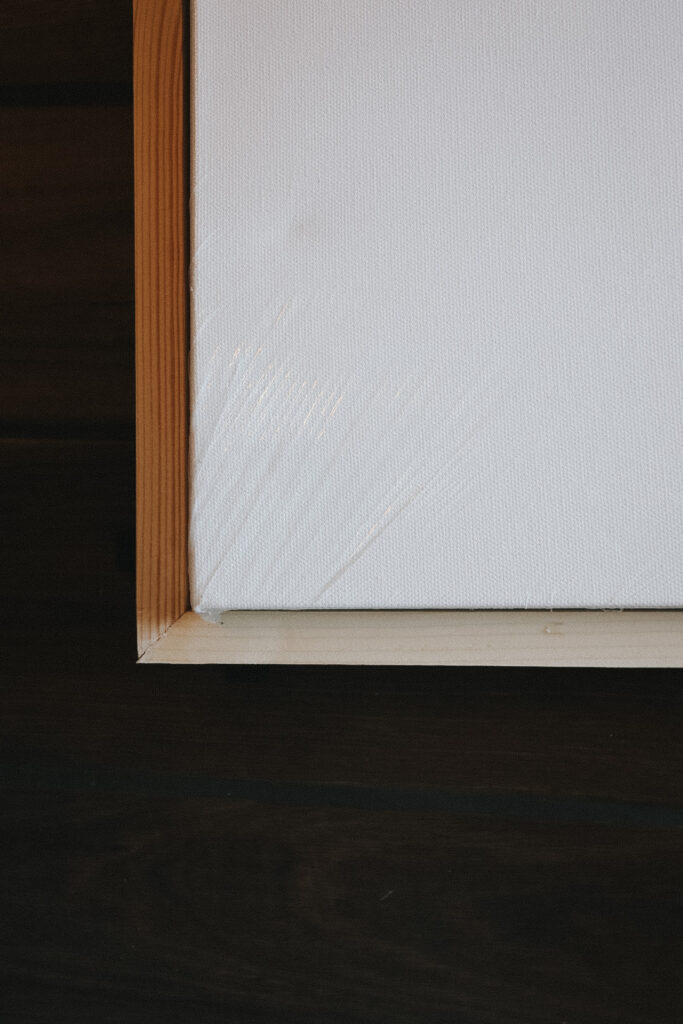
11) I inserted the canvas into the frame.
I kept the plastic packaging on to avoid marks and scuffs while assembling everything on the floor.

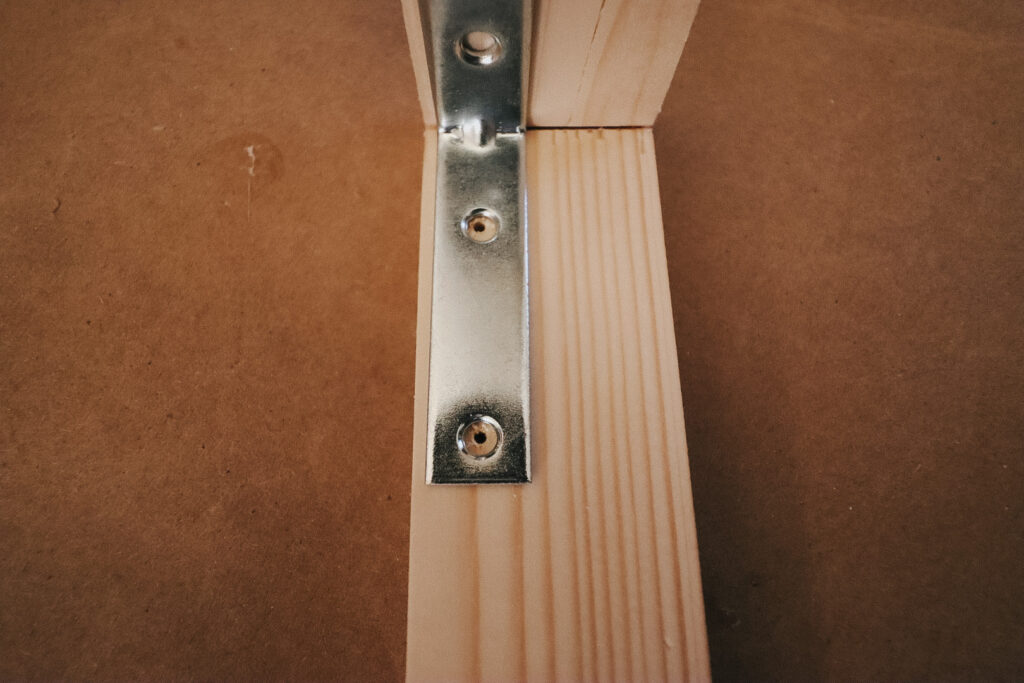
12) I installed mending braces on the back of the framed canvas corners.
Because I used corner braces, I needed a means for the frame to connect to the canvas. Had I not used corner braces, I could have otherwise was used a nail gun to nail the inner part of the canvas to the new frame. But again, I wanted sturdiness. Because I used corner braces, there is a small gap between the canvas and frame (which I appreciate the look of). If I nailed through the canvas to the frame, the nails would have shown, which I did not want.
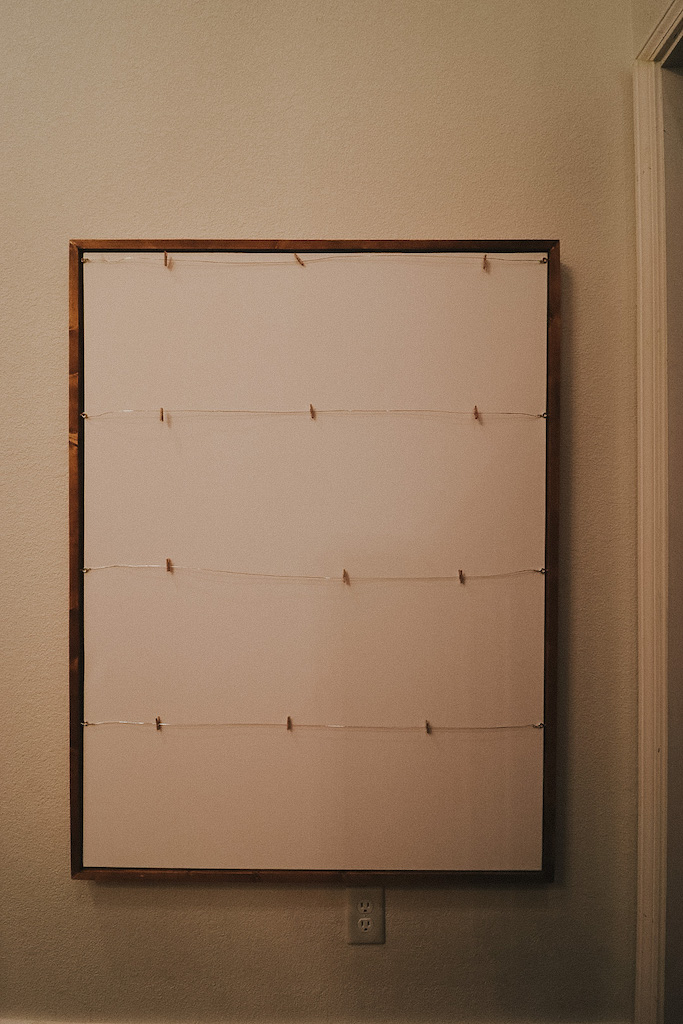
13) I looped brass wire through the the brass eye hooks.
This was a very organic look with varying loops around the brass hooks and kinks in the wire going across the canvas.
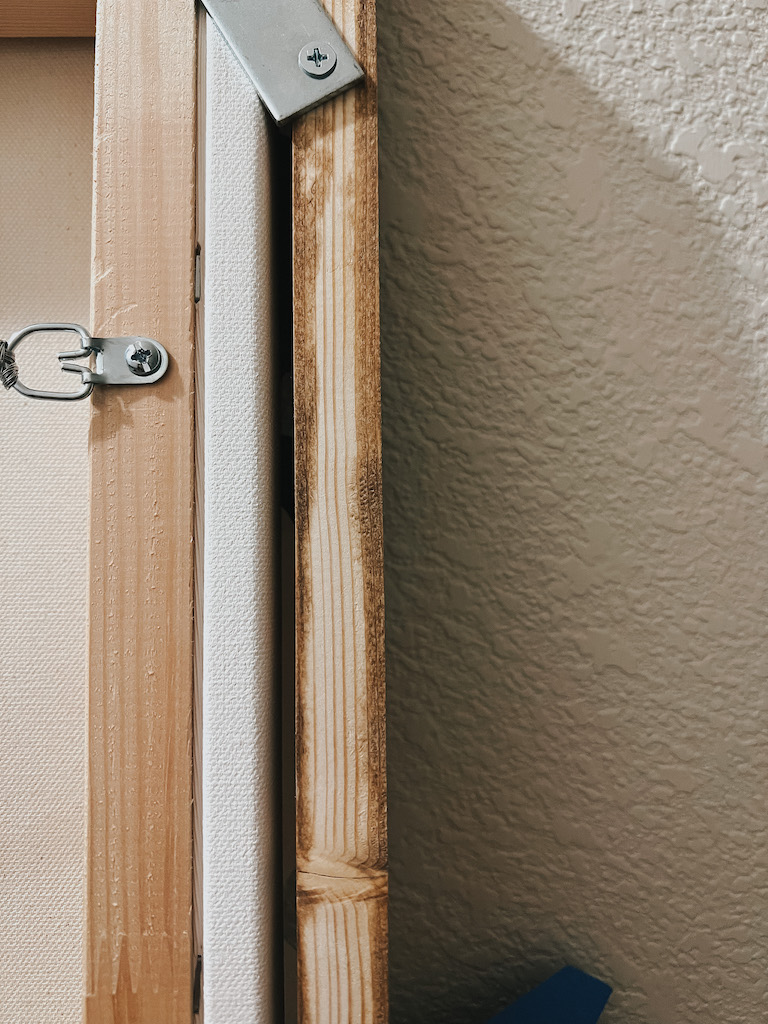
14) I installed the D-Ring hangers on the back of the canvas.
I measured a couple inches from the top of the canvas to allow room for the picture wire to stay hidden once hung.
15) I strung picture wire through the back of the D-rings.
16) I hung the DIY Framed Canvas for Kid Art.
COST
Curious about what this *custom* framing cost me?
- $75 – 2 – 48-in. x 36-in. Canvas
- $18 – 2 – 1-in x 4-in x 10-ft select whitewood board
- $7 – 2 – 4-pack 4 in. mending brace
- $7 – 2 – 4-pack 2.5-in x 0.625-in Corner Brace
- $11 – 4 – 90 degree corner clamps
- $7 – 1 – quick dry glue
- $3 – 1 – 4-pack D-Ring Hnagers
- $5 – 1 – 121112 #4 x 25 ft 40 lb Picture Wire
- $4 – 3 – 3-pack brass screw eye hook
- $5 – 1 – 20 gauge x 8 yd brass wire
- $3 – 1 – pack of mini clothespins
- Total: $145 total // $72.50 per framed canvas
*all other items I already owned and have used on other projects* I guesstimate if you purchased these items they would cost about $40: - 18-gauge X in. Finishing nails
- 220-grit sanding sponge
- Wood conditioner
- Wood stain (weather oak + early American)
- Multiple rags (for staining)
Note that prices/cost breakdown are for reference only. Your costs may vary depending on a number of factors to include location and availability.